A concrete floor in a brick or concrete bath is a rational and justified solution. The material can withstand very high temperature fluctuations, is not sensitive to moisture and steam, and is highly resistant to wear. However, concrete does not accumulate heat well, so such a floor needs insulation and wood finishing.
- Why a concrete floor is preferred
- Floor cake composition
- Requirements for the soil of the base of the floors
- Methods for installing a concrete floor in a bath
- Preparation of the base
- Rough screed
- Pit concreting
- Hydro and thermal insulation
- Fine screed
- Methods for arranging flooring in a bath
- Finishing options for further use
Why a concrete floor is preferred
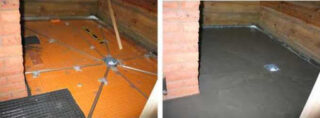
The advantages of a concrete base are obvious:
- service life is not less than 30 years;
- insensitivity to hot water, steam and high humidity;
- high mechanical strength;
- resistance to decay, corrosion, drying out;
- lack of special care;
- the higher cost is repaid many times over with a long service life.
The disadvantages of the foundation include the duration of the construction: it takes time for the concrete screed to freeze and gain its design capacity. In addition, the floor must be insulated, otherwise it will be expensive to maintain the temperature in the steam room and the washing room.
The concrete base is universal. For cladding, you can use wood, ceramic tiles, porcelain stoneware.
Floor cake composition
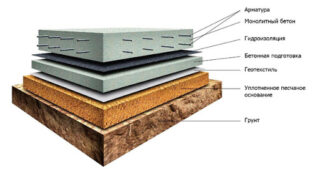
The construction of a concrete floor in a brick or wooden bath is quite complex.
- Subfloor - a base in contact with the ground. May include a concrete screed.
- Drainage system - if the floor lies directly on the ground, the drainage pipes are embedded in the subfloor. If the base is located above ground level, they arrange drainage and a drainage pit directly under the foundation or lay a water conduit to exit to the sewer.
- Waterproofing - the material is chosen in accordance with the design of the screed.
- Insulation - preferably polystyrene, expanded polystyrene or polyurethane foam. Mineral wool loses its properties when wet, and it is difficult to completely eliminate leakage or getting wet under the floor of the steam room. If, nevertheless, mineral wool is used, the insulated floor is waterproofed from above with a plastic wrap.
- Finish concrete base - screed, not less than 30 mm thick. The screed is reinforced.
- Finishing coating - boards, tiles.
Despite the complex structure, concrete floors can be equipped both during the construction of a bathhouse and during repairs.
Requirements for the soil of the base of the floors
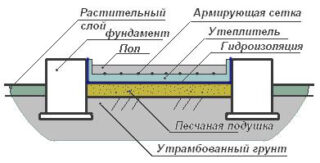
The floors on the ground in the bath are equipped if several conditions are met:
- the soils are immobile, construction is impossible on heaving soils;
- groundwater level at least 2 m;
- the soil under the base is dry.
If the groundwater level is less than 2 m, but more than 1 m, equip the drainage system. In high waters, a concrete floor cannot be made.
Methods for installing a concrete floor in a bath
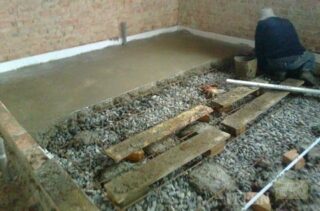
The device of the concrete floor in the bath depends on the type of foundation and the entire structure. There are 2 options.
- Laying on the ground - it is supposed to pour concrete on a crushed stone and sand drainage cushion. Such a base is characterized by maximum strength and durability.
- You can also make a floor over a ventilated subfloor. More materials will be required. The floor is a reinforced concrete slab. For the overlap, formwork is made and poured with concrete. The slab is trimmed and insulated in the usual way.
You can fill the floor on powerful logs from a bar with a section of 100 * 200 mm. This is how a concrete floor is made in a house on screw piles.
Since there is an air gap under the base, and moisture is escaping more actively due to ventilation, it is not possible to insulate such a floor so carefully.
Preparation of the base
Concreting the floor in your bath begins with preparatory work. Step-by-step instruction:
- A pit 40-50 cm deep is dug between the elements of the strip foundation. The bottom is tamped and covered with geotextiles.
- Pre-filling with gravel up to 15 cm thick is performed. The layer is also compacted, preferably with a vibrating plate. It is designed to drain water. It is recommended already at this stage to plan the slope of the floor towards the drain.
- Further actions depend on how it was decided to concrete the floor in the bath. If the screed is only 1, the role of the rough base is played by a sand layer with a thickness of 30 to 50 cm, which is moistened with water and compacted. Waterproofing is placed on top of it - roofing material is best.
If the screed is two-layer, they begin to build a "pie".
Rough screed
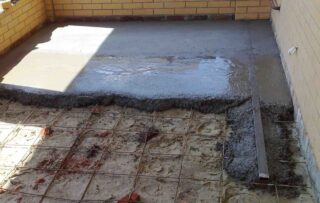
For a rough screed or foundation, low-strength concrete of grade B7.5 is taken. He is not reinforced. Layer thickness 3-5 mm. In some cases, the rough screed is pre-waterproofed with plastic wrap. It is important to observe the slope of the base.
Before the device of the first concrete layer, the location of the drain is determined and pipes are installed to drain the water.
Pit concreting
If there is a pit under the floor, work is added. Concreting its bottom or not is a moot point. Some experts believe that the concrete bottom is more convenient for repairs and better protects against flood waters. On the other hand, ground movements can damage and distort the structure. Therefore, it is advised to arrange the bottom from a sand-crushed stone pillow.
The walls of the pit are sealed with concrete rings. You can do the traditional way: make a formwork, reinforce and pour concrete.
Hydro and thermal insulation
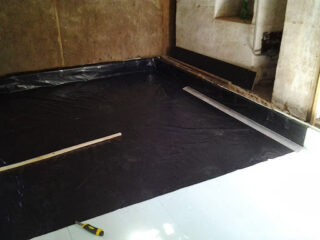
The rough screed is waterproofed, roofing material or a dense thick film is used. The material is laid in 1 or 2 layers with an overlap of 10 cm. Be sure to approach the wall at the height of the entire structure. The joints and approach to the wall are coated with bituminous mastic.
If roofing material is put in 2 layers, the second one should be perpendicular to the first one.
Then the insulation is laid. You can use bulk materials like expanded clay or perlite. More often they take polystyrene foam plates, since such a material has higher thermal insulation properties.
Plates are placed end-to-end. The insulation should go to the wall by 30-50 cm. For this, cut slabs are used. It is not necessary to waterproof the EPSP or PU foam layer.
Fine screed
The technology of arranging a clean floor screed in a bathhouse practically does not depend on the nature of the upper flooring.
- A reinforcing mesh from a bar with a diameter of 5 mm is laid on the layer of insulation.
- Beacons and guides are installed so that the future concrete floor has a slope towards the drain. The latter is best placed in the corner of the room.
- The structure is poured with a finishing screed 30 mm thick - not less. Use a ready-made concrete solution or a cement-sand mixture mixed with your own hands in a ratio of 1: 3 (cement grade not lower than M400). Level the floor.
- After a few hours, the guides and beacons are removed, the grooves are filled with the same solution and leveled with a rule.
- The concrete dries for at least 3 weeks. It is recommended to periodically wet the surface and cover with plastic wrap so that the material dries evenly.
- After hardening, proceed to the flooring of the boards. If the surface is not completely flat, the base can be sanded.
Expansion joints are maintained between the concrete base and the walls. Usually for this they take a damper tape and attach it to the wall around the perimeter.
Methods for arranging flooring in a bath
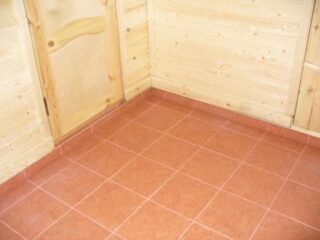
Traditional flooring guidelines are not always the most cost-effective solution.
For example, when laying ceramic tiles, there is no need to lay 2 concrete layers. The cladding can be placed directly onto the foam. At the same time, the tile is placed on a special especially thin composition.
In addition to polystyrene and expanded polystyrene, you can take special mineral wool marked "under the tiles".
An interesting option is when a thin layer of special concrete serves as waterproofing.
Finishing options for further use
After pouring the floor in the bath with their own hands, they start finishing. However, despite the versatility of the base, not all materials can be used.
- Wood - in the steam room and sauna, the boards are taken from the same species that were used for the wall cladding. In the dressing room, you can also use other wood.
- In the sink, the wooden flooring does not last long. It is better to decorate the room with ceramic tiles.
- An equally durable option is porcelain stoneware. The material is expensive, but lasts for decades.
When choosing a flooring material, you need to take into account its weight.


