Despite the presence of a large number of modern tension and suspension systems, ceiling plastering continues to be a popular and popular way to decorate residential and office premises. The material has a centuries-old practice of application, has shown itself to be a strong and durable coating. Plastering the ceiling with your own hands is a difficult, but quite doable task. To achieve a high-quality result, you need to correctly select the mixture, prepare it in accordance with the manufacturer's instructions and apply it correctly to the base.
The choice of plaster mix for the ceiling
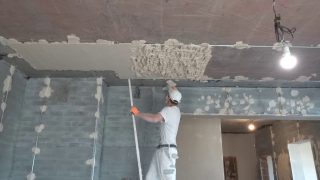
The trade network offers a wide range of finishing materials with various properties and application features. In order not to be mistaken when choosing, you should familiarize yourself with the types of the product available on the market. The fundamental difference is the composition of the mixtures.
- Cement based. They are distinguished by their special strength and high specific gravity. Lime, chalk, polymer additives and pigments are added as fillers. The solution hardens for a long time, it may take up to 21 days to gain full strength. Only after this is it allowed to continue further work.
- Gypsum-based. This ceiling plaster is lightweight and has a very fast crystallization period. This happens within 20-30 minutes, which is very much appreciated by craftsmen when they need to carry out repairs in an extremely short time. At the same time, gypsum is fragile, it is advisable to apply it on rigid substrates such as drywall or small reinforced concrete slabs.
In order to qualitatively plaster the ceiling, it is necessary to assess the conditions for its upcoming operation and make the most optimal decision that minimizes potential risks.
Advantages and disadvantages of ceiling plaster
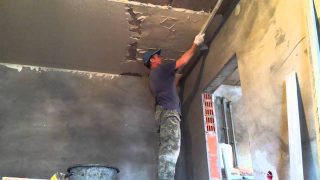
The choice in favor of plastering the ceiling should be made after considering the positive and negative aspects of this technology.
She has the following advantages:
- Affordable cost. The material and tools for the job are inexpensive. Representatives of all segments of the population can purchase them without prejudice to their budget.
- The ability to plaster the ceiling with your own hands, without hiring professionals. Almost perfect results can be achieved even the first time. To do this, you need to precisely fulfill the requirements of each stage of work, using a high-quality mixture and tools.
- Excellent ventilation performance. The plastered ceiling allows air to pass through, thus maintaining a comfortable microclimate in the room.
- Long service life. It is calculated in decades. The only thing you need to do sometimes is to refresh the finish. Repairing damage is not particularly difficult. Elimination of defects takes a matter of minutes.
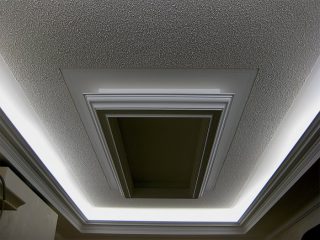
This method also has its drawbacks:
- Hygroscopicity. The structure of the finished surface is porous, it absorbs moisture, which is why it swells, changes color, cracks and even falls off.
- Insufficient strength. The surface is easily scratched and squeezed.It is often damaged by wallpapering, hanging a chandelier and even a champagne cork.
- Lack of pomp and flashiness, which is what many property owners want. In this, the plaster loses to the stretch fabric, metal slats and even PVC panels.
- There is no possibility of hidden laying of communications, installation of internal lamps and thermal insulation.
The lists of pros and cons in terms of volume are the same, everyone is free to evaluate them in their own way, applying them to a certain situation and conditions.
Required tools and materials
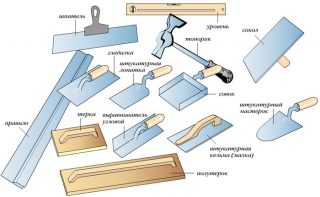
To carry out high-quality alignment of the ceiling for painting with your own hands, you will need the following set of tools:
- puncher;
- screwdriver;
- hacksaw for metal;
- a hammer;
- scissors;
- construction mixer;
- steel spatulas;
- trowel;
- grater;
- rule;
- roulette;
- paint brush and roller;
- level;
- stable stepladder.
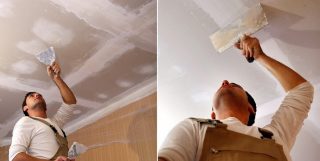
You need to purchase materials:
- putty for filling gaps and leveling the base;
- deep penetration primer;
- replaceable grater nets;
- screws and dowels;
- paint for painting skirting boards;
- plaster;
- container for mixing the solution;
- insulating tape;
- finishing;
- ceiling plinths.
To ensure protection of the head, hands, eyes and breathing, it is recommended to work with a helmet, rubber gloves, goggles and a respirator.
Surface preparation for work
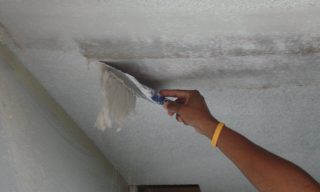
In order to qualitatively plaster the ceiling, it is necessary to carry out technologically correct preparation of the base for applying the solution.
- Removal of skirting boards and old flooring. The putty is knocked down with a spatula, chisel or perforator. The paint is washed off with a solvent or blown out with a blowtorch.
- Cleaning from contamination. Fungus and mold are destroyed with an antiseptic, grease stains and soot are washed off with soapy water, washed with a sandblaster or a metal brush.
- Elimination of surface defects. Holes, slots and openings are cleaned, their edges are primed, after which they are sealed with cement mortar and sealant.
- Alignment. It is carried out to apply decorative plaster with a layer of the same thickness and to exclude overspending of the mixture. It is better to putty the base with a starting compound, which is distinguished by its strength and speed of solidification.
- Increased adhesion. Improving the quality of adhesion ensures good contact of the material during application, prevents the applied solution from peeling off. Depending on the working conditions, a primer, contact-concrete liquid, steel mesh, shingles, boards are used.
It is possible to plaster the surface only after all solutions and technical liquids applied during the preparatory stage are completely dry.
Ceiling plastering methods
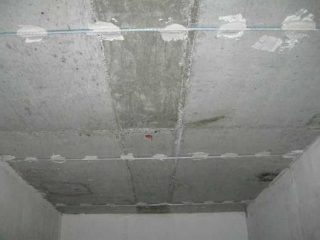
If the technology for preparing and using plaster is the same for all types of repairs, the methods of applying it are somewhat different.
There are such techniques for finishing the ceiling:
- With the installation of beacons. It is used when working on large areas with uneven geometry. The application of the mixture is carried out unevenly, while maintaining a clear horizontal line is almost unrealistic. To do it, guides are used, between which the plaster is laid and leveled. The most common method is to make tracks along an angular perforated profile aligned with self-tapping screws screwed into the plate. The distance between the tracks is tied to the size of the rule, usually 120-180 cm.
- No beacons. A similar approach is used when plastering is performed on a previously prepared or initially flat surface. Such bases are typical for small rooms, such as a bathroom, toilet, corridor, or for rooms where the plasterboard suspension system was installed.The composition is applied evenly with a thin layer of 2-3 mm. The distribution of the solution over the plane is carried out with a small rule or with a wide steel spatula. The control of the coating thickness is carried out tactilely, according to one's own feelings.
Based on the selected technology, the approximate material consumption is also calculated. You need to have it with a margin in order to apply it to the stove in one step. Otherwise, cracks may appear in those places where two layers of mortar were joined.
DIY ceiling plaster
The following plan is recommended for the master:
- Measurements. Assessment of the condition of the slab, the volume of dismantling and restoration work.
- Preparation of tools, purchase of building materials. Clearing the premises from objects and objects that may be damaged during the repair and interfere with its implementation.
- Removal of lighting fixtures, insulation of wires. Removing old finishes, covering furniture and window openings with protective devices.
- Cleaning the floor slab from dirt, various stains, mildew and mold. Surface treatment with a primer.
- Sealing cracks and holes. Leveling unevenness more than 1 cm with putty.
- Installation of beacons, if a layer of plaster is applied more than 1 cm.
- Mixing of the solution, its distribution between the guides, leveling.
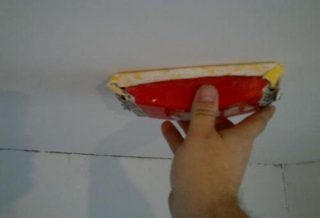
- Carrying out grinding and polishing of the hardened composition. Quality control of the achieved result visually and using a rule.
- Ceiling treatment with a primer. Installation of skirting boards.
You can paint the surface after the impregnation has dried. Then the chandelier is hung, the film is removed, things are put in their places.


