It is not difficult to sheathe a shed with your own hands from the inside and outside if you have the skill of installing facing materials on the crate. The finish must be mechanically strong and resistant to moisture.
Features of the room
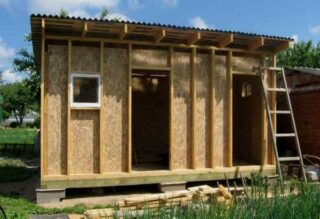
The barn refers to the premises for household purposes located in the courtyard of a summer cottage or a private house. It usually stores gardening tools and other devices for plant growing and animal husbandry.
When selecting the outside finishing of the utility block, the main criteria are strength, long service life, resistance to cold, temperature extremes and the effects of precipitation. Ease of installation also matters.
Since not food is stored inside, but household equipment, the requirements for protection from dampness are not as high as for the cellar. But it is still advisable to pay due attention to insulation and vapor barrier in order to prevent the accumulation of condensation and rotting of wooden walls.
What materials are suitable for interior cladding
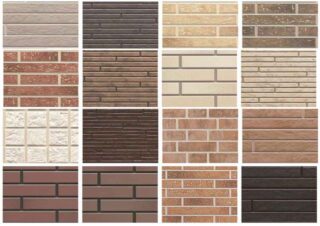
Since sharp tools are often stored indoors, the inside of the barn must be resistant to scratches and single cutting impacts. Sometimes the building is equipped as a workshop, where they carry out various household work, store aerosols and liquids that are prone to inflammation. In this case, a useful quality of the material for the interior decoration of the barn will be resistance to fire. Resistance to moisture and mold is also important.
To sheathe the ceiling in the barn, a frame is pre-arranged from a metal profile or slats. A good option would be stainless steel profiles. It is better to make a crate using suspensions - this will allow you to organize a thorough insulation, which is important for unheated rooms. From gypsum plasterboard products, blocks of the GKLVO class are suitable, which are less susceptible to damage from moisture than other options. It should be borne in mind that they are quite heavy. In order not to make the building too heavy, you can compensate for the weight of the sheets with a lightweight aluminum crate.
PVC panels available in a wide range of shades and patterns can be used. Products are monolithic and have voids in their structure. For the shed, the latter are better suited.
The length of the plasterboard blocks is selected depending on the dimensions of the building. For most commercially available products, it ranges from 1.5 to 3 m. The laid blocks are putty at the seams using fiberglass mesh. The top of the wall can be plastered for leveling.
Both the ceiling and the walls can be sheathed with oriented slabs. This material is made from wood shavings held together by wax bonds and artificial resins. Products are mounted on a wooden crate. The walls can be finished with thick slabs, and 8-10 mm options are chosen for the ceiling.
Planking the shed with a board is also permissible, but building materials in this case must be carefully treated with fire retardant and anti-rotting compounds. Often they use standard "inch" boards. Lining, although it has a beautiful appearance, is not very suitable for a shed due to the insufficient thickness of most options. Profiled boards have good performance, but they are rarely purchased for a utility unit because of the high price. Boarding can be done end-to-end and overlapped. In the second case, the material costs will be slightly higher.
At least once, wood sheathing must be treated with an antiseptic compound.
Outside finishes
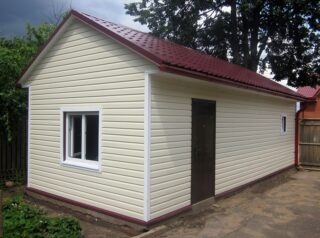
The outside of the barn can be decorated with different types of materials. The main thing is that they are durable and well tolerated by unfavorable weather factors. Among the most common finishing materials are:
- Vinyl or metal siding. These materials are easy to install and have a smooth surface and are available in a wide range of colors. When working with it, it is important to choose the right tool: for example, you cannot use scissors for metal, since the material often cracks in such cases. You can cut the siding with a jigsaw with a fine-toothed file or a regular hacksaw. When fastening, you need to leave a gap (for different types of products, its value is indicated on the package), since the material tends to change volume with temperature fluctuations.
- The profiled sheet is lightweight, easy to install, durable and scratch resistant. On sale you can find coatings with different colors, with wavy or trapezoidal relief. It can be fastened with an overlap or solid. For fixing, special screws are used. The only drawback of the material is its weak soundproofing qualities, due to which the noise of rain will be heard inside the room, but in the case of a utility block, this does not present any great inconvenience.
- From wooden building materials for the shed, a slab and edged board are suitable. The latter is somewhat more expensive, but has an attractive appearance. Usually the boards are laid in a herringbone pattern. Before installation, they must be treated with fire retardants and antiseptic compounds.
It is possible to sheathe the surface with OSB boards and sandwich panels. They are attached to a special frame. Step-by-step instructions for installing a sandwich are usually provided on the packaging.
It is also permissible to use plywood, as long as it is not wet. After repair work, many pieces of sheets remain; they are quite suitable for cladding. They are attached to the lathing lathing.
Can be used for cladding and polycarbonate sheets. The material is easy to cut and install, while being strong. A variety of color schemes will allow you to better fit the utility block into the surrounding landscape.
Slate can be used for roofing.
Self-assembly of siding
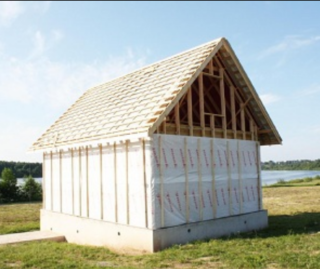
Before starting work, you need to calculate how much siding needs to be purchased for cladding the building. This is easy to do if you know the dimensions of the walls and the linear parameters of one panel. It is better to purchase cladding with some margin.
If you plan to build a barn using frame technology, it should be remembered that siding belongs to the category of finishing materials. The planes of the walls themselves cannot be formed by them. The frame is preliminarily sheathed with OSB plates with a thickness of at least a centimeter. Finishing panels can already be attached to them.
The old casing, if it has come to an unsatisfactory condition, must be removed. You need to mount the panels on a flat surface. Nails, protruding wire pieces and similar items are removed. The slots are sealed with a sealant. If the old cladding is flat enough, the sheathing profiles can be placed directly on top of it. If a shed with smooth wooden walls is sheathed, you can do without the lathing at all, fixing the panels directly to the walls. If the building was erected from block materials, a metal profile is used for the frame under the cladding. To align its elements in a vertical plane, first, 2 elements are mounted on the sides of the walls, and then a thread is pulled between them.
As fasteners, special self-tapping screws with washers or aluminum nails with a head width of at least 2.5 cm are suitable. From the tools you will need a hammer, pliers, screwdriver, perforator, hacksaw for cutting material. You also need tools for marking and controlling evenness: a building level, a plumb line, a square and a tape measure. Gloves and goggles are required to protect hands and face.
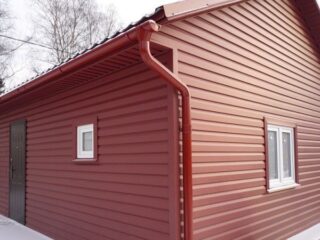
First, a crate is attached to the walls of the shed. Depending on the material of the walls, it can be made from a bar or a metal profile. If vertical laying of panels is planned, the lathing elements, on the contrary, are mounted in the horizontal direction. In this case, the distance between them should be about 0.4 m. If they want to lay the siding horizontally, the timber or profile, on the contrary, is placed vertically. In this case, the step value does not change.
The element to which the panels are attached is called the starting profile (or bar). Before its installation, marks are made on the wall, along which the evenness of the products will be monitored. J-strips are included in the scope of delivery for covering the area around door and window openings. To hide the ends of the panels in the corner parts of the building, external corners are used.
Sometimes they begin to sheathe from the space near windows and doors. The advantage of this option is the protection of these areas from corrosive processes and moisture ingress.
In no case should you firmly press the profiles against the wall, screwing the screws (or nailing) to the end. Otherwise, siding can lead, since it tends to expand with increasing temperature. It is necessary to leave a clearance of about 0.5 cm for the products to move.
The panels are overlapped from left to right or from bottom to top. Depends on which direction of laying is chosen - vertical or horizontal. A gap of 3-5 mm is left between them in case of a change in volume during frosts in winter or in hot summer. When a siding unit cannot cover the entire length or height of a wall, a piece of another panel can be attached to it. This is done using special abutting profiles.


