Plasterboard is a common building material, owing its appearance to the American Augustine Sackett, who in 1884 received a patent for the original building material: 10 layers of thick paper glued together with gypsum. As the owner of a paper mill, he almost immediately achieved a new field of application and an expansion of the market for his products. Subsequently, Stephen Kelly simplified the gypsum board manufacturing technology by using a solid gypsum core and a double-sided paper shell. The idea to close the edges of the sheet came to Clarence Ustman a little later. In this form, a drywall sheet (GKL) has survived to this day and is now widely used for interior decoration in any room, including ceilings.
Features of plasterboard ceiling

In general, drywall is gypsum compressed and coated on both sides with cardboard. It is environmentally friendly and does not emit toxic substances. Companies producing gypsum plasterboard offer consumers several types of this material, which differ from each other in the scope and technical parameters.
For the installation of ceilings, it is recommended to use a plasterboard ceiling, the thickness of which is 3 mm less than the thickness of a standard sheet. Thanks to this, the sheets can be bent, which makes it possible to equip arches and other curved structures without much difficulty.
Among the advantages of plasterboard ceiling are:
- light weight;
- ease of installation;
- availability of any type of decorative finish (painting, wallpapering, ceramic tiles, etc.);
- flexibility - when wetted with water, the material can be given any shape;
- the possibility of trouble-free manufacturing of structures to hide engineering communications (cables, pipes, air ducts, etc.).
The disadvantage of ceiling plasterboard is the need for special storage conditions and additional finishing: sealing of tile joints and places of mechanical fastening.
It is not recommended to use plasterboard ceilings in rooms where there is a risk of flooding from above. The material swells from water and its weight increases, which can lead to the collapse of the entire structure.
Options for attaching drywall to the ceiling
When installing the gypsum board on the ceiling, frame and frameless fastening methods are used.
Wireframe

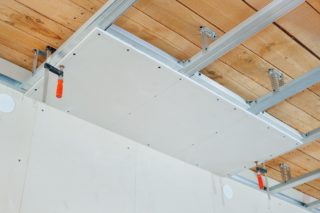
Installation of plasterboard on the ceiling involves the use of a metal profile or wooden battens. Drywall is attached to the frame details with self-tapping screws.
When using the frame on the ceiling, a reliable and durable structure is created without any special difficulties, which allows you to hide the unevenness of the ceiling and the engineering communications available there (wires, air ducts, etc.). It is also possible to install heat-insulating material, and a large range of commercially available profiles allows you to equip a variety of multi-level structures.
The wooden frame is more environmentally friendly than the metal one, while the height of the room it “steals” less.
Among the disadvantages of frame structures, the high cost of the metal profile is noted. The wooden frame cannot be used in rooms with high air humidity.
Frameless fastening method

Fastening drywall to the ceiling can be carried out without a frame, for example, glued or screwed on with self-tapping screws.
GKL can only be glued to a flat ceiling. When the height difference on the surface exceeds 4 cm, you cannot do without arranging the frame. It is screwed with self-tapping screws only to wooden ceilings.
Frameless methods for attaching drywall to the ceiling have several disadvantages:
- it is impossible to level surfaces with a large difference in heights;
- it will not be possible to lay heat and sound insulation;
- it is required to prepare the ceiling surface well;
- you cannot equip multi-level ceilings;
- drywall will not be able to carry a heavy load.
Fastening drywall to the ceiling without a frame allows you to reduce the cost of purchasing a profile or timber. Due to the refusal to assemble the frame, time is saved, the labor intensity of installation work is reduced and the height of the room is practically not reduced.
DIY fixing
When choosing a method for attaching drywall to the ceiling, you need to assess its condition, determine the amount of preliminary work: laying communications, laying heat and sound insulation, leveling the surface, etc.
Fastening to a metal profile

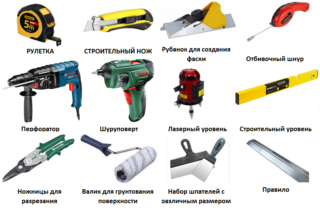
To fix the gypsum board on a metal profile, you will need:
- ceiling metal profile 60x27 mm;
- guide profile, corresponding in size to the ceiling;
- suspensions;
- fasteners (self-tapping screws for metal, dowels, dowel-nails, etc.);
- screwdriver;
- coated cord;
- roulette;
- building level;
- assembly knife, etc.
Installation work is performed in the following order:
- Using a tape measure, measure the height of the room.
- Points are marked at a distance of 25 mm from the ceiling in all corners. If it is planned to install built-in luminaires, this size is increased.
- With the help of a coated cord, they beat off the lines on the walls connecting the corner points to each other.
- A guide profile and hangers are installed along the lines drawn. The profile is attached to the walls using dowel-nails. The fixing step along the edge is 125 mm, and along the center line - 250 mm. Dowels are installed on the marked lines and hangers are attached to them.
- Ceiling profiles are inserted into the installed guides and fixed on the suspensions.
The result should be a rigid frame for drywall sheets. Next, the prepared gypsum boards are applied to the frame and attached to the latter with self-tapping screws for metal. Screw the self-tapping screws with a screwdriver, slightly recessed their heads in the GK. In this case, the distance from the edge of the sheet to the center of the screw must be at least 10 mm. The screwing step of the self-tapping screws is 15-20 mm. The depth of immersion of the self-tapping screw head in drywall is no more than 1 mm. At the junction of two sheets, additional jumpers from a metal profile are installed.
Fastening to wooden slats

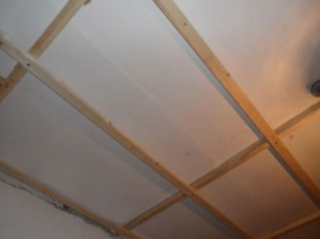
The slats of the wooden lathing should be no thinner than 8 cm. They are attached directly to the flat ceiling with dowels. If the ceiling is uneven, hangers are used.
Drywall is attached to the battens with wood screws with a pitch of 15-20 mm. At the joints of the sheets, additional wooden jumpers must be installed.
Adhesive and mechanical fastening method
Adhesive preparation:
- 0.5 kg of dry bone glue is poured with 3 liters of cold water.
- To swell, the glue is left in water for 12-15 hours.
- After the composition swells, 1 kg of lime dough is poured into the container and mixed thoroughly.
- Put the container on a small fire, stirring constantly, cook the resulting mixture for 4-6 hours.
- After removing the container from the fire, add 10 liters of water to it.
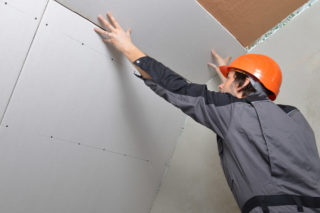
The produced glue is applied to the primed surface of the ceiling and allowed to adhere a little. After that, a sheet of drywall is applied to the ceiling and pressed firmly for several minutes.
The use of adhesive to attach drywall directly to a wooden ceiling is not permitted. There is water in the glue solution, which penetrates the wood and expands it. After drying, the wood returns to its original state, which will lead to the appearance of cracks in the sheathed surface.
GKL is screwed to the wooden ceiling with self-tapping screws for wood. The step between the latter should be no more than 2 cm, and the distance from the edge of the sheet to the first row of screws should be at least 20 mm.
To give additional strength, you can spot polyurethane foam on the sheets and then fix them to the ceiling.
Common mistakes

Installation of drywall sheets is often accompanied by a number of errors that subsequently cause defects in the lined surface. Among them, the most common are:
- wrong choice of profile;
- violation of the profile installation technology;
- poor quality profile cutting;
- extension of the profile walls;
- fastening the gypsum board with the back side out;
- violation of the rules for fixing gypsum board.
Defects arising from errors appear only during operation. It is almost impossible to eliminate them without violating the integrity of the cladding.


