When planning construction or renovation, the correct choice of material is of great importance, since each room has its own operating conditions. The main destructive factor for steel, plaster and drywall surfaces is dampness. Under its influence, fungus and mold develop, and the finish itself becomes unusable. An excellent option in all respects is plastic. Fastening PVC panels to the ceiling is not particularly difficult, but there are a number of nuances that must be taken into account in order to achieve a truly high-quality result.
Advantages and disadvantages of plastic panels
Plastic panels are flat longitudinal strips, consisting of two plates connected by longitudinal stiffeners. The width of the products varies between 18-60 cm, the length is 300-595 cm, and the thickness is 6-12 mm. The surface is matte, glossy and textured. Faceplates are made white, colored and patterned. The best option for finishing a bathroom, toilet, kitchen and balcony are lamellas 25 cm wide and 8 mm thick.
PVC panels have gained immense popularity due to the following advantages:
- Affordable cost, incomparable with all existing analogues.
- Lack of wet work and debris during installation. Only a small amount of dust is released when drilling walls and ceilings.
- The possibility of using the space under the stove for laying communications, placing insulation, lamps and fans.
- Ease of construction. A minimum set of household tools is required to work. The material is lightweight, does not require any effort during installation.
- High speed of installation. Fastening plastic panels to the ceiling, even in the absence of skills, occurs at a rate of one square per hour.
- Applicability to rooms with walls of irregular geometry. Profiles and finishes are easy to adjust to any curvature.
- A wide range of colors, textures and sizes.
- Long service life of at least 25 years.
When making a choice in favor of PVC panels, one should take into account their negative qualities.
- Soft surface. It is easy to scratch and dent. Damage is almost impossible to repair, only replacement.
- Lowering the ceiling, reducing the volume of usable space.
- Destruction by ultraviolet radiation, light and heat generated by incandescent lamps.
- Visible gaps between panels, lack of a single surface.
Since the number of advantages is much greater, plastic is a popular material in private and commercial construction.
Calculation of the amount of material
Correct calculation allows you to purchase the number of panels, which will be enough to work with a minimum amount of balance.
Calculations should be carried out in the following areas:
- Panels. The requirement is calculated mathematically when the ceiling area is divided by the area of one strip and then rounded up. Higher accuracy is obtained by the geometric method, when a diagram is drawn up, which clearly shows how many fragments of masonry are needed.
- Frame.Crossbars are installed at intervals of 50-80 cm, starting from the wall.
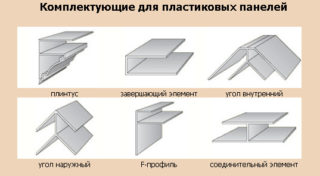
- Start profile. The need corresponds to the perimeter of the room.
- Connecting profile. The length corresponds to the width of the room.
- Dowels and screws. The total length of all elements of the frame and lathing in meters is multiplied by 4.
In all cases, you need to make a stock within 10 percent to cover errors, damage during transportation, storage and construction.
Required tools
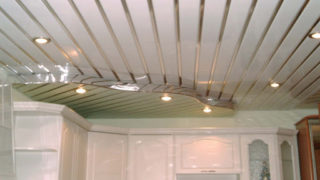
To fix plastic panels to the ceiling with your own hands, you should prepare the following tools:
- puncher;
- hacksaw;
- level;
- wide miter box;
- stationery knife;
- roulette;
- screwdriver;
- stapler;
- paint brush.
Materials required:
- panels, profiles and hardware, according to the calculations;
- antiseptic;
- glue.
To work comfortably and safely, you need to prepare a stable ladder, hard hat, goggles and gloves.
Methods for attaching plastic panels to the ceiling
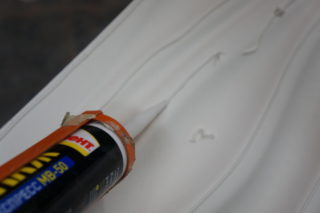
You can attach plastic panels to different bases and using different hardware. Of the fasteners, the choice is made in favor of nails, screws and staples. Installation can be carried out directly on the frame or with clamps.
Base options for mounting the coating:
- With crate. The structure consists of 15-30 mm thick wooden battens screwed to the floor slab. This choice is made when the wall cladding reaches the ceiling and there is no need to lower the suspension system. Well suited for finishing kitchens, toilets, bathtubs and corridors, if it is not provided for the installation of internal spotlights. The slats are screwed with self-tapping screws at a distance of up to 100 cm perpendicular to the direction of plastic laying. Small irregularities are eliminated with gaskets.
- Without lathing. It is allowed to glue the panels only on a perfectly flat surface, carefully treated with a primer. To properly fix the ceiling, you need to use high-quality quick-drying glue. Such a solution is good because the usable space practically does not decrease, you do not need to spend effort and money on making a frame, hardware and dowels, drilling holes in the ceiling and walls. The downside is that the coating is not separable. During dismantling or repairs, not only the lamellas are damaged, but also the base.
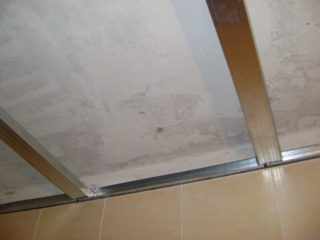
- On a metal profile. The decision to attach the cladding in this way is made when it needs to be lowered from the slab a certain distance. The reasons can be very diverse - laying insulation, air duct, installing a lamp, closing the gap between the wall decoration and the slab, as is the case on balconies after installing reinforced-plastic windows. The base is a spatial frame fixed in wall profiles and vertical suspensions. Differs in strength and durability.
The choice in each case is made individually based on the practical feasibility and characteristics of the room.
DIY installation features
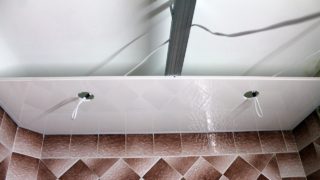
The first stage of making a plastic ceiling:
- Marking. The lowest angle is calculated, and an indent is made from it by a certain distance. Starting from the control point, using the level, horizontal lines are drawn along the walls.
- Drilling points are marked on the ceiling and walls. Holes are drilled, plastic dowels are inserted into them.
- Sawing out sections of the UD wall profile. Transferring marks from the wall to them, making holes through which they will be attached to the base.
- Screwing UD profiles to walls and vertical hangers to the ceiling.
- Measurement and cutting of the carrier CD profile. Installation of parts in grooves, alignment and fixation using self-tapping screws with a 19 mm drill.
It is recommended to check the strength of the frame by shaking each part with your hands.
TO
- Install a starter profile or decorative molding on three sides of the room. The corners are adjusted with a miter box and joined at a 45 degree angle.
- Measure the distance between the bottom of the openings on the adjacent sides of the molding. Subtract 1 cm from it and cut off a piece corresponding to this parameter from the strip.
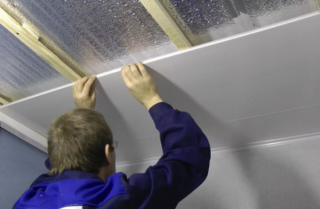
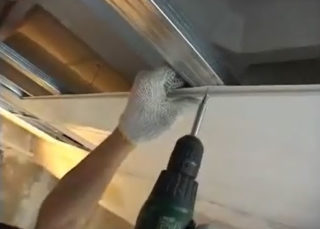
- Insert the first element into the grooves with a tenon towards the opposite wall. Push it all the way, screw it along the bar to the frame.
- Measure and cut out the second and subsequent fragments in the same way. Dock them with previously installed panels until they click into the lock.
- The last row is adjusted in width and inserted into the grooves along with the molding. The module is moved away from the wall with a screwdriver until it closes, after which the profile is moved back and closes the gap.
It remains to make holes, connect and fix electrical appliances.

