Mounting lining on the ceiling is one of the most popular design solutions for various premises. The cladding made of wood looks rich, is natural, and can serve for a long time without additional repairs. You can fix the panels on the base yourself.
- The choice of lining
- Metal
- Wood
- MDF
- Polyvinyl chloride
- Preparatory work
- Choosing the direction of installation of panels
- Vertical
- Horizontal
- Diagonal
- Combined
- Necessary tools and materials for work
- Methods for attaching the lining to the ceiling
- Through fastening
- Concealed mount
- Clamp mount
- Features of installation work
The choice of lining
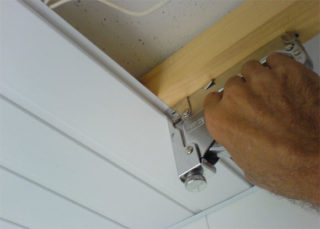
Before starting the renovation, it is necessary to select the appropriate material for the ceiling cladding. The lining is made of wood, metal, PVC, MDF.
Metal
The metal cladding is made of aluminum or thin steel. In living rooms, it is used only when decorating them in a techno style. More suitable for technical or utility buildings.
The aluminum finish has a long service life. It is resistant to inflammation, moisture and biological factors. However, this property is inherent only in expensive products.
The disadvantage of steel lining is corrosion due to minor mechanical damage to the protective layer.
Wood
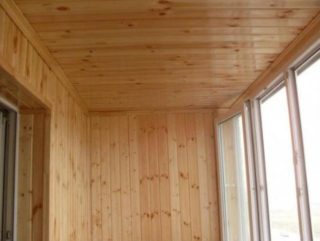
Wood material is the classic most popular among buyers. For the manufacture of cladding, different types of wood are used. The scope of its application is unlimited. Such lining is used in living quarters, baths, garden houses.
The material has the following advantages:
- environmental friendliness - the finish is suitable even for children's rooms;
- aesthetic appearance due to the unique pattern on the wood;
- thermal insulation properties: the ceiling helps to retain heat inside the room;
- durability: with proper processing, the finish is resistant to temperature extremes, the effects of other negative factors;
- ease of installation.
Wooden lining can be treated with special substances that increase its fire safety. Additionally, it is impregnated with antiseptics to protect it from the influence of fungus and mold, insects.
MDF
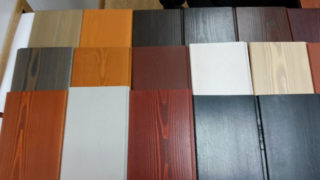
For the manufacture of MDF lining, wood shavings are used, processed under the press. It is lightweight and can mimic a variety of natural materials. Fasten it with glue or with clamps. This coating is used in the living room, bedroom. Such a lining is more suitable for wooden houses.
MDF is easy to care for. If one element is damaged, it can be quickly replaced.
Finishing is capable of accumulating moisture and collapsing under its influence, therefore, it is not used in the kitchen, in the bathroom or in the bathroom. The material is not flexible, and may burst under strong mechanical stress. Another disadvantage of such products is the high degree of flammability. If electrical wiring is placed under such a ceiling, it is hidden in insulating metal corrugations.
Polyvinyl chloride
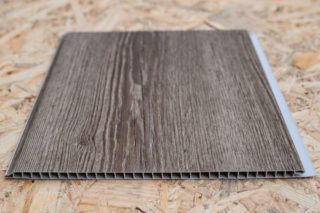
PVC is a budget option for finishing the ceiling. This cladding looks beautiful and easy to clean. It retains its properties for about 10 years. The material does not rot, does not fade in the sun, does not warp at temperature extremes. Its advantage is its low price.It is not difficult to fix the product, as it is lightweight.
The PVC finish is of low durability. Plastic does not allow air to pass through, so it cannot always be used in residential premises. This property contributes to the appearance of condensation on the surface of the walls and ceiling. The material can deform due to temperature changes. The surface of the lining turns yellow over time.
Preparatory work
Before attaching the lining to the ceiling, it is necessary to prepare the base and the material itself. The process involves the following actions:
- elimination of the old coating;
- inspection of the base for cracks, chips (flaws must be removed);
- treatment of the ceiling with antifungal agents;
- fixing the insulation (if necessary).
If the base has significant differences in level, it can be leveled with plaster. The procedure is needed if the lining will be attached with glue.
The material should lie in the room for several days unpacked in order to get used to the operating conditions.
Choosing the direction of installation of panels
For the installation of the lining, a frame is required that hides the height of the room. Before starting work, you should choose the direction of installation of elements on the crate.
Vertical
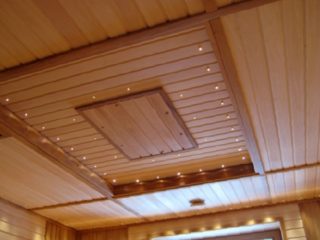
The vertical fixing method visually increases the height of the ceiling. It is acceptable in rooms with high humidity, since the liquid does not stay on the surface of the material, but quickly flows down the grooves between the lamellas.
Horizontal
The horizontal installation method is suitable for narrow rooms. This type of installation is used if you have purchased a lining "American" or boards with a selected quarter.
Diagonal
Diagonal installation of panels is rarely used, since it is technically difficult. There is too much waste left after such an attachment. However, this method of fixation is very beautiful and allows you to create interesting drawings.
Combined
This option has a high degree of decorativeness, but certain construction skills and accurate measurements are required to use it. Material consumption increases due to waste. The installation technique is complicated, so it is not suitable for beginners.
Necessary tools and materials for work
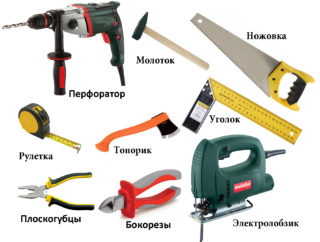
To properly attach the lining to the rough ceiling, you need to prepare tools and consumables:
- finishing panels;
- material for the manufacture of the frame (wooden beams or metal profile);
- suspensions or brackets;
- anchor with plastic dowels;
- self-tapping screws for fixing the frame;
- building level;
- screwdriver, hammer, puncher;
- a hacksaw for wood or scissors for cutting plastic, metal.
All wooden elements must be dry, clean and intact. It is better to treat them with a primer and antiseptic.
Methods for attaching the lining to the ceiling
The method of fixing the lining to the ceiling depends on what priority is given to the master: the appearance of the facing material, the ability to quickly dismantle the panels or the speed of work.
Through fastening
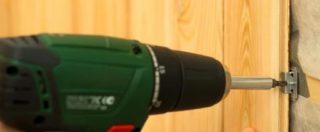
You can fix the lining with the through method if the work needs to be done quickly. Heads of fasteners are visible on the surface of the finish. When using wooden cladding, the cloves can be sunk into the planks, and the holes can be putty. After applying a layer of varnish, the fasteners will be less visible.
Often, galvanized self-tapping screws are used to fix wood elements. They do not split the lamellas. The through method of installing the lining is used to screw the first and last element in the corners.
Concealed mount
You can attach the lining to the rough ceiling using small studs or self-tapping screws with small diameter caps. The first element is mounted with a spike in the corner and screwed with a through fastening. During the execution of work, one must not forget about the control of the vertical level.In places where the lamellas will intersect with fragments of the lathing, through holes are made using a thin drill. They are located on the inside of the groove. The drill must be guided at an acute angle to the surface of the finish.
Self-tapping screws are screwed into the prepared holes so that their caps completely enter the wood. If nails are used for fixing, a doboinik is used for their convenient fastening. The next lamella is driven into the groove with a spike and the same work is carried out as with the first.
The last element is installed through fastening along the edge. If necessary, the plank must be cut to the width. The place of fixation is covered with a decorative plinth.
Clamp mount
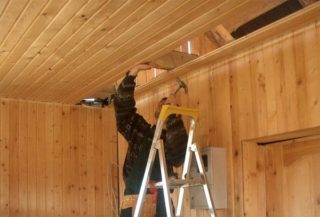
Cleamers are metal fasteners with which the lining can be firmly fixed to the frame, while maintaining its integrity. If necessary, dismantling the finishing coat is quick and easy.
Kleimer is a plate with holes made at the edges. There is a tongue in the middle of the element. This element is necessary for fitting the lamella into the groove, holding it in place. Such fasteners differ in size, shape, tongue height. The last indicator should be equal to the wall thickness of the lining groove. Kleimers are selected according to the type of facing material.
The advantage of fixing on clamps is that there is no need to drill holes in the lining.
Features of installation work
If wooden elements are used in the work, in order to maintain their attractive appearance and strength, treatment with an antiseptic, as well as means that increase resistance to fire, is required. Finishing is allowed to be painted, varnished or stained. Plastic panels do not need additional finishing.
Work order:
- Preparation of the base. You need to clean it from the old finish. If it remains and begins to fall off, the ceiling may lose its decorative effect and integrity. Cracks are slightly widened and repaired with repair mortar. If it is necessary to level the base, use plaster.
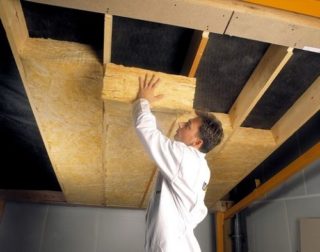
- Ceiling insulation. For work, use mineral wool or foil materials. They should be secured with construction brackets. A vapor barrier film is fixed on top of the heat insulator. At the same time, the smooth surface is directed towards the interior of the room.
- Installation of the frame. The lining should be attached to a wooden lathing or metal frame. For mounting the second option, measure the lowest point of the ceiling, its height in all corners. 5-10 cm recede from it downward. A starting profile should be attached to the walls along the perimeter of the room. This requires dowels. The suspensions are fixed on the floor slab. The main profiles are screwed in last. The beams of the wooden frame are screwed onto the rough ceiling.
- Installation of lining. For thin wooden slats, clamps are used. Heavy products are nailed in an open way. So that the ceiling remains intact and no cracks appear on the elements, the fasteners are hammered using a doboiner. First, the slats are cut to fit the ceiling. The elements of the lathing are directed perpendicular to the lining. The first fragment is pre-baited with carnations and its level is checked. The rest of the lamellas are inserted with a spike into the groove and fixed.
- Fastening decorative elements. The joints between the ceiling and walls are covered with baseboards.
If it was decided to lay the white lining, all work is done as carefully as possible. Any imperfections on such a surface will be noticeable.


but in order for the thorn to enter the groove, what will you pound with? With a hammer? I did NOT see mallets in the tool list. And my advice is to wrap this mallet with stretch film before work so as not to leave marks on the lining.