To make the room complete and aesthetically pleasing, you need to cover not only the walls and floor, but also the ceiling. This part of the room is the most visible. For decoration, paint, plaster, putty are traditionally used. Installation of a two-level plasterboard ceiling with backlighting will allow you to repair the base without complicated procedures for leveling it and bring zest to the interior.
Varieties of two-level ceilings
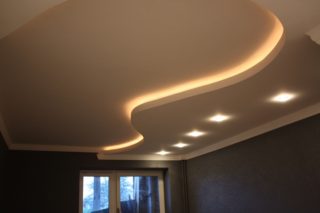
Multilevel designs look very original. Most often they are created from drywall, which is easy to process. Various intricate shapes can be cut from this material.
Symmetric
The symmetrical design is characterized by uniformly spaced shelves and straight lines. If a decorative element is installed on the right side of the room, the same must be fixed on the left.
Asymmetric
The asymmetric version is characterized by the fact that the transition between two horizontal planes is made with a curved shelf.
General device
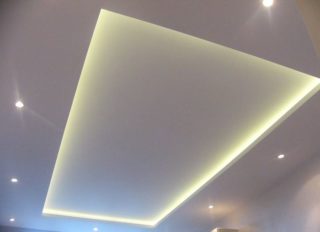
A two-level plasterboard ceiling with your own hands is easy to make. It consists of a frame made of a metal profile and a sheathing. The second level is located under the first, more often along the perimeter of the room. The shape of the structure and its size depends on the dimensions of the room and the design of the ceiling. The design can be simple or consisting of several elements.
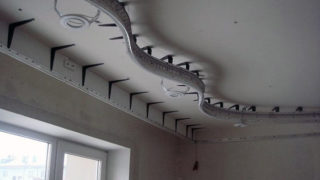
If the foundation does not have significant flaws, it can become the first level. Next, a metal frame is installed on it. It is considered the foundation of the second level. The design is equipped with additional lighting fixtures, which helps to zone the space.
All tiers are mounted strictly parallel to each other.
Required tools and materials
To fix a two-level plasterboard ceiling with lighting with your own hands, you will need the following tools and materials:
- metal profiles (guides, ceiling): the frame is made from them;
- ceiling hangers (straight);
- devices for connecting profile elements to each other;
- self-tapping screws for metal, as well as fasteners for screwing drywall;
- polyethylene-based sealant;
- acrylic primer;
- serpyanka tape for strengthening the joints of plasterboard sheets;
- putty.

For the correct installation of the frame, you will need a laser or ordinary building level, a plumb line. The marking of the ceiling and material is carried out using a pencil (marker) and a measuring tape. You will also need a square or a long ruler.
Sheets are trimmed with a fine-toothed hacksaw. You can cut the profile using metal scissors or a grinder. Also, for work, you will need a screwdriver, drill, perforator (if work is carried out on a concrete or brick base). Use a brush or roller to apply the primer to the ceiling surface. Putty is carried out with a spatula. For grouting, a special compound is required.
The choice of drywall depends on the type of room in which the renovation is being carried out. For the kitchen, a moisture-resistant, fortified version, resistant to temperature extremes, is suitable.For living rooms, a standard sheet that does not have enhanced properties is suitable.
Before screwing, the material should lie in the room for 1-2 days to get used to the conditions.
Ceiling preparation and marking
Before installing a two-level ceiling, you need to remove furniture from the room. It is better to remove old trim, especially if it is not securely fixed to the base. If there are minor irregularities, it is not necessary to level the rough ceiling. However, if there are cracks on it, they should be removed with cement mortar, and then primed.
Before attaching the profile, it is advisable to make a drawing indicating the dimensions of all elements and the distance between them. The diagram indicates the location of the support fragments, the placement of lighting fixtures, and trim parts. Thanks to the figure, you can make an accurate calculation of the required amount of materials for the frame and cladding, the cost of the work.
The suspended ceiling must be securely fixed in the center of the base and around the edges. The standard distance between profiles for drywall 1.2 m wide is 40 cm. In this case, the installation of transverse jumpers is carried out so that the joints of the sheets fall on them. The interval between them is 2.5 m.The step between the vertical suspensions does not exceed 25 cm.
The placement of the support surfaces and fasteners depends on the installation of the lighting fixtures. In this case, the frame will be a structure of transverse and longitudinal profiles with a cell of 40 * 25 cm. It is necessary to step back from the walls by 10-15 cm. All markings from the drawing are transferred to the base. In this case, it is better to use a laser level.
DIY installation
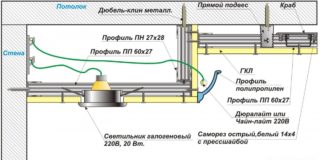
There are several options for attaching the frame. One of them presupposes the fixation of the first and then the second tier. The other is characterized by screwing first the second level, and then the first. This option is more time consuming. To make the design correctly, you must follow the step-by-step installation instructions. It provides for the following stages of work:
- Installation of the first tier. According to the markings, a guide profile is attached to the wall. The fasteners are fixed with a step of 50 cm. At the same stage, the suspensions are screwed, the distance between which is also 50 cm. To maintain the correct level of the frame, a nylon thread is pulled on the surface. If some profiles are suspended, they are adjusted using suspensions. The cord is pulled along the guide profile.
- Laying of electrical wires. They must be insulated in a corrugated tube. At this stage, it is important to ensure that the wires do not touch the metal profile. At each point where the lighting fixture will be installed, the wire is led out by 15 cm.You also need to take into account that the lighting is connected to a switch and an electrical box.
- Installation of the second level frame. Installation of the frame of the second tier is carried out in the same way as the first. In this case, additional wiring is not excluded.
- Installation of lighting devices. In this case, you need to pay attention to the power of the devices. You may need to install a voltage regulator or an electricity converter. LEDs are mounted in niches specially prepared for them.
- Fixing drywall. After the lathing is attached, it is sheathed with sheet material. For the installation of arched plasterboard ceilings, the bending radius of the structure must be taken into account. Notches are made on the metal profile. Cuts are also made on drywall sheets and they are bent, being careful not to damage the top layer of cardboard. Sometimes the material is moistened and processed with a needle roller. They fix it with self-tapping screws, the caps of which need to be slightly recessed inside.
- Finishing finish. First you need to putty all the fasteners. At the joints between the sheets, a serpyanka mesh is fixed.With its help, each corner of the structure is strengthened. The first layer of putty is applied to the surface. After it dries, the ceiling is checked for irregularities and flaws. After that, the surface is putty again. The final stage is painting the ceiling or decorating it with wallpaper. Before applying paint, the surface is sanded with fine sandpaper.
Since when the backlight is turned on, the slightest flaws will be visible on the surface, all finishing work is carried out as carefully as possible. Before painting, the ceiling is carefully examined under a bright light.
Safety precautions when working with drywall
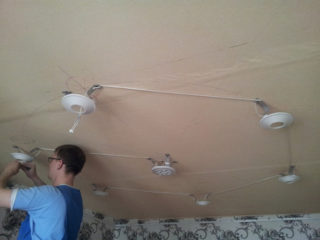
Working with the presented material is not difficult. However, even when installing drywall on the ceiling, compliance with safety rules is required:
- Since electrical tools are used during work, they must be in good condition. The risk of short circuit or electric shock is completely eliminated.
- Carefully work with cutting devices so as not to injure yourself.
- To fix the sheet on the ceiling, a stepladder or goats are required, which must be moved carefully.
- If the height of the base exceeds 1.3 m, the mobile scaffold must be equipped with protective guards.
- When cutting or screwing drywall sheets, it is better to use a respirator and goggles, since this process is characterized by increased dust formation.
- Garbage and waste are removed from the premises in a timely manner.
There is no need to rush to get the job done. Due to the simplicity of material processing, even a novice master can build original structures.


