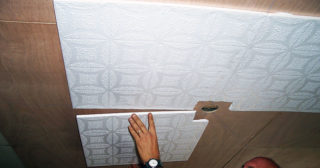
For the manufacture of ceiling tiles, polystyrene foam is used, which is a type of foam. The decoration is used in residential and public areas. Ceiling tiles are glued using additional decorative elements in the form of plinths, sockets, moldings, corners. The elements are squares that are fixed to the upper floor with glue.
- Varieties of slabs for the ceiling
- Extruded
- Foam or stamped
- Injection tile
- Selection of tiles by technical parameters
- Calculation of the amount of material
- Choosing an adhesive for the job
- Preparatory work
- Required tools and materials
- Methods for placing tiles on the ceiling
- Parallel
- Diagonally
- DIY installation features
Varieties of slabs for the ceiling

Significant visual differences and technical characteristics of the finish are due to the use of various raw materials and the manufacturing method.
There are panel options:
- extruded polystyrene foam;
- styrofoam stamping;
- injection variety.
There are non-standard models in the form of a rectangle. There are tiles with edge edging with a clear seam boundary or seamless options with straight or wavy lines.
Extruded
This type of finish is produced from expanded polystyrene foam, the shape of the pattern is given by pressing through machines (extruders). The models have a polished surface and a small thickness (2 - 3 mm), they make decorative elements of high density.
During production, pigments are added to give the tiles an imitation of stone, wood, fabric.
You cannot paint the finished extruded tile, as the paint rolls on the surface and does not stick to the substrate.
Foam or stamped
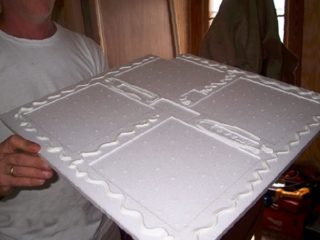
It is obtained by pressing and cutting large sheets into small slabs with a thickness of 7 - 8 mm. The graininess is clearly visible, the models are distinguished by a porous and loose surface, in which dust accumulates over time. The tiles are soft, they are made only in white color.
After gluing, they are painted with acrylics to facilitate subsequent care. It can be glued in living rooms, but the material is destroyed in the kitchen and bath from grease and moisture.
Injection tile

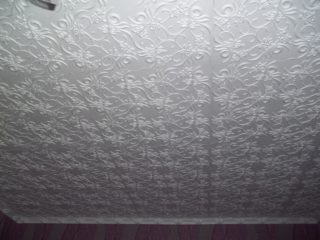
Produced in a seamless version, the production process involves the sintering of granules in model forms. A clear pattern is formed on the surface.
On the ceiling, a monolithic tile covering with a convex ornament 5 mm thick is obtained.
The tile is easy to stick, after installation it can be painted in different colors.
The material is popular due to its high quality and non-standard appearance, at an affordable cost.
Selection of tiles by technical parameters
When buying, take into account the ideal size, uniformity in thickness. The boundaries of the elements must have a similar bead (suture option), not contain delamination, burrs. It is better to take plates from one production batch.
Take into account the place of gluing the ceiling tiles. It is difficult to create a high-quality coating on a curved ceiling; during installation, the edges will bulge, so they take thin elements that are easy to glue.
Calculation of the amount of material
Before gluing the ceiling tiles, consider the number of elements. Usually there are 4 elements per square of the ceiling, since each has a size of 50 x 50 cm. The tiles contain 8 panels, so one package is enough for 2 m².
Find the area of the room by multiplying the length and width. The resulting value is multiplied by 4 to calculate the number of tiles required.A factor of 1.1 is applied to account for the shearing. A more accurate and correct calculation is obtained if you make a drawing with an accurate layout.
Choosing an adhesive for the job

They use Titanium, Nset glue, liquid nails for gluing. All compositions are suitable for gluing ceiling tiles, but according to the instructions, you need to hold each element in a suspended state for up to 5 - 10 seconds. The glue sets faster. Moment.
Mastics are produced, which are packaged in small buckets. The compositions are ideal because they stick instantly. For non-leveled surfaces, a finishing putty is used, and it is better to fix large differences in advance with a starting mixture.
Preparatory work
The paint is cleaned from the ceiling, whitewashing is better to the stove, but you can leave a strong layer of putty. They are primed with deeply penetrating compounds, then the area is equalized using a plastic mesh. The seams between the plates are sealed with putty and the serpyanka must be glued.
Before gluing, apply the primer again, since the surface must be fixed so that the layer does not come off along with the glue and tiles.
Required tools and materials
Work at heights is carried out from a folding ladder or construction scaffolds of a low height are used.
Tools required:
- knife on g / cardboard;
- thread cut with colored pigment;
- tape measure 5 m, square, pencil;
- leveling and adhesive spatulas.
It is better to take a wide brush for a primer, you will need a container for putty and primer. The remaining glue is removed with a sponge.
Methods for placing tiles on the ceiling

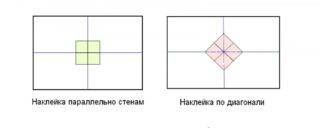
Apply a diagonal arrangement or lay out the elements in straight rows. The first option looks more interesting, with its use, the unevenness of the ceiling is visually reduced.
Irregularities with any method can be no more than 5 mm, otherwise any location will only emphasize the differences. The diagonal method uses more material because edge triangular trims cannot be applied.
Parallel
To glue the tiles on the ceiling yourself, start from the center of the square. The first tile is exposed so that it is parallel to the sides of the room. After her stickers, they beat off the rows on the ceiling with a thread, along which the following elements will be placed.
There is an offset option in the next row of vertical joints to get the brick effect. All marking lines are checked, since it will not work to tear off the whole tile, you will need to clean the surface under it again.
Diagonally
The center of the ceiling is determined by stretching two threads between the corners of the room. The first element is glued so that its corners coincide with the lines on the ceiling. After fixing the first plate, on its sides, the sides of the first row are marked with a skip, between which there will be adjacent parts in the row.
The second row is beaten off after sticking the first one and so they act until the entire area is filled. At the walls, the tiles are cut off in place.
DIY installation features
The thread markings on the ceiling are checked with a rule with a level or a long straight rail. You can move the tiles only for a few seconds, until the glue has set. If you are not sure of the correctness of the markings, use a putty that does not harden for about 10 minutes.
Glue from the face of the panel, which got on the tiles, is removed immediately with a rag or sponge. The seams between the elements are filled with putty, glue paste. You can apply a white acrylic based sealant. It sticks to polystyrene and expanded polystyrene, paint is excellent on it.


