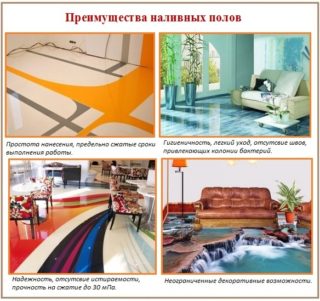
Liquid self-leveling coatings are used in apartments, private houses, offices and industrial premises with heavy loads. They make a self-leveling floor with their own hands with a thickness of 3.5 mm. If the technology is followed, the mixture spreads evenly and forms a perfectly horizontal layer. The process of pouring such a coating compares favorably with the implementation of a cement screed and a concrete base in that it requires low labor costs and high productivity is obtained.
Varieties of self-leveling floors
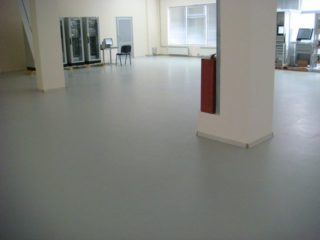
European technology provides for the use of a self-leveling mixture simultaneously with the installation of insulation, noise and waterproofing of the base. In the first two options, a layer of foam is placed, and a polymer film is placed against moisture.
Liquid mixtures:
- thin-layer, used in the final leveling of the surface with high accuracy (3.5 - 10 mm), dries for 2 - 3 hours;
- the middle layer, which can later be used as a floor covering (10 - 25 mm), dries for 3 - 5 hours;
- a quickly hardening screed based on gypsum or cement serves as a preparation for decorative coating with parquet, laminate, tiles or linoleum (25 - 50 mm), dries for 5 - 12 hours.
The mixture contains an astringent, which is represented by Portland cement, cement or alabaster, mineral additives in the form of expanded clay crumbs, quartz sand. Dry mixes include fiber fibers and polymer modifiers to increase strength and moisture resistance.
Basic
The compositions are used to roughly level the surface of the base with differences in height in the form of depressions and protrusions. Such mixtures can be poured up to 5 cm thick. If the irregularities are greater, concrete is used, since the use of leveling mixtures at such heights is uneconomical.
Highly filled compounds are used where there are high mechanical loads. The properties of the base materials are similar to those of polymer concrete. The coatings are resistant to abrasion, abrasion, impact, and are durable. The screed can be moved 12 hours after pouring.
Pouring with starting mixtures is done before the topcoat device in order to reduce the thickness of the last layer. The base formulations are evenly distributed over the floor area using devices for leveling the mortar. The uncured mass is rolled with a spiked roller to remove air bubbles.
Finishing for finishing
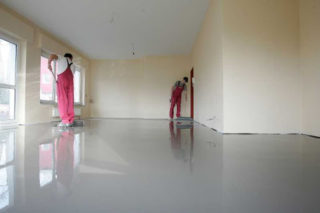
Such floors are used for leveling subfloors without thick flooring, whereby the layer thickness reaches 25 mm. They are poured onto the base screed from the self-leveling floor system or they are made over a standard layer of concrete, wood floor or cement-sand screed.
The coatings are called finishing coatings, but they are used as the final leveling of the screed and do not serve as the last layer. The thinness reduces the load on the floor slabs and the building foundation. You can walk on the hardened self-leveling floor layer after 5 hours, and after a day it is allowed to start decorative flooring.
The finishing category also includes the self-leveling floor technology, which assumes a thickness of up to 10 mm.So the base is leveled for laminate, ceramics, for laying linoleum, if the main area is without a slope and has small irregularities. Such a coating hardens quickly and is walked on after 3 hours, but after finishing it you need to wait at least another 5 hours. The overlap must be primed before the finishing layer.
Types of decorative self-leveling floors
The final layer is produced with the use of polymer additives, which make it possible to make the front decorative layer.
Additional materials are required for the device of polymer layers:
- compositions for priming and surface preparation for pouring, putty, sealing cracks, shrinkage gaps;
- to increase the wear resistance and seal flocks, chips, a polyurethane-based finishing varnish is used: semi-matt, glossy, matte.
Variety allows you to determine the type of finish layer that is required in the room. You need to make a do-it-yourself floor in an apartment so that it meets the conditions of functioning and has a beautiful appearance.
In the design of industrial facilities, impregnating, quartz-filled, paint layers are often used, the installation of decorative bulk flooring is done in the interior of socially significant buildings. For the floor in the warehouse, only impregnation can be made, it will meet the requirements for no dust, increased strength.
Epoxy floors
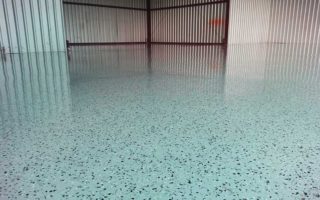
Such a coating with a decorative effect is found in the halls of airports, shopping and entertainment centers or in luxury apartments. The volume of the components is prepared in advance, since after the start of pouring, the work must be done quickly. Approximately 1 liter is taken per 1 square of coating with a thickness of 1 mm, the standard layer thickness is 3 - 5 mm. The mixture is prepared on the basis of epoxy resin, modifiers are added to it, and a hardener is added at the end of the batch.
Resins are used:
- less viscous ED-20;
- denser ED-16.
The latter type withstands high static loads, but it is not very convenient to work with. To increase shock resistance, a plasticizer (DEG-1 or DBP) is introduced into the composition. Fillers are included in the mixture for decoration purposes and to save resin. Quartz sand, pigment pastes are usually introduced. A transparent coating is cheaper than a colored one.
Polyurethane floors
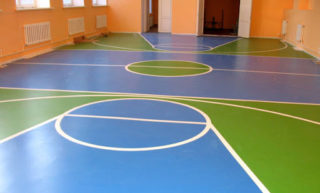
The raw material is polyurethane resin, which, after hardening, withstands loads and prevents cracks in the floor area. Polyurethane does not react to chemical irritants, which is why it is often used in manufacturing workshops.
Polyurethane floorings are:
- Thin layer and single layer. The layer rarely exceeds 1 mm, suitable for rooms with light loads. They can tolerate household chemicals and minor shocks, but are easily scratched.
- Two-component or highly filled. The layer thickness is 1 - 3 mm, the coating can withstand strong impacts and friction. They serve for about 10 years in extreme conditions.
Resin from the group of polyester-polyols withstands sudden changes in temperature, therefore they are used in unheated buildings with regular vibration and severe loads, abrasive action. The layer hardens quickly and gains strength.
Cement acrylic floors
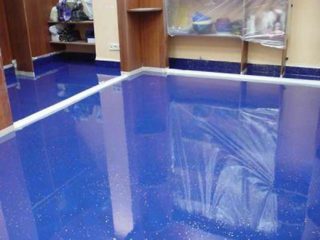
The composition involves mixing a resin base with cement to increase the strength and maintain the flexibility of the polyurethane. Such a layer seals the decorative pattern on the floor in chemical laboratories, food processing units, pharmaceutical workshops. They use high grade cement, use polyacrylate copolymers, fillers.
The flooring is performed as a preparation for laying tiles, laminate. The main requirement for installation is that the base must be carefully prepared for cement-acrylic floors. The coating is laid on old layers or a fresh screed is used.
The base can be concrete, wood, asphalt, ceramics, metal, which are primed twice before pouring.The layer hides irregularities and cracks, but large gaps are putty to reduce material consumption.
Methyl acrylate floors
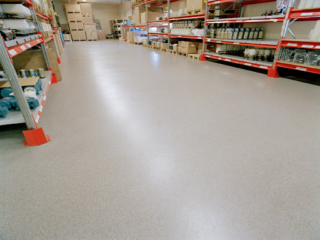
The composition is produced on the basis of methyl acrylate resins, which, when hardened, form crosslinked polymers. The universal coating is made in various buildings and structures, from sports and shopping areas to floors in private homes.
The material is distinguished by its strength, which does not decrease under the influence of negative factors, so it can be laid in the open air. Methyl acrylate flooring is performed in workshops, in parking lots. The coating does not have a beautiful appearance, but resists mechanical damage, is characterized by wear resistance and quickly hardens.
The properties of the methyl acrylate layer are changed with the help of various polymer additives, for example, they increase flexibility or increase the density index. The flooring is laid in frost and heat, but ventilation should be organized in the room due to the pungent smell of an uncured mixture.
Advantages and disadvantages
Other benefits:
- the service life is on average 40 years;
- you can seal the decorative layer and get beautiful floors;
- does not emit toxic components;
- durable, wear-resistant, waterproof, does not burn;
- the possibility of self-filling.
The disadvantages include the high cost of the constituent components, as well as the need for careful preparation of the base. If you need to dismantle a layer of self-leveling floors, this will create difficulties.
Tools required for styling
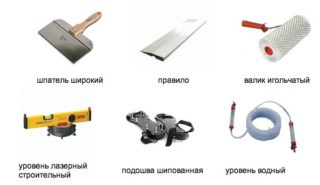
A mixer is needed to prepare the mixture, because as a result of manual kneading, the correct consistency will not be obtained, and due to slow mixing, there will be breaks in work. If there is no mixer, use a container and an electric drill with a whisk.
Other fixtures and tools:
- measuring container for precise dosage of components;
- a set of spatulas (small 3 - 4 cm and large 50 - 60 cm);
- needle roller with projections along the floor thickness;
- padding polyester rollers for primer;
- grinder for cutting deformation gaps in the coating.
To coordinate the level of the surface, beacons from a galvanized profile are used for plastering work or single reference beacons are installed.
Walking on an uncured surface will help paint shoe boots, but they cannot be used if the layer is poured over insulation.
Preparation of the base
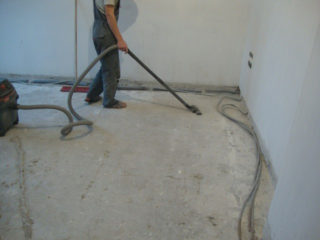
The preparation for each type of flooring is slightly different, but there are general procedures for all types of flooring. The first requirement concerns the mandatory repair of the old coating so that there are no peeling areas, cracks, gaps, and contaminated areas on it. Oiled bases are cleaned off to the layer where there is no fat at all.
Preparation stages:
- the protrusions are knocked down to the planning level;
- embroider cracks with cement or plaster mortar;
- remove dust with a vacuum cleaner;
- the area is primed twice;
- install a damper tape around the perimeter and a waterproofing membrane before the second primer.
On a wooden base, floorboards are nailed, achieving a stable state, sometimes boards or logs are changed. With a screed with a height of more than 10 cm, a fiberglass mesh must be used for reinforcement.
Self-leveling floor pouring technology
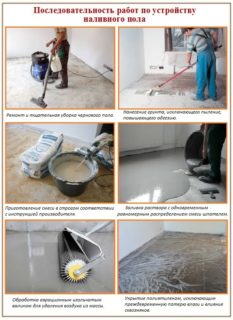
Step-by-step instruction:
- preparation of a solution for the first layer;
- installation of a reinforcing mesh;
- applying the initial screed;
- kneading the mass for the second layer;
- final leveling of the floor.
5-6 liters of water are poured into a bucket, a bag (25 kg) of dry powder is poured and mixed with a drill (4-5 minutes) until a homogeneous composition without lumps is obtained. Leave for 10 minutes, then stir for another 2 minutes. Excess water will lead to uneven sedimentation of the mixture, grooves will appear during solidification.
The solution is poured onto the floor and leveled with a wide spatula, then rolled out with a needle roller. Do not knead the mixture in dirty containers, wash them before cooking.

