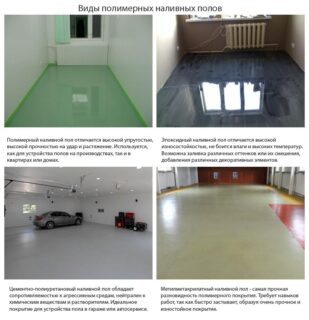
A garage is a room where the base is constantly exposed to strong mechanical stress. Special requirements are imposed on it, because moisture and chemicals additionally affect it. Self-leveling garage floors are very popular, as they satisfy the requirements of the owner and are distinguished by suitable technical characteristics.
- Basic requirements for a self-leveling floor in a garage
- Advantages and disadvantages of self-leveling floors
- Varieties of self-leveling floors
- Which option to choose
- The process of self-filling the self-leveling floor
- Preparatory work
- Pouring mixture preparation
- Pouring composition
- Laying the finishing layer
Basic requirements for a self-leveling floor in a garage
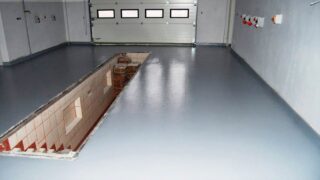
Before you start choosing a mixture for the job, you need to consider what qualities it should have. The floor must meet the following requirements:
- be resistant to mechanical stress: otherwise it will deform and crack;
- not to change its technical properties under the influence of temperature extremes: since the garage is mainly an unheated room, the base should not lose strength during frosts;
- withstand exposure to moisture;
- be resistant to inflammation (fuel, machine oils are often stored in this room);
- do not succumb to the influence of aggressive chemicals.
The floor surface should not be slippery or excessively embossed. An optimal base does not require complex maintenance. Also, the surface should be attractive.
Advantages and disadvantages of self-leveling floors
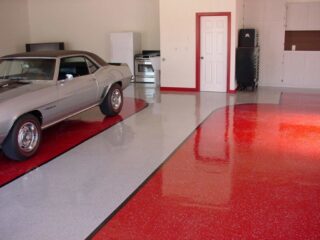
To choose the right finishing material, you need to consider its pros and cons. Advantages:
- high strength: such a coating practically does not deform, does not crack, does not scratch;
- the surface is seamless, monolithic, therefore it is less vulnerable to mechanical stress;
- long service life (40-50 years);
- resistance to moisture (the concrete base is reliably protected from water ingress, and for this, a layer of a flooded floor of 1.5 mm is sufficient);
- preservation of technical properties at negative temperatures or sharp surface heating;
- ease of maintenance: dust does not adhere to the self-leveling floor, since it does not accumulate static electricity, and a simple damp cloth is used for cleaning);
- lack of toxic components;
- fire resistance;
- good adhesion to the rough base;
- attractive appearance.
Another plus of the material is that you can make a self-leveling floor with your own hands.
Minuses:
- high cost;
- difficulties in installation (the base must be carefully prepared);
- difficulty in dismantling: a special tool is required to remove this coating.
The properties of the floor depend on its composition.
Varieties of self-leveling floors
- Epoxy. Polymer coating, which contains resin, quartz sand, hardener. After hardening, a hard layer is obtained, which does not withstand shock loads very well. The advantage of the material is its inertness to moisture, chemical aggressive substances, negative temperatures. The floor is abrasion resistant, durable. The disadvantage is the low level of elasticity, so if a heavy instrument falls to the floor, it can crack.This option is optimal for garages where the car will need to be washed.
- Epoxy-urethane. Liquid self-leveling floors with high strength, wear resistance, elasticity. They tolerate temperature extremes, exposure to chemicals, moisture well. The disadvantage of the material is the high cost and difficulty in laying the composition.
- Methyl methacrylate. The option is the cheapest. It is characterized by good frost resistance, therefore, such a floor is often equipped in garages that do not provide heating. The material is elastic, moisture resistant, durable. Since the material hardens quickly, it must be laid quickly. In this case, it is necessary to correctly determine the thickness of the coating. Due to the strong chemical smell, the mixture is only suitable for work in a garage with a good ventilation system.
- Cement acrylic. Such material is inexpensive, but has good technical characteristics. It provides high mechanical stability and a long service life. A cement floor combined with acrylic is not afraid of temperature fluctuations. Since the composition contains quartz sand, the surface of the layer is non-slip. However, it is capable of collapsing under the influence of aggressive substances.
The choice of coverage depends on the operating conditions of the garage, the presence of a heating system.
Which option to choose
To purchase a suitable material that will last a long time and with high quality, you must take into account the following parameters:
- abrasion resistance, compressive strength;
- the ability to withstand static and dynamic loads;
- the ability to perform functions in conditions of temperature differences;
- material consumption per square meter;
- ease of use and maintenance.
The choice also depends on the reputation of the manufacturer (it often affects the cost of the mixture).
The process of self-filling the self-leveling floor
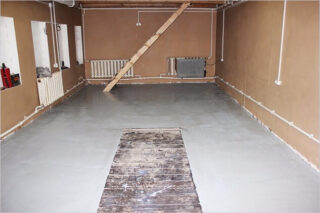
To properly fill the garage floor, you need to follow the step-by-step instructions. It involves the preparation of the mixture and the base, the formation of the layer, the finishing.
Preparatory work
A level and clean sub-floor is required for pouring the mortar. The surface is cleaned of old finishes, glue residues, cement deposits, dust and dirt. Oil stains should also be removed. All protrusions are removed by grinding the base. Small cracks are covered with a repair compound and treated with sandpaper. A primer is used to improve surface adhesion.
If a heating system is not provided in the garage, a damper tape is laid around the perimeter before pouring the mixture. If it is impossible to level the subfloor by grinding, a self-leveling cement-based mortar is used.
Pouring mixture preparation
The technology of mixing the bulk mixture has some differences depending on the grade of the material. However, in general, it provides for the following actions: powder is poured into a clean liquid and thoroughly stirred with a construction mixer or a drill with a specific nozzle.
Often, the ready-made solution takes time to infuse, which is indicated on the package. If necessary, after “resting”, the material is mixed again. You should not prepare a large amount of solution, as it quickly hardens and may become unusable, having lost its elasticity.
Pouring composition
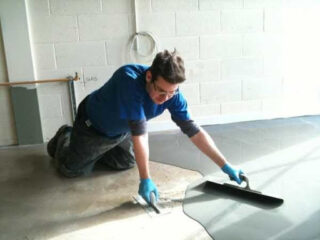
Work begins from the corner farthest from the entrance. The solution is poured out in stripes. If the garage is small, one half of it is processed first, then the other. A spatula is used for leveling. To remove air bubbles, the layer is rolled with a needle roller.
The next strip is poured so that it goes 2-4 cm onto the previous one. When pouring the floor, a slight slope must be observed towards the exit. If the garage is large, you shouldn't forget about expansion joints.
Laying the finishing layer
Most often, epoxy paint is used to decorate the floor.Before its application, the base is polished and cleaned of dust. A hardener is poured into the finishing material, mixed. Further work is carried out in half an hour or an hour. First, paint is applied around the perimeter of the walls, as well as in the corners. After that, paint the entire remaining surface. To do this, use a paint brush or roller. To prevent the floor from being slippery, decorative chips are scattered over it. It will be possible to operate the garage in 5-6 days.
To make the floor durable and last a long time, it can be poured in several layers: a mixture based on cement (Ceresit, Bergauf level the subfloor, increase its strength); epoxy mortar (Epoxy Shield, Eneklad SFS is used as a finishing layer, capable of withstanding severe mechanical stress).

