A well-designed garage made of corrugated board can be used, in addition to its direct purpose, as a workshop, warehouse, vegetable store and even a place for leisure. In addition to purely protective functions, the metal garage has a presentable appearance, perfectly fitting into any landscape.
Material features
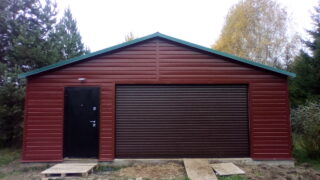
A metal profile (corrugated sheet, corrugated board) is a plate that is pressed into a waveform with ribs of a semicircular, rectangular or trapezoidal cross-section. The stamped product is coated with a zinc or polymer coating to provide protection against moisture and corrosion. To build a garage from a profiled sheet with your own hands, panels 120 cm wide and 250-300 cm long are used.For the construction of a two-story building, strips 500-600 cm long are selected.
Finishing the garage outside with a profiled sheet can be done with materials of this type:
- Fence (wall). Medium strength strips, mainly used for finishing. Rib height 20-44 mm.
- Roofing. Stronger product with additional water drainage grooves. Rib height 44-57 mm. The application is universal, from walls to roofs.
- Carrier. The most durable variety that can be used as a permanent formwork for the arrangement of floors. Wave size 58-80 mm.
A finishing profile with a wavelength of up to 3 mm can be considered as a type of material. It is used for decorative purposes on top of a solid and solid base.
When planning to build a garage from corrugated board with your own hands, you should take into account the intended purpose of products made using various technologies using certain materials.
The following product groups are on sale:
- Cink Steel.
- Alloy with added chromium and nickel.
- Copper sheets with and without spraying.
- Aluminum panels.
When planning a garage from a profiled sheet, it is advisable to use non-ferrous metal compositions on the roof and interior decoration, and use more durable steel plates for sheathing the frame.
Advantages and disadvantages of a corrugated garage
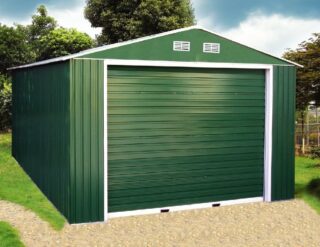
Like any structure, a garage sheathed with corrugated board has strengths and weaknesses inherent in the material and technology used.
Advantages of the structure:
- Affordable cost. Raw materials are inexpensive, and mass production is well established.
- A wide range of products. On sale are models with a matte and glossy texture, ribs of different shapes and metal thickness.
- Presentable appearance. The building looks solid and beautiful, even with mid-range finishes.
- Ease of installation. The sheets are immediately ready for use, they do not need to be painted or galvanized. With the right planning, you don't even need to cut.
- Durability. Steel products last up to 25 years, and non-ferrous metal sheets can be used for 100 years or more.
- Refractoriness. The professional sheet can withstand 30-60 minutes of open flame.
Having decided to make a garage from a profiled sheet with your own hands, you should familiarize yourself with the disadvantages inherent in this design:
- A thin layer of protective coating that is easily damaged. Rust appears very soon in such places.
- Limited strength. Even a thick sheet is not a reliable barrier against intruders.And if you sheathe the frame with self-tapping screws, you can be left without finishing, since the hardware can be easily unscrewed with a cordless screwdriver.
- High thermal conductivity. The metal quickly cools and heats up. Dampness and condensation forms.
There are negative points, but each of them has its own ways of complete or partial solution.
Preparatory stage
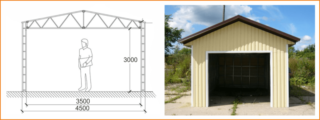
Building a garage starts with planning. Initially, you need to think over the place where it will be located. The best option is for the building to be located near the entrance gate, but also closer to the house. Avoid awkward and long driveways with many bends. It is also impractical to choose lowlands where the structure can be flooded.
In accordance with SNiP, the following norms for the location of the garage from other objects have been established:
- fence - 1 m;
- residential building - 6 m;
- water well (well) - 15 m;
- underground and air communications - 3 m.
After determining the construction site, you should decide on its size and configuration. Options can be for one or two cars, with or without superstructure.
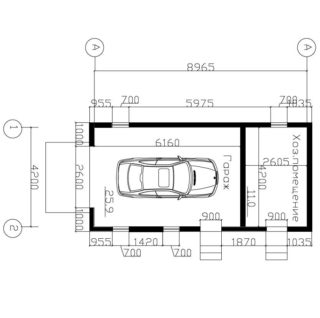
The next step will be drawing up a project, where the following information needs to be reflected in the drawings:
- foundation;
- floor;
- walls;
- goal;
- overlap;
- roof;
- ventilation;
- water supply and sewerage;
- boxes and boxes for spare parts, tools and special fluids;
- electrical circuit.
Garage dimensions are considered optimal for one car:
- length - 600 cm;
- width - 400 cm;
- height - 250 cm.
On the basis of the compiled documentation, an estimate and calculation of the necessary property is drawn up.

To make a garage with your own hands from a professional pipe and a professional sheet, you will need the following tools:
- Bulgarian;
- welding machine;
- roulette;
- level;
- shovel;
- spanners;
- riveter;
- drill.
When arranging a buried strip or slab foundation, it is advisable to buy or rent a concrete mixer.
To build a frame garage, you need to prepare materials:
- ingredients for concrete (sand, crushed stone, cement);
- profiled pipes for uprights 80x40 with a thickness of 3 mm and for strapping 60x40 mm;
- profiled sheet for walls, roofs and interior cladding;
- self-tapping screws with a drill;
- acrylic paint for sealing edges, cuts and holes;
- fittings and knitting wire.
If there is no experience with welding, the frame can be made of wood. For racks, a beam of 80x80 is taken, for jumpers and rafters - 40x40 mm.
Pouring the foundation
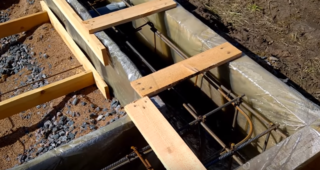
Making the foundation is a long and time-consuming business; this activity should be carried out with an assistant. Calling the masters will cost a lot, so it's better to save money.
Sequence of work:
- Make a markup, remove the top layer of soil, dig a pit.
- Lay roofing material, dense cellophane or geotextile cloth on the bottom of the pit.
- Pour a pillow of sand and crushed stone with a total thickness of 30-40 cm. Moisten the mixture with water, level and tamp.
- Assemble and secure the formwork.
- Make reinforcement from reinforcement. The rods should be tied as welding weakens the metal and causes it to corrode.
- Mix and pour concrete into the mold. This must be done continuously. The best option is when one worker prepares the mortar, and the second carries out its leveling in the formwork.
- To immerse embedments and pipes for communications into wet concrete.
The finished foundation should gain strength over a period of 14-28 days, depending on the air temperature. Throughout this period, it must be periodically watered and kept under a film.
Frame fabrication
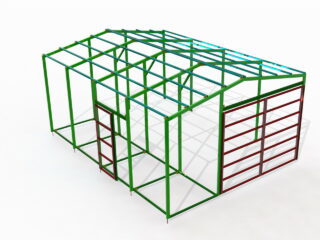
The installation of the frame can be carried out by alternately fastening the profiles or by connecting pre-welded frames. In the second case, errors and inaccuracies are possible, so experts recommend assembling in stages.
The sequence of actions is as follows:
- Fasten the lower harness links to the guides. Weld in the corners after fine adjustment.
- Align the vertical supports. First, they need to be aligned and spot welded. After checking the correctness of the actions, make the final seam. It is better to install the racks with an interval of 115 cm so that the joints of the profiled sheets fall on them.
- Make the top harness. If one profile is not enough, then docking on one of the supports.
- Fasten the cross members. The optimum distance between them is 50 cm. This will ensure sufficient rigidity of the cladding.
- Close up the ends. Better to weld them, as plastic plugs do not last long.
- Make leaves for the gate, if a swing system is chosen.
In conclusion, the metal must be cleaned of rust and scale, then primed and painted.
Installation of a profiled sheet

As already mentioned, the plates should not be screwed on with self-tapping screws, unless the construction is being carried out in a protected area. In other cases, it is better to use rivets.
Panel mounting sequence:
- Fasten corner and starter profiles.
- Drill holes along the edges of the sheets, paint over them with a protective compound.
- Transfer the projection of the holes to the frame profiles, make holes in them corresponding to the rivets.
- Place the panel on the base, riveting it to the pipes starting from the top.
- Consecutively make the first row with an overlay on one wave, then reach the penultimate one.
- Cut the extreme row in height, paint over the ends and attach.
- Close the rest of the walls and pediment in the same way.
When all the plates are installed, check for correct operation and cover them with the top end plate. The rivets can be painted over with a suitable color to enhance the appearance of the coating.
Roof device
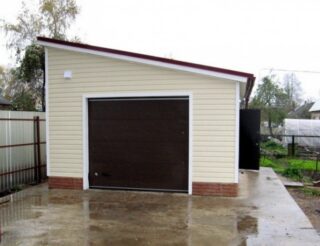
If the garage is not planned to be equipped with an attic or a working attic, it is advisable to make a pitched roof on it. It's simple, fast, inexpensive, but practical. The rafter system can not be erected, but at the stage of creating the frame, raise the front crossbar of the upper strapping above.
It remains - to make a crate and in a similar way to the walls to lay the roofing.
The draft angle should be set within 30 degrees. On such a roof, snow will freely melt and it will not be blown off by a strong gust of wind.


