Quite often, redevelopment is carried out in apartments to combine the loggia with the room. To create comfortable living conditions, waterproofing, insulation and finishing of the ceiling on the balcony with plastic panels are carried out. This work is simple and can be done by hand without any problems. You need to familiarize yourself with the features of the material and the technology of its application.
Features and benefits of PVC panels
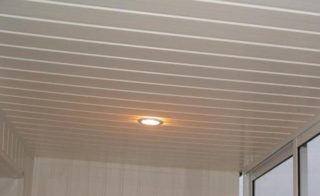
As a finish, plastic has been used for a long time and is popular among property owners. The panels are two plates, front and back, between which there are stiffeners. On the sides of the rail there are fastening shelves, with the help of which the fragments of the masonry are joined.
The width of products for interior cladding varies from 25-37.5 cm, with a thickness of 6-8 mm and a length of 270-595 cm.
The material has the following advantages:
- tightness, lack of hygroscopicity;
- attractive surface;
- ease of processing and installation;
- environmental Safety;
- low specific gravity;
- affordable cost;
- long service life.
Polymer planks are one of the best options in many ways for cladding a residential loggia.
Varieties of PVC panels
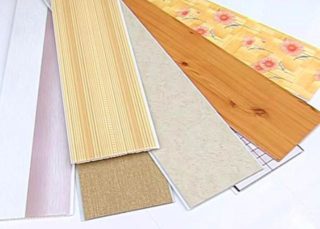
The trade network offers a wide range of plastic panels that differ in size, texture and color. Products are monochromatic, with a pattern, wood, stone or other substances.
It is customary to subdivide products according to the following methods of decorating the front surface:
- Matte. They have a smooth or slightly bumpy surface. When exposed to light, they practically do not give glare. This option is equally good for monochromatic painting and for drawings.
- Glossy. The faceplate is flat and smooth. Thanks to the applied varnish, it perfectly reflects the light of the sun and electric lamps. Well suited for indoor installations on the shady side of buildings.
The cost of glossy products is 20-40% higher than matte ones. However, for a small loggia, the difference will be insignificant.
Necessary tools and materials for work

Polymer plates are easy to process, it will not be difficult to assemble the ceiling on the balcony from PVC panels with your own hands. There is a wide range of materials and installation methods.
During construction, you need to take into account the following points:
- Markup. Lamellas are inserted into grooved profiles. It is necessary to make a margin of at least 1 cm for each running meter to ensure thermal expansion of the material. The lines must be drawn with a marker, as the marker and pencil will be erased.
- Lathing. It can be made of boards, plastic and steel profiles. Each material has its own characteristics. From changes in humidity and condensation, wood can lead, and iron can rust. Plastic has one drawback - high cost.
- Thermal insulation. To avoid leaks from above, all cracks and joints are sealed with facade sealant. This must be done not only from the inside, but also from the outside, in order to exclude the slightest likelihood of flooding. Penoplex, polystyrene, basalt wool or expanded polystyrene are used as insulation.
- Fasteners - staples or screws.It is easier and faster to drive in staples, but they do not have a strong hold and can eventually be destroyed by corrosion. Self-tapping screws are more expensive, more difficult to work with, but strength is guaranteed.
- Cutting. The polymer is equally well cut up and down. To do this, you can use a clerical knife, jigsaw, milling cutter or grinder with an adjustable speed. A regular angle grinder will not work, since the edges of the parts will melt and lose their shape from strong friction.
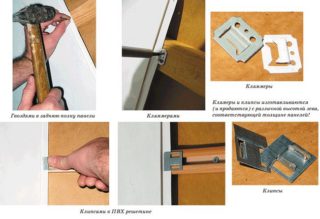
To make a plastic ceiling on the balcony with your own hands, you will need:
- the panels themselves with a margin of 10-15% to compensate for errors, damage during transportation and installation;
- stapler or screwdriver;
- puncher;
- a hammer;
- level;
- roulette;
- awl;
- square;
- steel ruler;
- masking tape.
Since the suspended ceiling will have to be made at a height, it is necessary to purchase a stepladder or think over a stable structure. Work should be done in protective gloves and goggles, a helmet will not interfere.
Pros and cons of a ceiling made of PVC panels
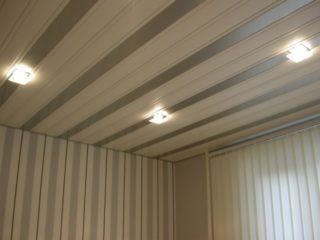
The decision to sheathe a room with polymer panels has its positive and negative sides.
The ceiling made of PVC panels on the balcony has the following advantages:
- Possibility of hidden laying of communications and installation of internal lamps. Wires and cables are laid in flexible corrugated tubes.
- Availability of repeated disassembly and assembly for repair and modification. No glue and nails are used during construction, ceiling fragments can be easily and without damage removed from the grooves
- Ease of maintenance. The surface can be cleaned with a mop with a cloth, a soft brush and a cleaning vacuum cleaner.
- Sufficient strength and flexibility. The material retains its integrity and shape when the house shrinks, is able to withstand the weight of lighting devices without arranging a separate bracket for them.
- Adequate space to accommodate insulation. The result is an effective thermal and sound barrier, thereby achieving an optimal level of comfort.
- You can even decorate the loggia alone, without involving assistants and specialists. The process is quite simple, and the lamellas themselves are so light that they do not require significant efforts when carrying, lifting and installing.
The ceiling on the balcony made of plastic panels has the following disadvantages:
- After installation, visible seams remain on the surface. It is almost impossible to get rid of them.
- The frame and the cladding itself takes 3-5 cm of usable volume. Provided that thermal insulation is used, the ceiling drops by 15-20 cm.
- Over time, PVC will fade and become faded. If the sun's rays hit it, cracks appear on the surface.
- Strong heat makes the lamellas soft and may sag. In the event of a fire, the cladding emits toxic smoke.
- The faceplates are easily damaged and scratched. Great care is required when cleaning, disassembling and assembling.
Plastic constructions do not lose popularity, since the advantages prevail over imperfections, most of which are purely hypothetical.
DIY installation procedure
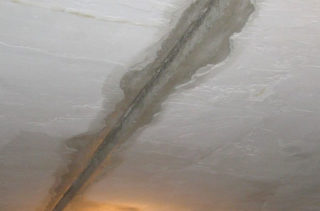
To make a high-quality and beautiful ceiling on a balcony from PVC panels with your own hands, you need to draw up a detailed and detailed step-by-step work plan.
The preparatory stage is underway:
- Cleaning the object from foreign objects. Furniture, flowers and other things that may interfere or suffer during the construction process are taken out.
- Removing unstable fragments from the slab. Cleaning and, if necessary, widening of narrow gaps. Dust cleaning.
- Sealing all existing openings, holes and joints. Concrete processing with a deep penetration primer. The liquid will strengthen the surface and increase its resistance to moisture, mildew and mildew.
- Restoring the edge of the slab if it is cracked or partially destroyed during operation.
The next step is to make the frame:
- Screwing the guide profiles along the perimeter of the balcony onto the walls. Their fastening should start from the lowest corner in the room, leaving room for insulation.
- Installation of vertical plumb lines. The step is taken in the range of 50-60 cm to ensure that the slats are not sagging.
- Support profiles are inserted into the guides, aligned and fixed with self-tapping screws. After that, they are fixed in suspensions, the excess fragments of the strips are bent up, vertically or horizontally.
- Laying of communications. After being pulled through the plastic tube, they are rigidly fixed to the plate with clamps. The track from the air conditioner is in a cocoon.
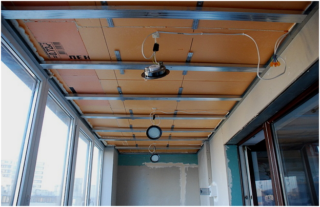
Insulation can be glued, nailed with disc dowels, laid on a crate or on a wire stretched under the ceiling.
The final phase of the renovation is the installation of the plastic.
- A starting or decorative molding is screwed to the guide profile. The corners of the perimeter are adjusted. One side (final) is left free.
- Determination of the length of masonry fragments and cutting of blanks. If the ceiling is curved, this must be done sequentially.
- Setting the first segment. It is bent, inserted into the side slots and pushed against the stop in the end profile. The wide bar is fixed to the frame.
- Installation of subsequent panels except the last one. The connection into the lock is made until it clicks.
- The last panel is cut in width, the starting profile is fitted on it and in this position it is inserted into the grooves. Then the fragment is pushed away from the wall with a screwdriver, and after clicking, the profile moves back.
Finally, fixtures are installed, the surface of the ceiling is cleaned of dust and dirt.


