A bathroom in a log house is the most difficult part of the construction, requiring special attention from the developer. Its arrangement does not fundamentally differ from similar premises in houses made of other materials, but there is still a difference in methodology. The main nuances that the homeowner will have to reckon with are a more thorough study of issues related to the laying of utilities and the operation of the ventilation system.
Bathroom construction rules
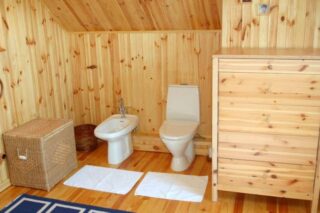
Designing a room begins with choosing a location and determining dimensions. The bathroom must have access to a water source and be connected to the sewerage system. It should also be taken into account that the total area, together with the utility rooms, should not exceed 25% of the total area of the house.
Equipping in your own home, for example, a huge bathroom, is not prohibited by any regulatory document - the main thing is to attend to the appropriate waterproofing.
- When designing a bathroom in a wooden house, it is recommended to adhere to the following rules:
- One of the walls of the toilet in a wooden house should be external - this will simplify the ventilation of the room.
- The preferred location of the bathroom is not far from the bedroom. Moreover, the entrance to it should not be from the living room.
- It is undesirable to place the toilet room near the premises associated with cooking and eating.
- In two- and three-story houses, bathrooms on each floor are located one below the other. It is better if they are in the space under the stairs.
- The recommended size of the combined bathroom is at least 3.8 sq.m. With a split layout, the minimum dimensions of the bathroom and toilet should be 3.2 and 1.5 sq. M. respectively.
- The layout of the bathroom is carried out taking into account the previously developed engineering communications scheme.
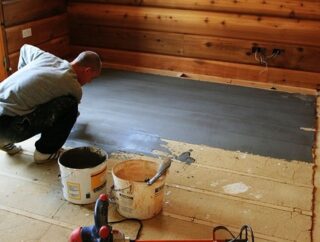
A bathroom in a wooden house is equipped in stages:
- Arrangement of the sewer network.
- Ventilation system installation.
- Laying waterproofing.
- Plumbing installation.
- Finishing work.
It is equally important to ensure the convenient use of plumbing. When installing the bathtub, leave at least 70 cm to the opposite wall. The width of the passageways in the bathroom should be at least 60 cm.
Arrangement of engineering communications
Installation of utilities begins with the installation of sewer pipes. It is important to avoid displacement or failure of sewer pipes due to shrinkage of the house. It is equally important to prevent the manifestation of leaks in the components of the sewer network. Homeowners address these issues in different ways, but there are general solutions to reduce the likelihood of malfunctions to a minimum.
- When laying the sewer network, plastic or metal-plastic pipes are used.
- Pipes brought into the house are attached to a solid foundation, and not to the walls of a wooden house.
- When it is necessary to remove pipes from the upper floors, elastic suspensions are used.
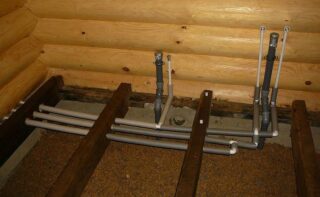
Water pipes can be routed in two ways - upper and lower. In the first case, a storage tank is installed in the attic, which allows you to create an emergency supply of water. In this case, the pipes are routed in a hidden way along the ceilings.
With bottom routing, pipes can be laid in an open way or under the floor. The open method when connecting water pipes to the bathroom is preferable, since it allows you to visually monitor their condition and the tightness of the connections. Hidden laying of pipes under the floor of the bathroom will require taking into account seasonal changes in humidity and the response of wooden structures to this. To avoid leaks, in this case it is recommended:
- through holes in walls and logs to equip with elastic seals;
- fix the pipes in the basement with elastic fasteners.
The water supplied from the water supply system is cold enough, which often leads to condensation and moisture in wooden structures. Therefore, water pipes will have to be insulated along their entire length (under the floor and in the walls).
Features of the ventilation system
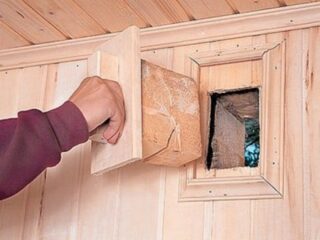
Special attention should be paid to the arrangement of ventilation in the bathroom of a wooden house. Exposure to moisture is detrimental to wood. Fungus and mold are just a few of the troubles and problems that can arise. To avoid them, you must follow a number of rules:
- The parts of the ventilation system must not come into contact with the wood; therefore, special brackets must be used as supports for its component parts.
- The ventilation ducts are discharged through special holes that will protect the system from displacement when the house shrinks.
- Non-combustible materials are chosen for ventilation ducts.
- A special fan is installed in the bathroom, which is structurally protected from moisture penetration.
- The electrical wires leading to the fan are hidden in a metal corrugated tube.
- To exclude the flow of air during a fire, it is recommended to equip the ventilation system with fire dampers.
The best place to place ventilation equipment is considered to be the attic.
Floor waterproofing
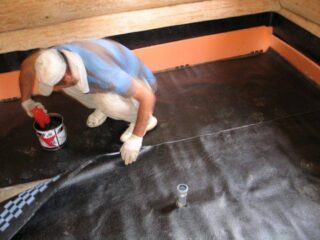
For any type of finish, the floor in the bathroom should be about 2 cm below the floor level in other areas of the house. It is equally important to protect it with a layer of waterproofing.
If a wooden house stands on a monolithic concrete foundation, and a standard reinforced concrete slab is used as the overlap of the first floor, the floor in the bathroom is waterproofed over a leveling screed (standard technology).
In the presence of a wooden floor, the waterproofing process is more complicated and includes the following operations:
- Moisture-resistant plywood is cut into 4 pieces and attached in rows to the subfloor with self-tapping screws. Small gaps are left between the parts, and the rows are offset relative to each other.
- Seams are filled with sealant.
- Roll waterproofing is laid with a mandatory transition to the walls (waterproofing strips should overlap each other by 15-20 cm).
- Along the perimeter, a special damper tape is attached to the walls, which will provide the necessary floor mobility.
- A thin fiberglass reinforced screed is poured over the waterproofing.
- A finishing coating is laid on the screed, which can be used as a tile, parquet board or laminate. At the same time, the seams are treated with a water-repellent mastic.
Sometimes, instead of tiles, logs are laid on the screed in the bathroom, which are fastened together with transverse bars. They are not attached to the walls and base (floating method). Then heat-treated massive boards, which are characterized by increased resistance to moisture, are laid on the logs.
Features of finishing the bathroom
A bathroom in a house from a bar is trimmed in different ways. You can sheathe the walls with wood - for this, use any sheathing, but preferably heat-treated boards. The main thing is not to forget to carefully treat them with antiseptic compounds and provide a ventilated gap on the "seamy" side of the material in the process of sheathing.
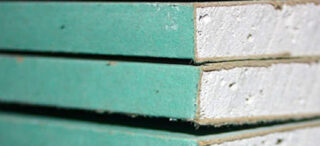
If desired, you can sheathe the walls and ceiling with moisture-resistant plasterboard. However, it is best to do this on the basis of a sliding frame - a metal structure that is not affected by the walls when the house shrinks. The mobility of the frame is ensured by the oval-elongated mounting holes made in the frame with a drill. The frame is attached to the wall with dowel screws, which are loosely tightened - this will make it mobile. Drywall is attached to the frame with self-tapping screws. If necessary, make holes for electrical wires and sockets. The drywall surface can then be tiled.
If you do not want to hide the beauty of natural wood behind finishing materials, you can leave open wooden surfaces when decorating a bathroom in the country. In this case, you will have to regularly apply protective compounds and impregnations to them in order to preserve the original appearance and integrity of the wood, despite the humid air in this room.
Plumbing installation
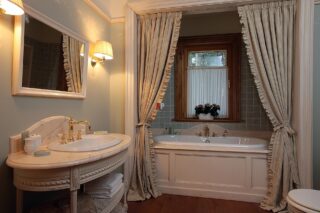
In general, a plumbing kit for a wooden house may include:
- shower stall;
- bath;
- toilet;
- water heater;
- bidet;
- jacuzzi.
Depending on the chosen plumbing, you will need to purchase various types of faucets and taps.
All plumbing fixtures are installed in their respective places according to the instructions.


Very detailed instructions for building a bathroom in a wooden house. Thank you. I'll save myself a note.
helpful information