Arranging a gazebo with a pitched roof with your own hands is a simple and budget option. Having picked up the materials and using the step-by-step installation instructions, you can get a beautiful recreation area in the country.
- Advantages of erecting a gazebo with a pitched roof
- Classification of structures
- Algorithm for the construction of the base for the gazebo
- Technical specifications
- Foundation with bottom strapping
- Gazebo frame and top harness
- The procedure for the construction of a gazebo with a pitched roof
- Determination of the angle of inclination
- Calculations
- Creation of the lathing
- The choice of roofing material
- Laying insulation for snowy areas
- Chimney outlet
Advantages of erecting a gazebo with a pitched roof
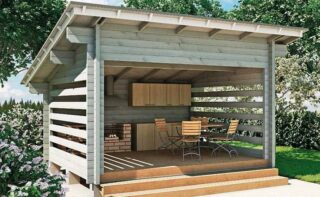
Even a beginner with little experience in construction can handle the construction of a gazebo of a simple design. The geometry of the interior space allows you to install a brazier, dining table and sofa. The following factors are in favor of choosing a structure with a pitched roof:
- A simple project, a drawing of which can be downloaded from the Internet or developed independently using the basics of geometry.
- Versatility lies in the possibility of stand-alone placement or as an extension. Any option looks organic.
- The low budget is due to the efficient use of materials due to the geometry of the structure. A slight slope reduces the cost of roofing.
- Various options are used - summer kitchen, dining room, relaxation area and a place for family events.
On the thematic sites, ready-made projects are freely available, including the calculation of materials, drawings of the frame and rafter system. A sketch can also be ordered from an architect.
Classification of structures
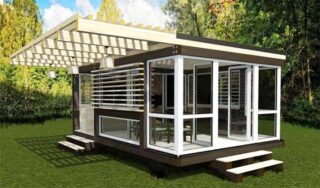
The owner of the suburban area does not have any restrictions on the choice of the shape of the gazebo. However, in the construction industry, there are three main types:
- The open version is easy to install, ideal for relaxing in warm, windless weather. Of the minuses - there is no protection from precipitation.
- Semi-open models require perimeter barriers. The design partially protects against splashing rain and gusts of wind.
- The closed design resembles a summer kitchen in appearance. The structure is recommended to be erected from metal and double-glazed windows.
- Construction combined with an open veranda or barbecue.
Modern trends in landscape design suggest arranging a gazebo with a terrace when the structure is being built without a roof. The decoration and decor are kept in the same style as the house. Rattan or wood furniture is displayed outdoors as it is used.
An additional element of the gazebo can be a fireplace or barbecue. The place, parameters and shape are reflected in the project, since the height of the foundation depends on the characteristics. The construction of the frame is carried out around the finished heating source.
Algorithm for the construction of the base for the gazebo
To make a gazebo with a lean-to roof with your own hands made of wood step by step, you need to create a project. The markup, design parameters and individual elements are taken out on the drawing. According to the received dimensions, an estimate is made and material is purchased.
Technical specifications
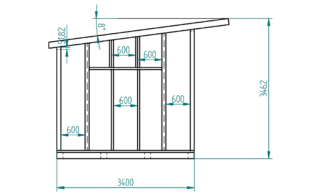
Before building a gazebo with a pitched roof, it is necessary to determine the characteristics of the structure. For a high-quality construction of a structure, you also need to familiarize yourself with the construction of the frame, foundation and straps.
Technical specifications:
- size - 3x3 m;
- base - columnar;
- supports - timber 100x120 mm;
- roof - pitched;
- rafter system and lathing - boards 18 pcs. 25x100 mm;
- roofing material - ondulin.
Use the same sized rafter and frame boards to square the pieces. For work, 18 pieces are enough. Place the structure at the top - the gazebo is 80% complete.
Foundation with bottom strapping
For the construction of a gazebo with dimensions of 3x3 m, it is enough to use a brick base. Coat the finished supports with bitumen, lay sheets of roofing material on top. Make the lower harness from a bar of 100x100 mm. Use the “half” method for the connection. Lay the lathing around the perimeter of the future structure according to the plan. In the center, fix the joists to hold the floorboards.
Gazebo frame and top harness
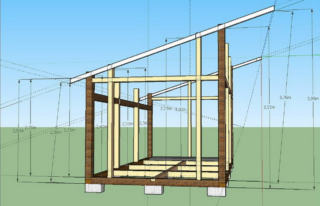
A beam of 100x120 mm is suitable for assembling the frame. The standard parameters of the pillars are 100x100 mm. Fix the posts with metal corners of at least 70 mm. As an additional fixation, use a support - these are boards that are installed between the lower harness and the post. Saw the ends of the boards at an angle before working to ensure an even fit to the wood surface.
In the example shown, a custom top rail is used. As a rule, the top is commensurate with the bottom, and a bar is laid around the perimeter. But for a gazebo with a pitched roof, it is recommended to place the bars parallel to each other. At the end of the work, fix the rafter system.
The procedure for the construction of a gazebo with a pitched roof
Follow the step-by-step algorithm for installing the gazebo in order to avoid mistakes in construction. The primary task in the construction of a structure is drawing up a drawing. An estimate is formed on the basis of the sketch. The lack of a clear understanding of the design parameters does not allow starting work.
Determination of the angle of inclination
The shed roof of the gazebo assumes that one of the sides of the building is 20 cm higher than the other - the angle of inclination can be made larger. However, the given variant is sufficient to continue construction. After determining this parameter, it is necessary to install the rafter system. A crate is laid on top and covered with ondulin or other roofing material.
If the minimum angle of inclination is reduced by 20 cm, there is a risk of roof collapse. A gable roof made of galvanized material will bend under the weight of the snow.
Calculations
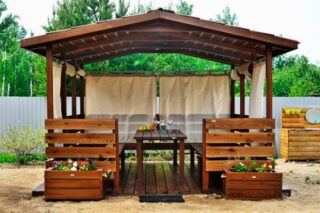
Instead of a timber, boards of 25x100 mm will be used. The waterproofing layer can be skipped, but if a closed gazebo is planned, then it is better to complete this stage. The dimensions of the future structure are 3x3 m, so additional rafter legs and supports are not needed. It is enough to install a bench along the length of the roof (4.5 meters). In this case, the elements of the rafter system will not bend under the influence of precipitation and atmospheric phenomena.
Place the rafter legs on top of the parallel laid strapping: install the boards across - up and down with a side of 25 cm, and 100 mm elements on the sides. Such a procedure will give the structure reliability and prevent sagging.
Use metal corners for fastenings - this will avoid additional cuts.
Creation of the lathing
The lathing is formed from boards 30x150 mm with a pitch of 50 mm. It is not recommended to purchase sanded boards, because, unlike the floor, a smooth surface is not needed here. However, if you have a grinder, you can independently process the elements. To protect against rot and mildew, treat the boards with a wood primer.
The choice of roofing material
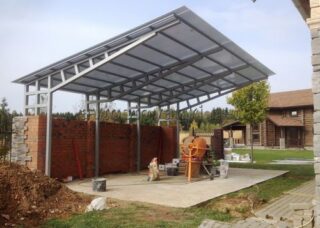
Depending on the type of coating, the material will have different properties. The main parameter when choosing a roofing finish is UV resistance. For example, ceramic tiles do not deteriorate under the influence of sunlight and, on average, serve 25 years. When using profile materials, you should select products with a protective polymer layer.
The use of varnish and paint on the roof is prohibited, since they quickly deteriorate under the scorching sun.
The second parameter is the color stability of the coating. During operation, the materials burn out. It is also recommended to pay attention to the thermal expansion and contraction characteristics.
Laying insulation for snowy areas
If, according to the plan, the gazebo is supposed to be of a closed type, and a lot of snow falls in the region, then the roof must be insulated. This is due to the lack of heating and low temperatures in winter. For these purposes, use penoplex or its analogs. Roof insulation will allow you to cook, gather with relatives and friends.
Chimney outlet
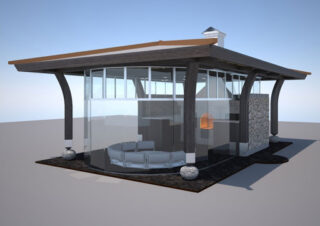
It is necessary to think about arranging a gazebo with a stove, barbecue, fireplace or barbecue at the design stage. This is due to the fact that the construction of the structure takes place around a ready-made source of fire. For this, the following work is performed:
- Make a base for the gazebo with nine supports measuring 40x40 cm.
- To create the lower and upper strapping, you will need a 15x15 cm bar.
- Form a foundation for a barbecue, and then a sand cushion 10 cm thick and a pillar depth of 5 cm. Knead the concrete at the rate of 2 parts of sand, 1 part of a cement mixture, 3 parts of fine crushed stone.
- Insulate the slab and pipe run.
- Start tiling using a 15x2 cm board.
- Create a rafter system from 15x15 cm boards with a step of 57 cm.
- Install the roofing material. It is recommended to use metal tiles as they are resistant to high temperatures.
The construction of a gazebo with a pitched roof is a simple option that does not require specific knowledge and skills. If you have any difficulties, contact a construction company or a foreman. Preparing for work avoids mistakes and budget increases.


