In modern construction, requirements for environmental safety are increasing; this trend is not bypassed in the field of roofing. A plank roof is an invariable success in the construction of private houses: this is a type of construction, the outer covering of which is made of a plank - edged board. The technology has been known since ancient times: earlier, the material was harvested by hand, cutting logs and trimming the edge parts to give the same width. Today, edged boards are produced by means of machining, which greatly simplifies and speeds up the process.
Design features
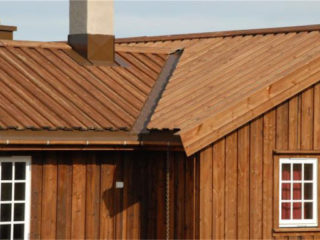
The laying technology provides for the installation of building materials on the rafter system in at least 2 layers: thanks to this, the plank roof receives protection from precipitation (snow, ice, rain, condensation accumulation). To increase the service life, wooden elements need to be processed:
- At the initial stage, the lumber is cut using a plane. This gives the surface the smoothest possible texture.
- After that, the board is impregnated with antiseptics, anti-rodent and parasite agents. Thanks to this, the material will be able to serve an order of magnitude longer.
- At the third stage, the board is coated with a fire retardant compound, which reduces the risk of fire and provides the maximum level of roof protection.
The tes itself is attached to the rafter system with nails or self-tapping screws: the second option is preferable, since it is a more reliable fastener, structurally protected from self-untwisting. Edged board for the roof is made of hard wood, characterized by high density. The cheapest option is pine sawn timber, but the performance characteristics of this species are not high enough.
The optimal solution is a larch plank: the wood contains essential components and phytoncides that protect the structure from decay.
Advantages and disadvantages of a plank roof
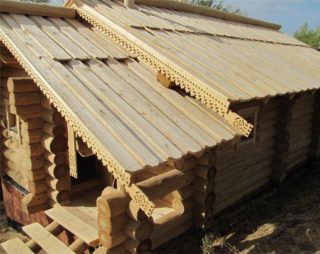
The advantages of plank roofing structures include the following properties:
- reduced thermal conductivity, due to which the structure does not overheat from direct sunlight, while retaining heat in the house in autumn and winter;
- good vapor permeability, due to which a useful microclimate is maintained in the under-roof space;
- environmental safety, the absence of harmful or toxic components in the composition, therefore, the arrangement of a plank roof does not harm the environment;
- improved sound absorption: due to this quality, the wooden roof does not create unnecessary noise during rain, hail and hurricane winds, does not allow extraneous sounds from the street;
- attractive design that can turn the house into a festive tower in the traditional Russian style;
- high maintainability: if one or more boards are damaged, it is not required to cover the entire roof;
- relatively simple and quick installation.
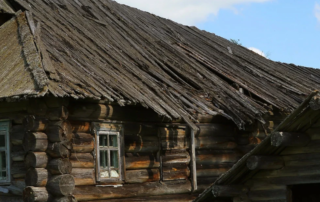
Like any other design, a plank roof has a number of disadvantages. These include the following points:
- increased weight, due to which it is necessary to install a more powerful rafter frame, which affects the duration of preparatory and construction work, increases the final price;
- fire hazard, because of this property, board elements need deep impregnation with fire retardants;
- susceptibility to damage from moisture and rodents, for this reason, a wooden roof must be carefully waterproofed and protected from pests;
- a roof made of wood needs regular processing, otherwise the structure will have to be changed very soon;
- a high-quality plank made of larch is not cheap.
Some of the shortcomings can be eliminated by timely processing of the material, but this takes time and effort. If the recommendations are followed, the service life of the structure will be 13-15 years.
Calculation of the required amount of material
Before installation, it is required to draw up a design drawing, having previously determined the volume of lumber required for the construction of the roof. Main steps:
- Determination of the number of boards in each row. To find out the quantity, you need to divide the width of the ramp by the width of the wood.
- Determination of the number of rows. To do this, the length of the slope must be divided by the length of the edged board.
- The number of boards must be multiplied by the number of rows. After that, you need to multiply the resulting value by 2 (double layer of laying) and again by 2 (the number of slopes, relevant for a gable roof). If you plan to install in 3 or more layers, you need to multiply by the number of layers and then by the number of slopes.
- The resulting number must be multiplied by the volume of one board. This will determine the number of tesa in cubic meters.
When calculating, it is advisable to add 10% to the amount received: this is an additional value for the marriage, which may be in the batch of the purchased board. It is better to purchase testers with a margin than to find out during the installation process that you will need to buy additional products.
Styling options
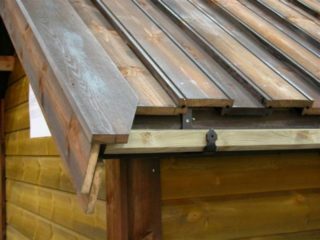
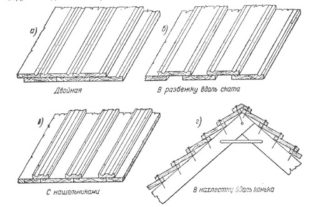
There are several schemes for installing a plank roof; you should choose a specific option already at the design stage.
Longitudinally
With a roof laid in this way, plank walls are perfectly combined, since they are usually mounted transversely. The installation provides for the location of the boards perpendicular to the ridge element. For this, you can use elements of different lengths. This method of installation is most popular, especially when installing roofs of residential buildings and summer cottages. The finished design looks aesthetically pleasing and neat.
Transversely
As a rule, transverse installation of a board for roofing systems is used for temporary buildings, baths, guest houses and other similar buildings. This allows you to shorten the installation time by skipping the lathing stage, in contrast to the previous installation option. With transverse technology, the tes is placed parallel to the ridge. Unlike longitudinal installation, this option only provides long boards.
To eliminate the gaps between the elements, the tes is laid with an overlap, this allows you to protect the surface from the accumulation of foliage, debris, moisture and ice formation in winter.
The main stages of laying a plank roof
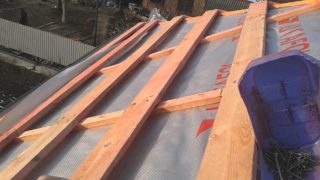
The installation of the plank roof structure is performed after the installation of the rafter legs and the ridge. Key stages of work:
- Laying waterproofing film. It is desirable that it also provide high-quality vapor barrier. For fixing, a construction stapler is usually used: this allows you to quickly and accurately fix the material without disturbing the structure.
- Installation of the lathing. For this design, wood bars are used, the cross section of which is 5 by 5 cm.When longitudinal laying, the slats are installed transversely, and vice versa. It is advisable to use self-tapping screws for fastening, since they are much more reliable and hold wood better than nails.
- Installation of the tes itself.The material is laid in compliance with the selected scheme and fixed with self-tapping screws. The first layer is laid with the inner surface down, the second - with it outward, this provides maximum waterproofing and protection from other external influences.
- Ridge waterproofing. Most often, roll materials like roofing material are used for this. After that, the ridge board is fixed, and for more reliable protection, a galvanized steel corner is screwed on top.
- Arrangement of additional elements. These can be ventilation outlet points, pipes, drainage structures and other parts.
It is very important during the operation of the building to take care of the plank roof in a timely manner. In the spring, it is required to clean the structure of snow and ice before they begin to melt, any defects must be eliminated as soon as possible. Treatment with fire retardant and antifungal agents is performed at least once every 3 years, the frequency may vary depending on weather and climatic conditions. If a rotten or cracked piece is found, it is recommended to replace the affected parts.


