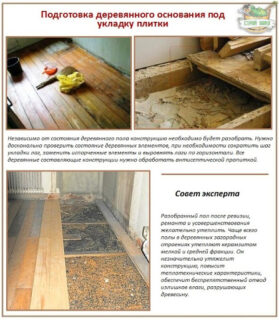
Tile in a wooden house requires a solid foundation and proper surface preparation. Failure to comply with the laying technology can lead to deformation of the tree, its rotting due to high humidity and other unpleasant phenomena.
Features of a wooden surface
Before laying tiles on a wooden floor, you need to have an idea of the characteristics of wood that can affect its use as a base for tiles. One of the main features is the tendency to shrinkage in the first year of operation. It is more pronounced, the more moisture in the material. It is better to build buildings from well-dried raw materials, the moisture content of which does not exceed 12%. Shrinkage can affect the condition of wall structures and flooring.
Other features include:
- Susceptibility to moisture, including high levels of moisture in the air. This is most important for the kitchen and bathroom. When performing installation work, it is important to take care of waterproofing.
- The ability to change shape and volume when changing environmental indicators (temperature, humidity).
- Susceptibility to infection by fungal and mold colonies, as well as damage caused by insects. To prevent these phenomena, wood must be treated with antiseptic compounds. Reduces the chance of spoilage and paint or varnish application.
If we compare wooden structures with tiles, the former have significantly lower weight and density. When preparing for installation work, the goal is to level this difference so that the base can better cope with the heavy load. Also, you should first assess the bearing capacity of the foundation.
If the dwelling is newly built, you should not lay the tiles until the period of active shrinkage has ended (it lasts 6-12 months). Otherwise, there is a possibility that the tiles will move due to the movement of the wood. During these processes, tiles can crack.
Compatibility of construction and finishing materials
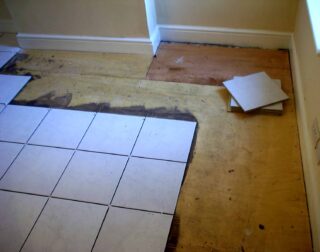
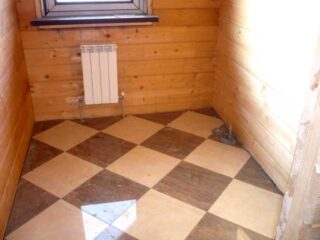
To choose a tile for a wooden floor in a wooden house, you need to imagine how different materials interact with each other upon contact. The cladding is easiest if the roughing is made of plywood sheets or wood chips bonded with glue. Tile should not be placed on a grooved board.
In order for the coating to serve for a long time without loss of performance, a screed is organized before installing the ceramics. It allows you to get a solid base, the connection to which will come out more stable than when using tile adhesive.
Since the materials from which the rough coating is most often made (OSB, plywood sheets) are not as durable and strong as tiles, the maintainability of the finished floor is low. Stress can occur in the thickness of the tree, leading to cracking and reshaping. These features are due to the problem of poor compatibility of such subfloors with tiles. If a wooden floor is mounted on logs on top of the slab, you can disassemble the logs and floorboards and make a tightening layer for the ceramics.
Required tools and materials
To carry out the work, you need to prepare tools and consumables:
- two spatulas - rubber and provided with teeth;
- utensils for mixing the composition;
- crosses inserted into suture areas;
- painting net;
- sticky tape;
- fasteners (screws, nails);
- polyurethane foam;
- waterproofing material;
- primer and grout mixture.
If traditional cement is used for gluing, it is worth adding liquid glass to the composition for working with wood. You can also use special products with polymer additives, which have high plasticity and good adhesion to the surface. On sale there are adhesives designed for laying tiles on a wood base. They have good waterproofing properties and are formulated to neutralize the effects of wood movement. Another option is liquid nails. The surface must be well dried and degreased before using them. When using light tiles, the nails are applied pointwise, if the facing products are heavy - spirally.
PVA glue is not suitable for gluing tiles to plywood or other thin base - it will be moistened and deformed. If the surface is well dried and has sufficient thickness, it is permissible to use it.
Preparatory work
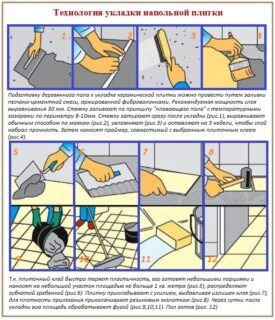
Waterproof plywood flooring can be used to compensate for wood movement. Its thickness should be at least 2.5 cm. The sheets are mounted directly on the plane of the floor or wall or on the crate. The gaps between them are buried with polyurethane foam. Its damping properties would be appropriate for such a design. Instead of plywood, chipboard boards can be used to organize the depreciation layer. Plasterboard is also used, connected to a wooden base with self-tapping screws. The flooring is covered with a membrane polymer waterproofing material. Its fragments are overlapped and connected with adhesive tape. Lightweight ceramics can be mounted directly on plywood, without waterproofing and subsequent screed. But for this you need to choose an adhesive composition suitable for such an operation.
After laying the waterproofing, a deeply penetrating primer is applied to the surface. After it dries, mount the painting net and fix it with fasteners. Often they do without a mesh - in this case, the primer is applied only after the constricting mixture. Then the screed is poured. It is made from a coarse sand fraction, liquid glass (40% each) and water (20%). You can not prepare the composition yourself, but purchase a special product for wooden bases. Such mixtures remain elastic even after hardening. They do not crack when the wood moves. When the composition and the subsequent primer are dry, you can start laying the cladding.
Diy tile laying technology
If it is decided to lay the cladding on a wooden wall, a substrate made of a waterproof grade of plywood or drywall is mounted on it, otherwise the products may chip off. In cramped rooms, it is permissible to do without this, limiting itself to sealing cracks and butt sections of polyurethane foam. In this case, the surface is covered with a thin layer of plaster with high elasticity.
Laying the tiles begins from the second row of the wall. The procedure is carried out in small fragments, covering the surface with glue for 2-3 elements and then installing them. At the same time, it is recommended to lubricate with an adhesive mixture not only the wall, but also the inner side of the tiles themselves. Thanks to this, they are fixed more reliably.
Seamless installation of tiles on a wooden surface is not allowed. It is often accompanied by a situation where the elements begin to bump into each other, if the base moves or changes volume.
Cross stitches should be installed in the seams. The first row, often consisting of threaded parts, is placed at the end. The joints are sealed with silicone sealant. Seams are treated with grout.

