The cellar on the site is a structure intended for storing crops and pickles. To extend the shelf life of agricultural products, it is necessary to create an optimal temperature and humidity regime in the room. Do-it-yourself construction of a ground cellar is endowed with a number of features that should be taken into account in order to avoid mistakes.
- Choosing a location for the construction of a cellar on the site
- Features of the construction of ground storage facilities
- Preparation of the project and materials
- Sketching a ground cellar
- List of materials for work
- Ground cellar construction technology
- Features of construction with embankment
- The nuances of construction without embankment
- Wall-mounted version
- Recommendations
Choosing a location for the construction of a cellar on the site
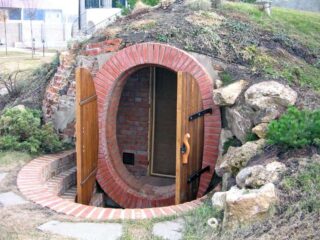
Above-ground cellars are built in accordance with current regulations. Such storages should be located in accordance with SNiP 30-02-97. The document reflects recommendations for choosing a construction site in relation to sources of pollution:
- cesspool - 12 meters;
- building for keeping animals - 12 m;
- compost block - 8 m;
- outside shower - 8 m.
If the personal plot is not overloaded with structures, the cellar is placed at the highest point. The restrictions do not apply in this case.
It is recommended to draw up a project with the designation of distances before erecting a building. So you can choose the optimal place for storing agricultural products and avoid difficulties in operation.
Features of the construction of ground storage facilities
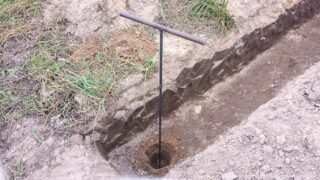
A feature of the construction of the cellar above the ground is the account of the groundwater level (GWL). This parameter is considered the main enemy of basements and outbuildings in the country. To determine the GWL, the following methods are used:
- drilling to a depth of three meters;
- information from neighbors;
- request to hydrogeological organizations;
- observation of moisture-loving plants growing on the site.
The latter option is used in villages, but it is scientifically based. Alder and willow are water-loving plantations. In places of their lush growth, the level of groundwater does not lie further than a meter. Fruit trees such as the apple and plum trees negatively perceive such soil, therefore they often get sick.
Preparation of the project and materials
Sketching a ground cellar
Before building the simplest ground cellar with your own hands, it is necessary to develop drawings. According to SNiP 2.08.01-89, the dimensions of detached structures, including subfields, should be as follows:
- total area from 4 to 6 m²;
- ceiling heights from 1200 to 1900 mm;
- manhole with a length of 80 cm, a width of 60 cm.
If the storage of vegetables and fruits is supposed to be in the basement of a residential building, the regulations are not taken into account. The dimensions depend on the base of the building.
List of materials for work
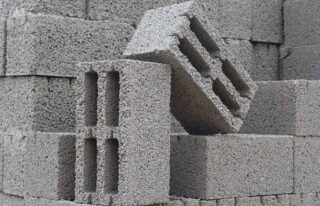
A cellar with a surface structure is a rather simple structure, but at the same time it is reliable. Various materials are used in construction, for example:
- red or white brick;
- wood;
- cinder block or foam block;
- concrete for forming a pillow;
- roofing materials;
- waterproofing;
- clay, sand, gravel and expanded clay.
However, this is an incomplete list of ingredients.The quantity and materials depend on the preferences of the owner of the cottage, the size of the building and financial capabilities.
Ground cellar construction technology
There are various designs where pickles, vegetables and fruits can be stored. However, builders distinguish three types of cellars that you can do yourself.
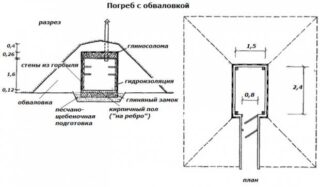
Features of construction with embankment
This storage option provides for deboning, i.e. backfilling with earth, except for walls with a door. Traditionally, peat soil is used, which is able to retain heat. In winter, snow serves as additional insulation.
A step-by-step guide on how to build your ground basement:
- Material preparation. Soak the sanded boards with a diameter of 20 cm with bitumen or burn them. These works are carried out to protect the structure from rotting, since the logs go deep into the ground by 0.5 m.
- Walling. Mark the perimeter of the future structure. The classic sizes are 3 x 4 and 4 x 8 m. Dig in the boards with the finished end and fix.
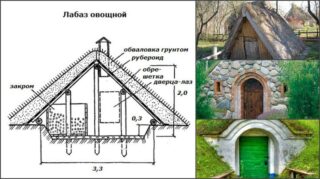
- Roof construction. For small cellars of 4-4.5 m, a pitched roof is sufficient. Erect the frame from the rafter system - take thick boards. You will also need a crate - the last board is taken when cutting logs (shafts).
- Laying of roofing material. A simple option is roofing felt. It is noteworthy that in this case, Mauerlats can not be done, but the rafters can be supported on the walls.
- Laying of hydro and thermal insulation materials. Cover the walls with roofing material. To insulate the end, proceed according to the scheme - board, roofing felt, board. Cover all other elements with earth.
- Arrangement of the entrance involves the installation of a door on the north side and the construction of a canopy.
- Drainage is necessary to prevent the accumulation of water on the walls of the storage facility. To do this, dig a ditch around the perimeter of the cellar with a depth of 0.5 m.
At the end of construction it is necessary to create ventilation. A simple option is an exhaust hood with a valve and two pipes with a diameter of 10 cm.The flow-exhaust system ends under the ceiling, and starts 0.5 m higher above the floor level.
The nuances of construction without embankment
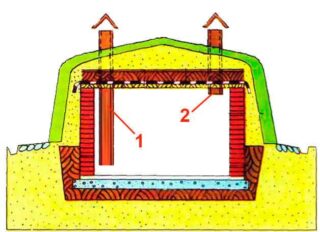
Building an aboveground cellar for storing vegetables with your own hands is not more complicated than the previous option. You must first dig a pit to a depth of 0.5 meters, level and seal the walls. Next, follow the instructions:
- Pour expanded clay at the bottom for waterproofing and a layer of clay 12 cm thick. Lay the brick tightly on top.
- Cover the walls of the pit with a brick, placing it on the edge. Use a lime-clay mixture diluted with sand as a solution. Erect the masonry until it protrudes 30 cm above the ground.
- Build walls and ceiling from 40 cm thick boards in two layers. Place insulation between the logs.
- Fill up the cracks and sheathe the walls with roofing felt for waterproofing.
- Build a roof.
- To drain water, make a 0.5 meter deep moat around the cellar.
After finishing work on the end wall, equip an entrance with two doors and a vestibule. Additionally, it is necessary to make a ventilation system.
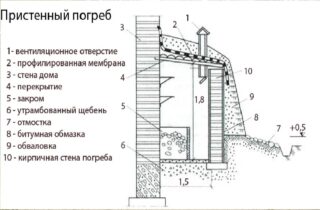
Wall-mounted version
Features of the construction of a wall-mounted storage option:
- Make a depression in the ground no more than half a meter. It is not recommended to loosen the ground around an existing building too much. Otherwise, there is a risk of deformation of the soil and provoke the formation of cracks.
- Before arranging the floor, it is necessary to provide drainage by reducing the level of rain or melt water. For this, a pillow is created from sand, gravel and brick fragments.
- Walls are erected from foam blocks or a wooden frame, filling the space with heat-insulating materials.
- Use synthetic materials or soil boning as additional insulation.
So that the outside of the cellar does not stand out in style relative to other buildings, use a similar decorative finish.
Recommendations
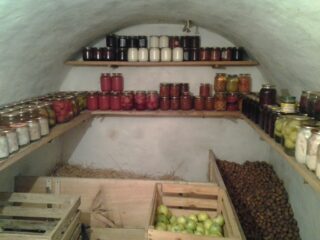
Any person can master the theory of building a cellar. However, in order to avoid unforeseen difficulties, you should use the advice of the masters:
- when choosing a location, consider the risk of flooding;
- before construction, engage in drawing up drawings;
- do not deepen the building below half a meter;
- use moisture resistant building materials;
- do drainage;
- treat wooden elements with antiseptics;
- Perform electrical wiring in accordance with fire safety requirements.
To build an aboveground storage for the grown crop, proceed according to the technology and according to the drawn up project. Supplies will stay fresh for a long time if you equip the building with ventilation and insulate the walls.

