Flooring on the ground in a private house eliminates a number of problems: mice underground and unpleasant odors due to poor ventilation, excessive moisture of the base plate, and more. However, it is not always possible to equip such an option.
Design features

The main difference of such floors from ordinary ones is the absence of an underground. The presence of the latter is often viewed as an advantage: this is how an additional air gap appears, which improves heat storage and prevents waterlogging. However, the subfloor must be well ventilated.
In a private house, air vents are made at a height of 50 cm from ground level. But not every building has floors that high. Therefore, in winter in most private cottages there are problems with the ventilation of the basements and underground.
The floor on the ground has a number of structural features that solve these problems:
- Such a floor is often more durable than a reinforced concrete floor slab. The latter is laid on the edges of the foundation and the concrete layer until the reinforcement of the floor is small. As a result, with poor ventilation, moisture from the soil accumulates in this area, the slab begins to collapse.
- In the underground, mice, spiders, and other insects often breed. Ground floors exclude this phenomenon.
- Due to poor ventilation, odors accumulate in the subfloor, especially unpleasant if the materials of the foundation or slab begin to deteriorate.
The floor on the ground frees you from the need to monitor the state of the underground, ventilate, periodically repair.
Possibility of mounting
Before choosing how to pour the floors in the house on the ground, you should evaluate the characteristics of the soil, foundation, climatic conditions. The most important criteria:
- The arrangement of such an option is possible with a strip or columnar foundation. The slab base itself is a floor over the ground.
- Stable soil - subsidence, soil movement, etc. is excluded. Therefore, in areas with high groundwater, with sand in the upper layer, on watered sandy loam, the overlap cannot be laid on the ground. When moving, the floors are lowered by 5-10 cm, and the plinth remains on the wall.
- Freezing of the soil is excluded. The foundation is insulated - vertical insulation is preferable. If there is a risk of frost heaving of the soil, horizontal insulation with a width of at least 0.7 m is installed.
- Backfilling should be less than 0.6 m. The soil settles gradually, with a greater layer thickness, subsidence is possible.
On the ground, you can equip heated floors.
Floor device on the ground
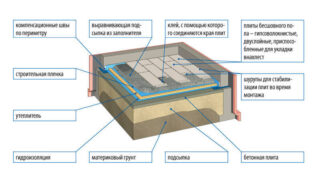
- Compacted soil - usually compacted by hand.
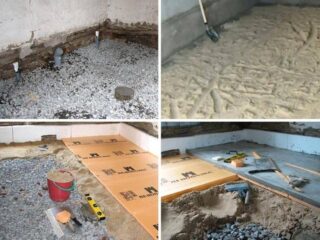
- Backfill - 7-10 cm of sand and 7-10 cm of crushed stone. The fraction of the stone is large - 5–30 mm. They take any sand - ravine, river. The main task of the bedding is to protect against capillary rise of water. The bedding can also serve as a leveling layer.
- Rough screed - a plastic wrap is placed on top of the bedding and covered with a mixture of sand and crushed stone. Here, the sand is necessarily riverine, and the fraction of the stone is fine - 5–10 mm. The rough screed does not need to be reinforced. To make it more dense, the layer is poured.
- Waterproofing - its role is played by 1–2 layers of roofing material. In some cases, waterproofing can be dispensed with.
- Warming - use foam, EPS of sufficient density.The thickness of the layer is determined by climatic conditions.
- Fine screed - its thickness is 7-10 cm. Crushed stone for screeds is taken fine - 5-10 mm, only river sand. The finishing layer must be reinforced with a wire with a diameter of 3-4 mm.
- Finishing coating - boards, plywood, laminate.
Different flooring options include additional layers or do without any intermediate ones.
For concrete preparation
In this version, the rough screed is replaced by a concrete one. Such a floor is more reliable and durable, but its construction takes longer: the concrete screed dries for a long time.
The correct technology has some features:
- The backfill film is laid with an approach to the walls. Above the perimeter of the walls, an edge separation layer is fixed. It is collected from scraps of insulation 2–30 mm thick.
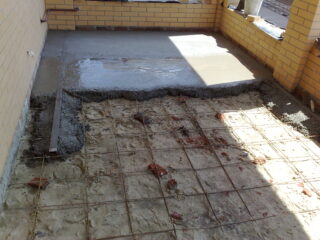
- Concrete preparation - a layer of lean concrete B7.5 – B10 and crushed stone - 5–10 mm. The layer thickness is 50–80 mm. The screed is reinforced with fiberglass or steel mesh. It is immersed in the layer at least 30 mm. While the concrete dries, it is covered with a film and periodically watered.
- Waterproofing and insulation is carried out according to the usual scheme.
- A monolithic finishing screed is made of concrete of class B12.5, reinforced with a welded steel mesh. Layer thickness - at least 60 mm. If the flooring is made of laminate or linoleum, then a self-leveling solution is applied on top.
Concrete pouring the floor in the house on the ground is a classic option. It appeared in those days when roofing material had to be glued to a solid base.
Directly onto a sealed base

This option is more common, as it allows you to do without a rough concrete screed. This is made possible by new waterproofing materials that can be laid directly on the ballast cushion.
The design of such a floor hardly differs from the original step-by-step scheme. Film waterproofing is laid on a layer of insulation - with an overlap and exit to the wall. Then a fine concrete screed 10 cm thick is poured. The filler is fine-grained. The screed is reinforced with a mesh.
This method is recommended in areas with low groundwater levels.
Required tools and materials
To arrange the floors you will need:
- sand - river and ravine for different layers;
- crushed stone - large and small fractions;
- concrete - class B7-B12.5, depending on what it is used for;
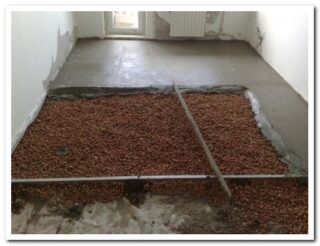
- insulation - expanded clay, polystyrene plates, polystyrene;
- reinforcing mesh;
- laser and water level, corner, tape measure;
- beacons, profile, screed rule;
- shovels, graters, other auxiliary tools.
For large areas, concrete is best done in a concrete mixer. For small ones, they manage with a construction mixer.
Installing floors on the ground with your own hands

How to pour the concrete floor in the house on the ground depends on its structure. Each of the layers is equipped sequentially and only after the readiness of the previous one. There are some recommendations that are relevant specifically for structures on the ground:
- According to the instructions, concreting begins from the far end of the room. It is better to immediately divide the surface into strips 80-100 cm wide and divide it with a profile or beacons-boards. This will allow the concrete to be prepared in batches and leveled immediately.
- The lighthouses are removed when the concrete dries slightly, and then the recesses are filled with fresh concrete.
- In some cases, it is cheaper and easier to equip a finishing screed made of dry materials, such as plywood, gypsum fiber sheets. However, this option is not possible for rooms with high humidity.
- Crushed stone should not be replaced with brick fragments or other waste. This layer first of all prevents the capillary rise of water, and broken brick does not.
- The level of reinforcement is determined by the characteristics of the building. On the reinforced floor, you can put interior partitions, place heavy equipment.
The floor on the ground is chosen not for its cost, but due to its practicality and ease of maintenance. However, in some cases - high groundwater, mobile soils - this option cannot be realized.


