Slopes serve to protect the seams from dust, debris, moisture, and also perform a decorative function. Not all firms that install windows provide their services for cladding this part of the structure. Window slopes are easy to do with your own hands, you just need to follow the installation technology and take into account the technical characteristics of the materials.
Used materials for slopes on windows
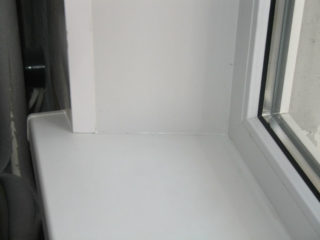
Regardless of the window material, the slopes require interior and exterior finishing. Facing on the street is not always done, which is a common mistake. It is needed to protect the polyurethane foam from destruction, the negative influence of external factors, and to improve the sound insulation of the structure. Different materials are used for work: plastic, wood, plaster.
PVC panel
PVC panels are used today for finishing any surfaces, including window slopes. The material is selected depending on the size of the opening, its technical properties. However, before using the panels, the base must be carefully prepared. For fastening products, a lathing of wooden slats is required, although they can be fixed with glue.
The advantage of PVC is a smooth surface, ease of installation and maintenance, a wide range of shades, harmonious combination with other materials. In this case, additional surface finishing is not required. The disadvantage is that the panel is not very resistant to mechanical shock.
Drywall
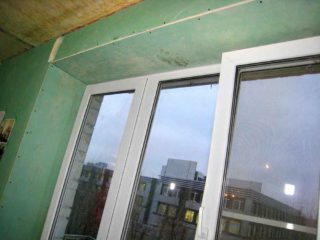
For interior decoration of slopes, drywall is often used. Its advantage is ease of installation, low cost. Even an inexperienced master can make repairs using such sheets. Installation is quick.
To make plasterboard slopes on the windows with your own hands, you need to mount the crate. The product has a small mass, so the load on the wall is minimal. After installation, drywall can be repainted in any color.
To prevent the development of mold and mildew in high humidity indoors, drywall must be treated with antiseptic impregnation.
Plaster
The plastering mixture is used indoors and outdoors. However, this cladding method is suitable for perfectly flat surfaces. In this case, the thickness of the layer does not exceed 2 cm. Otherwise, the material will quickly crack and the repair of the slopes will have to be carried out again.
Plaster allows you to hide only minor imperfections. If the slopes have serious differences in level, it is better to choose other finishing options. Before and after applying the mixture, the slopes must be treated with an antifungal primer. The air temperature in the room during operation should not be lower than +5 ° С.
Plastic
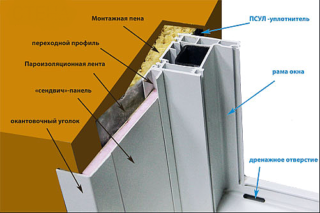
One of the most popular solutions is the use of sandwich panels. Their main advantage is the presence of a heat insulator inside. It can be used for installation on slopes in any premises. Such material retains decorativeness and technical characteristics for a long time. Liquid nails are required to secure the panels.
Sandwich panels provide an energy-saving effect as they are sealed. This material is safe for human health. Most of all, the product is suitable for outdoor decoration of the house.Its distinctive feature is a wide range of colors.
Required tools and accessories
The list of tools changes depending on the selected finishing material. Before making slopes on plastic windows, you need to assemble the following devices:
- building level, measuring tape, square, as well as a pencil or marker for marking;
- construction mixer or drill with a special attachment for mixing glue solution, putty;
- containers for the preparation of mixtures;
- knife, hacksaw with fine teeth, jigsaw;
- scissors for metal;
- wide brush for applying a primer to the surface;
- perforator with special attachments for preparing slopes for work;
- a primer with antifungal properties.
Depending on the material chosen for finishing, a trowel is required, which is used to apply plaster and putty. Need to prepare a corner leveler, falcon. A float is used to smooth the putty surfaces.
For fixing some types of materials, you will need wood strips or a metal profile. When using PVC panels, you need a gun for polyurethane foam, as well as a special syringe with a sealant. Plastic cladding can be fixed with a construction stapler.
Preparatory work
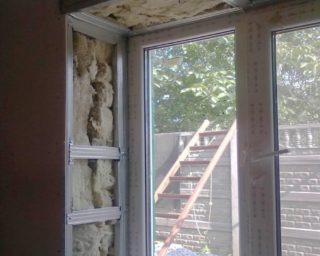
Before making the slopes on the windows with your own hands, the selected material must be left indoors for a while so that it gets used to the operating conditions. It is required to prepare the surface of the base for processing: clean it of debris, dirt, concretions of concrete, dust, old finishes.
To remove the paint layer, you can use a thinner or a building hairdryer. After cleaning, the slopes are impregnated with an antiseptic primer. This procedure is necessary when using any finishing material. If the structure needs to be insulated, and there is not enough space for the insulator, the old layer of plaster must be completely dismantled.
Instructions for the manufacture of slopes
Depending on the selected material, the installation technology may differ slightly. For the inner and outer surfaces, it is identical.
Installation of plastic slopes:
- Prepare plates of the required size.
- Fixation of plastic. For fixing the panel, use liquid nails or special glue.
- Corners are used to decorate the ends of the PVC panel.
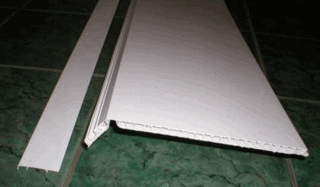
For work, you need to buy panels that will be resistant to moisture, direct UV rays and mechanical stress. You need to choose a material that will match in shade with the overall design of the room.
A jigsaw is used to cut the material. So that the cladding does not deform, compounds with a low expansion coefficient are used to fix it.
For fixing drywall, use a metal profile, putty, foam. The most common is the first option, as it is characterized by the simplicity of the procedure.
- An L-shaped profile is screwed along the perimeter of the window frame. It is the basis for fixing drywall sheets.
- They make thermal insulation. To attach the material to the surface of the slope, use glue or sealant.
- The fixing substance is applied to the near edge of the structure and the drywall element is pressed against it. The second edge will be fixed with a profile.
All joints are sealed with sealant. For further finishing, drywall is putty and painted using water-based compositions.
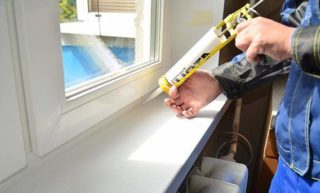
If plaster is used to finish the slopes in the house, the installation technology provides for the following types of work:
- Installation of a guide metal profile. It is installed around the window niche.
- Installation of a perforated corner near the window frame.When installing this element, you need to focus on the already installed profile. The corners can be fixed with gypsum plaster, which cures quickly.
- Application of the solution. At this stage, the external corner is aligned, the formation of the desired layer thickness. The mixture is applied first to the side surfaces, and then to the ceiling.
- Leveling the mortar. For this, a small rule or a wooden lath is used. There is no need to achieve a perfectly flat surface. It is necessary to distribute the mixture so that it fills all the irregularities, voids. The material can be completely smoothed out after it has set. Work is carried out from the windowsill. It is better to remove excess immediately.
- Elimination of external guides. To decorate the structure, perforated painting corners are installed on the outer corners. They serve to strengthen the edge of the slopes. You can fix them with a plaster putty. They are mounted according to the height and width of the opening. It takes half an hour for the solution to harden.
- Application of the second layer of plaster. At this stage, the outer edges of the painting corners are compared to the wall. The inner corners are leveled with a special spatula, which captures two planes at once.
- Puttying the surface. The thickness of this layer does not exceed 1.5 mm. A wide spatula is used for application. You need to move it from the window frame towards the room.
- Grout. This process allows the surface of the slopes to be smoothed out. You need to move the tool in a circular motion counterclockwise.
After the completion of all work, the structure must be treated with a primer and painted.
If an electrical cable was inserted into the room through the window frame, it is important not to damage it during finishing.


