The popularity of wooden housing construction is easy to explain: the material used is environmentally friendly, natural, strong and durable. The building looks rich and unique. An optimal microclimate is created inside the rooms, good for health. It is not difficult to build a residential or country house made of wood with your own hands if you follow the technology of the work.
The choice of material for the construction of a wooden house
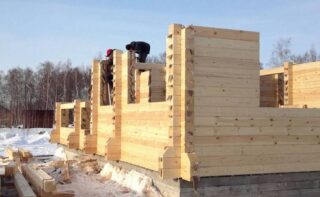
When choosing a building material, the purpose of the building and its size, the cost of consumables, and further costs for finishing are taken into account. The thermal insulation properties and the quality of the wood are equally important.
Beams
For construction, one-piece, glued and profiled timber is used. The first type is made from a tree trunk by cutting from four sides. In this case, the element receives a rectangular or square section. The surface of the timber is either sanded or not. For work, elements with a thickness of 9 cm (for internal partitions) to 25 cm (for load-bearing walls) are suitable. During construction, they fit tightly to each other, providing reliability and thermal insulation of the structure.
The profiled timber is characterized by the presence of ground surfaces and locking elements: the tongue-and-groove connection. In this case, no additional fasteners are required. Glued laminated timber is made from dry wooden lamellas, the length of which is 12 m, and the thickness is 7.5-35 cm. The elements are processed with glue and pressed. The result is a bar with increased strength and resistance to warpage. The construction of laminated veneer lumber is durable, reliable with a flat smooth surface. It is he who is used most often.
Logs
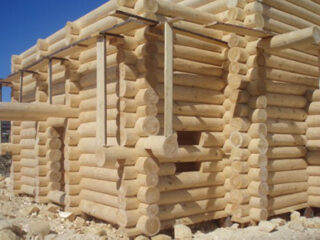
A debarked or rounded log is suitable for building a house. In the first case, the bark is removed from the trunk with an ax or using a special machine. The length of the element reaches 6 m, and the diameter is 45 cm. The house from the “wild” log looks impressive, but the presented material is rarely used today.
For the manufacture of rounded logs, not only the bark is removed from the surface of the trunk, but also the top layer 2 cm thick. The length of the elements is 6 cm, the diameter is 15-30 cm. During construction, the crowns are the same, with a clearly defined texture.
Panels
The panel is based on a frame made of a dried board or timber, inside which a heater is placed. The product has a layer of steam and waterproofing. A house made from such material costs the same as from a bar, since the main funds are spent on finishing it.
The advantage of the panels is the speed of construction, as well as the absence of the need for additional insulation.
Features of the construction of a wooden house
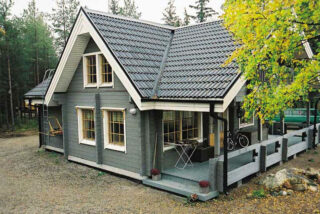
Before building a wooden house with your own hands, you need to decide on its type. In addition to Russian, there are Canadian, Norwegian and Finnish types of structures. Each of them has its own characteristics:
- Finnish. Such houses are very popular now. Their feature is simplicity of lines, restraint of color. The building is characterized by a gable roof, a rectangular structure, an area of up to 120 sq. m., simplicity of layout, good sound and heat insulation properties.The building is more often one-story, while the minimum length of the roof overhang is 20 cm, the height of the basement is 40 cm. The Finnish project provides for low ceilings and the presence of a sauna.
- Norwegian. The building is monolithic and proportional. It is characterized by a simple layout, large premises with a minimum of corridors.
- Canadian. The house has a complex fundamental structure, characterized by a high roof, spacious rooms, terraces. For work, large diameter logs are used, installed according to the "post and beam" technology.
There are several directions in Russian housing construction:
- country: there are ancient Russian symbols in the interior;
- hut: no unnecessary decorative elements, restraint in design, the presence of a traditional stove;
- terem: the use of expensive decorations.
When choosing a project "Russian estate" pay attention to the presence of carvings, shutters, cladding of the roof top.
Pros and cons of a wooden house
Before you build a house out of wood with your own hands, you need to consider its pros and cons. The following design advantages are distinguished:
- high strength of the building material;
- low weight of the structure (there is no need to build a heavy foundation);
- low level of thermal conductivity;
- aesthetic appearance;
- high speed of installation.
Wood has some disadvantages:
- There may be knots or other flaws in the boards or logs: such elements may not be used for the construction of main walls.
- Untreated material will rot when exposed to moisture.
- Temperature changes lead to deformation and warping of the tree, uneven shrinkage of the house.
- A bar or a log is a fire hazardous material, therefore it requires additional processing with protective compounds.
Disadvantages can be easily eliminated using specialized tools.
Designing a wooden house
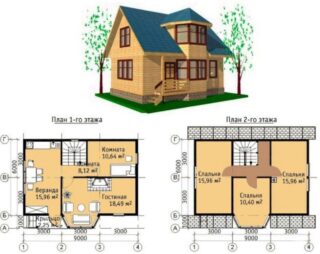
If a choice has been made of which tree to build a residential building from, it is necessary to start creating its project. First, the location of the building is determined. The distance from the site of neighbors, the location of utilities, a well, the level of soil freezing, the danger of flooding the structure during spring floods are taken into account.
The design phase includes the following sections:
- architectural: information about the exterior decoration, the location of the rooms, the number and type of windows, doors;
- constructive: includes statements about the variety and technical parameters of the foundation, roof, walls and floors;
- engineering: information about communications (heating, water supply, sewerage), electrical wiring, ventilation system.
When planning a house, the following parameters are taken into account:
- building configuration: today, preference is given to buildings of complex shapes that are expensive, but it is worth considering simple projects that can be made no less comfortable;
- number of storeys: if the house has more than one level, you need to think over the location and type of stairs;
- type of foundation: for light structures, a shallow strip base is suitable;
- roof shape: gable as standard;
- number of residents;
- heating system;
- purpose of the structure: for permanent residence, for summer use;
- use of the "warm floor" system;
- features of interior and exterior decoration.
When drawing up a project, additional extensions, financial capabilities are taken into account. At this stage, it is necessary to provide for ways to protect wood from the negative influence of external factors. The location of the heating system is determined taking into account the increased fire risk.
Tools and materials

To build a wooden residential house with your own hands, you need the following devices:
- shovels (for preparing a trench for a foundation);
- measuring tape, level, level, as well as a cord and stakes for marking the territory;
- jigsaw, circular saw;
- concrete mixer;
- a hammer.
Also required components for the preparation of a concrete solution (for pouring the base), a waterproof and vapor barrier film, insulation. Finishing materials are selected if necessary. Metal reinforcement is used to strengthen the foundation.
Wooden house installation technology
The work involves the construction of the foundation, the construction of the box, the installation of the roof, and the subsequent finishing.
Foundation
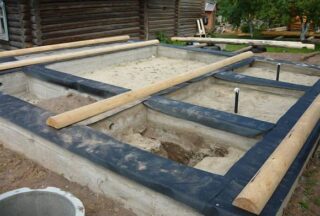
For a wooden structure, you do not need to make a base that is too strong: it is not very heavy. A shallow version of the tape type is suitable here. The following sequence of actions must be followed:
- Cleaning and marking the territory.
- Digging a pit. Its depth is 50-60 cm, and its width is equal to the thickness of the walls with an increase of 15-20 cm. A water protection is laid on the bottom of the tamped trench, on which a layer of sand (20 cm) is poured. The pillow is compacted.
- Reinforcement and pouring. Formwork is made from the boards, a reinforcing frame is laid. The boards are pre-coated with a moisture-repellent material. Now the solution is poured. To exclude the appearance of air inside, the concrete is compacted.
- Base waterproofing. For this, roofing material or coating compositions are used.
When arranging the foundation, you need to make a drainage system and a blind area. Moisture is drained away from the foundation and walls, reducing the risk of structural failure.
Walls
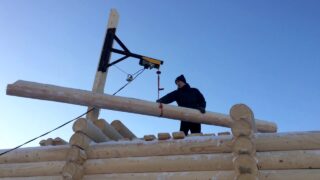
After the foundation has settled, you can start building the walls.
- Laying the floor and the first crown. The first row of beams or logs is placed on the waterproofed surface of the base. Material from larch should be used, as this breed is most resistant to decay. Jute is placed between the beams for insulation.
- Installation of subsequent rows. The elements are treated with antifungal agents. If a natural log is used for construction, the corners are connected in a “bowl” or “in a paw” way. Profiled or glued timber is laid according to the “thorn-groove” system.
After the walls have been erected, a temporary roof is erected. Before installing windows and doors, the house must go through a shrinkage process. When using laminated veneer lumber, this time is reduced to 6 months. During work, it is necessary to monitor the level of the walls.
Roof
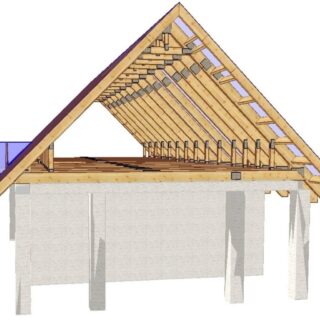
Before you build a wooden house, you need to decide on the type of roof. It is best to use the gable version. The work includes the following stages:
- Floor installation. Fix it using special nails. Temporary flooring is placed on it.
- Installation of rafters. This procedure is carried out directly on the roof. Bolts are used to connect the rafter legs. The lower part of the elements rests on a protruding beam. In the area of the joints, they are fixed with nails and tightened with staples. Several layers of waterproofing material are laid on top of the rafters: roofing material or dense plastic film. Spread the material with an overlap of 20-25 cm. Counter-battens are nailed on top of the waterproofing. They are necessary to create a ventilation space.
- Arrangement of the lathing. Screws are used to secure it.
- Roof decking. After that, they begin to fasten the roofing material.
There are 2 options for arranging the rafter system: hanging or layered. The first option is used if the structure rests on the side walls. She is lightweight. The distance between the walls is 6-14 m. The load on the capital side foundations increases. To reduce it, I use horizontal retaining elements, diagonal connecting bars.
If the house has internal load-bearing walls, you can use a layered rafter system. It has several stop points in addition to the capital side structures. The main reference area is the ridge. Before the construction of the roof, waterproofing and Mauerlat are laid on the walls.In the last turn, they carry out the internal and external decoration of the structure.

