When viewed from above, the roof with four slopes appears to be like an envelope. Such designs attract attention with their dimensions and expressive forms. If an envelope roof is chosen for a dwelling, the structure diagram and main units must be carefully thought out. In addition, it is important to correctly calculate the dimensions and consumption of materials.
The device and features of the roof-envelope
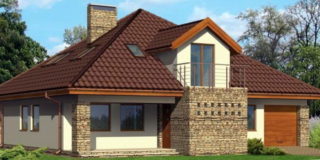
Structures are common in private low-rise construction. Unlike other types of roofs, they are not equipped with gables. The latter are replaced by additional sloped surfaces. Thus, the roof-envelope is always hipped. There is considerable space under the roof. There you can equip a living room, a summer recreation room or an attic.
Roof structures can have 2 versions. They differ in the shape of the rays.
Tent
Such a roof is suitable for a building with a square base. It consists of 4 slopes identical in shape and size. The ridge of such a roof is made as the legs of the rafters combined at one point. This distinguishes it from gable structures.
Hip
Such a roof has slopes of different shapes. One pair of them looks like a trapezoid, the second (they are called hips) - like triangles. The ridge of such roofs is significantly inferior in size to the length of the slope along the cornice. In general, hips can be considered a replacement for pediments. Such structures are suitable for buildings with a rectangle at the base.
When designing and calculating, it is important to take into account the loads caused by precipitation and wind.
Calculation of the roof with an envelope
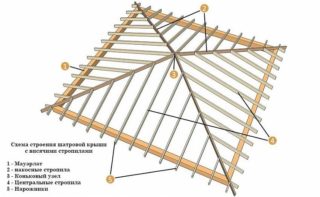
When preparing materials for the roof, it is important to correctly calculate the dimensions of all the main elements. Only in this case, the design will be reliable, and the developer will not spend extra money. Based on these data, the amount of roofing material is calculated.
During operations, you need to keep in mind that the construction involves slopes in the form of isosceles triangles and trapezoids. You can calculate many of the necessary parameters by measuring the dimensions of the walls of the dwelling and determining the angles of the slopes. The values of sine, cosine, tangent of angles, integral and divided by 2 wall lengths, as well as the Pythagorean theorem are used.
To find the area of a triangular slope, the height of this figure - the perpendicular drawn from the top to the base - is multiplied by half of the latter. For a trapezoid, the formula changes: the sum of its horizontal sides is multiplied by the height and divided by 2. The total area of the roof is found by summing the values for the four slopes. Based on this number, you can calculate the number of sheets required. To do this, the roof surface area is divided by the value for one sheet and rounded up.
Advantages and disadvantages of the envelope roof
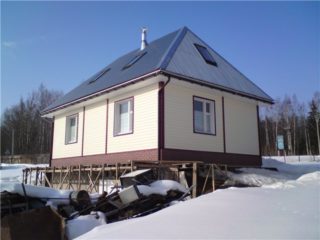
One of the main advantages of this design is the timely outflow of liquid from the surface. This is facilitated by a pronounced slope and large areas of slopes. Precipitation flows off them without problems. In addition, large amounts of snow and ice do not accumulate on the surface in winter. Thanks to this, additional loads are not created on the foundation.Since instead of gables, additional ramps are involved in the structure, the outer walls, together with their covering, are reliably protected from precipitation, which ensures their better preservation. It also possesses excellent load-bearing properties and is resistant to strong wind gusts.
The significant dimensions of the roof space allow you to equip a spacious attic room or a residential attic. The design also predisposes to uniform heating of both the outer area and the room below it. It has an attractive and memorable appearance, makes the building visually taller.
Making such a roof yourself is quite difficult. The work requires high-quality calculations and carpentry skills. This especially applies to the design stage of the hipped roof. Experts say that only a person with sufficient experience in such work can correctly calculate the rafter frame of such a design. Due to the large dimensions, a lot of resources are spent on arranging the roof.
Features of building an envelope roof with your own hands
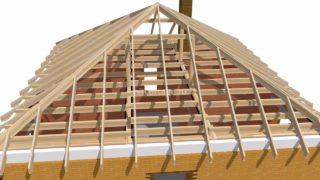
Such a roof is durable and reliable, but rather difficult to install. Particularly difficult areas are considered to be the junction of the ridge beam with the diagonal rafter elements.
Installation begins with laying out the Mauerlat on the upper trim of the building so that the mass of the system is distributed more evenly. Mauerlat is a solid and solid bar, square or rectangular in shape. They need to embed the legs of the rafters.
Vertical rack elements are mounted. They are installed on an internal load-bearing wall, which is previously covered with a bed. In this aspect, a hip roof is simpler than a hip roof - only one pillar is mounted for it. For a roof that has slopes of different types, you need at least 2 of them.
They put diagonal rafter elements. Their undercut is supposed to be done so that they have a connection with uprights and a ridge run.
Begin to fix other rafter elements - mast and privates. They are responsible for the formation of sloping planes. The first type of elements can be based on an embedded beam or directly on the Mauerlat. It is possible to increase the rigidity if the joints are not made by cuts, but by the creation of cranial bars.
The lathing is installed - a structure made of rails fixed at right angles to the legs of the rafters. It is an important element in helping to distribute the mass of the roofing material. The construction step is determined by the profile brand. If the slopes are steep enough (at least 15 degrees angle), the distance will be 50-100 cm.
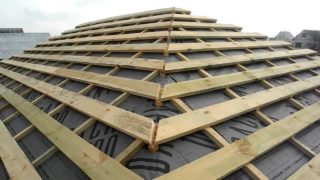
The vapor barrier layer is laid out. Place it on the rafters along the frame so that it sags a little. A stapler is used for fixing. The strip above should have some overlap. For seam joints, construction tape is used. After vapor barrier, plates of insulation material are mounted. They are installed by the spur between the rafters. Then the waterproofing layer is laid.
They begin to mount the roofing material on the roof. It is necessary to fix the strips intended for them on the eaves. Fixation is carried out using self-tapping screws, sharpened for working with corrugated board. The initial sheets are laid on the cornice, while it is important to provide for some release beyond the wall for overhangs. The elements located nearby are fastened to each other with self-tapping screws on the crest of the corrugation. They are coupled with a crate, on lowered parts. Cutting of workpieces can be done using a hacksaw or scissors intended for metal flooring.
The final stages will be the installation of the drainage system and the installation of the ridge element. The latter is also laid on the backbone of the hips with an overlap of the overlying layer on the lower one.


