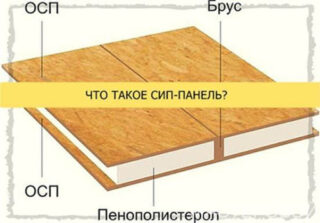
Houses from SIP (SIP) panels appeared in the second half of the XX century in Canada. The name of the technology stands for “constructive heat-insulating panel”. It will take 2-3 weeks to erect the structure, materials and tools. Knowledge of the installation technology for building a house from SIP panels with your own hands will help to avoid mistakes and their consequences.
Methods for assembling houses from SIP panels
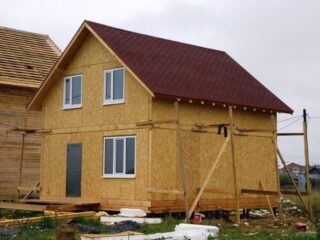
SIP is a two-layer sandwich made of OSB and heat-insulating material. If we compare SIP panels and a frame house, the first option wins in price and usable area. Heating indicators are the same for them.
The construction of a house from SIP panels is carried out in one of two ways:
- Frame assembly involves the use of timber or metal.
- Frameless technology involves fixing the panels with thermal dowels of a smaller thickness than the plate.
In Russia, the first method is popular, since the frame gives the building additional stability. The technology is also distinguished by its maintainability - if the unit is damaged, it can be replaced.
As part of SIP panels, the formaldehyde emission level should be marked no more than E1. Check with the manufacturer for the presence of high-quality self-extinguishing foam in the inner layer of the slab.
Characteristics of a house made of SIP panels
The binding elements are resin, which contains formaldehyde. It is to this material that claims are made, since this poison causes poisoning. Select products manufactured in accordance with GOST R 56309-2014.
The advantages of SIP panels are resistance to high humidity, no deformation and low price.
Tools and materials
Before building a house, purchase the required number of SIP panels or ready-made kits. You can order materials in production or from intermediaries. The managers of the companies offer to select everything necessary for the subsequent installation in the catalogs. When choosing slabs, remember about the foundation of the building, as a rule, it is mounted on screw piles.
From the tools you will need a screwdriver, self-tapping screws, a chainsaw and a circular saw. For marking, prepare a building level, tape measure and marker. The selection of the slots in the SIP-plates is carried out with a thermal knife.
Technology for assembling a house from SIP panels
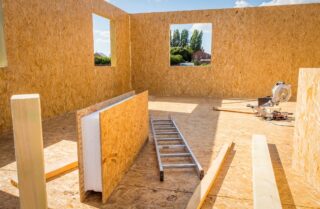
Do-it-yourself construction of a self-supporting insulated wire-house begins with the assembly of the base located on the foundation. Often a timber construction is used. The assembly technology involves the formation of the strapping of the perimeter of the future structure and the longitudinal installation of intermediate beams supported on the foundation posts.
SIP houses are lightweight, which does not require a massive base. Buildings are erected on a strip, slab or pile-screw foundation.
Connection of SIP panels
Insert a timber or thermal dowel to connect the panels and fix with self-tapping screws, which are screwed through the OSB into the body of the wooden dowel. It is recommended to first grab the boards with “yellow” wood screws 40-50 mm.Then punch the joints with nails 50-65 mm, adhering to a step of 10-15 cm.
To avoid the risks of getting a leaky house, apply polyurethane foam to the plate before assembling any unit. The product will fill the gaps, creating a thermos effect.
First overlap
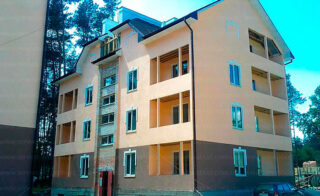
The first floor is a floor that does not require additional insulation. Assemble SIP panels 224x625 mm. Such a width of the beams, located with a step of ~ 60 cm, allows the structure to withstand the load.
When installing slabs, lay the slabs according to the technology of bricks in the masonry, that is, adhere to the mismatch of the seams so that they do not jar from high humidity. To protect the bottom OSB panel from moisture, treat each slab with bitumen mastic or a similar compound.
Phased connection of SIP panels:
- Place a mounting bar between the plates and fix it along the edges of the strapping with long nails. Secure with self-tapping screws.
- Cover the side cuts of the slabs on all floors with an edged board. Apply polyurethane foam to the end using the snake technology. Attach the board and fix it through the OSB to the end with self-tapping screws.
- Along the perimeter of the sandwich, install a starting board on top, which will become a support for the SIP panels. Place them around the perimeter of those areas where interior partitions are planned.
- Attach the girder boards with nails through to the pile heads. Make holes for the studs into which they will be driven, and then tightened with bolts.
If the slabs are 1250 mm wide, cut them lengthwise into 2 equal parts.
Walling
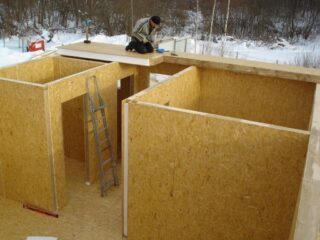
Start installing the walls from any corner. Apply polyurethane foam to the board or the end of the sandwich. Take the panel, flip it over with the notch down and “slide” it onto the installed starting board. Align the plate vertically and fix it on both sides with self-tapping screws, adhering to a step of 10-15 cm.
Apply polyurethane foam to the side of the installed plate. Install the second slab at a 90 ° angle, to which the end block is attached, with a thickness equal to the depth of the groove. Attach this panel to the strapping starting board in the same way as for the first plate. Fasten the corner with self-tapping screws - select the length so that it passes through the plate and the mortgage board. Fasteners are carried out in increments of 40-50 cm.
The assembly of walls from SIP panels is carried out according to a similar principle - proceed step by step: a bar is installed between the plates, the next plate is fixed to it and to the lower strapping. You can strengthen window and door openings by installing perforated metal corners. The detail, although optional, gives the structure additional stability.
Partitions
The erection of partitions is carried out in a similar way: fix the crown board, install blocks on it. The thickness of the interior walls can be the same as that of the exterior walls, or thinner. Use interior decoration materials to improve sound insulation. It is possible to reduce the burden on the budget by using frame partitions. But in this case, the frame is first mounted, and the sheathing is carried out after the roof is installed.
Roof
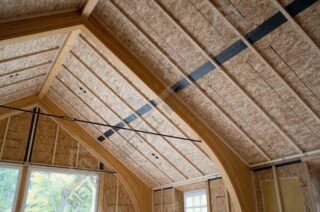
It is recommended to build the roof also from SIP panels. In this case, the need to install rafters and other structural elements responsible for strength is eliminated.
Installation instructions for SIP roofs:
- Install a support beam (Mauerlat) around the perimeter of the future roof and fix it to the crown board of the last floor.
- Assemble the gables by analogy with the installation of the first SIP-plate - the element is fixed to the support bar. These works require accuracy and care.
- Place a ridge support bar between the two gables and lay the SIP panels on top. Secure the plates with bolts.
The roof assembly technology is identical to that of the ground floor floor. Despite the fact that the panels are durable, use a connecting board when forming the roof.This approach guarantees the rigidity and resistance of the structure to wind gusts.
When choosing SIP panels or ready-made sets of houses, pay attention to manufacturers with a good reputation. Poor quality materials are a common source of problems when assembling a building.
Errors and their consequences during construction
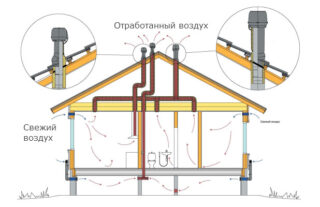
Errors and shortcomings in construction are always associated with a lack of knowledge about the features of technology. For example, during the installation and strapping of the foundation, the absence of waterproofing between the pile heads and the timber is common.
At the stage of assembling the frame, the following mistakes are often made:
- the use of boards from boards leads to the formation of gaps at the junction of the boards;
- the rejection of expansion joints leads to a limitation of the natural movement of the panels;
- low reliability of the frame is guaranteed by laying the corners of the structure from boards, and not from timber;
- if you assemble the corners of the house with the plates fastened in the side, this will reduce the strength of the fixation.
The fear of non-compliance with technology can be avoided by concluding a contract with a construction company. After the completion of the work by the contractor, you can start independent finishing. If a house is built with technological nuances in mind, it will last for many years.

