Bathroom ceilings must be water resistant and easy to clean. Materials of different price categories are used, but not all types of coatings are suitable for installation in a wet room. The aesthetic appearance of the cladding is taken into account so that it is in harmony with the walls and floor.
Basic requirements for bathroom ceilings
The room is damp and contains a lot of steam, so water resistance is a prerequisite for choosing a finish. The coating must withstand the ingress of water from above from the neighbors and at the same time not deteriorate.
Other requirements for the ceiling material in the bathroom:
- Safety. The concept includes the ability to release toxic substances. Some coatings become harmful to human health when the temperature rises. In addition, the layer must be strong and not fall off when the fasteners are loosened over time.
- Durability. The cladding should work for a long time without losing its original color and integrity.
- Corrosion resistance. The coating must not rust or deteriorate from the detergent.
It should be possible to mount luminaires, lamps or other light sources into the ceiling. The possibility of mold formation and the development of fungus is excluded.
Unsuitable materials
There are materials that are saturated with moisture and swell. Such coatings are inexpensive, but they are not used for ceilings in bathrooms and toilets.
These types include:
- ordinary drywall;
- fibreboard (fiberboard);
- paper-based wallpaper;
- fabric cover.
Drywall is divided into 3 types, which are distinguished by color. Beige means normal quality sheets, green paper on the surface indicates moisture resistance of the material, and gray indicates fire resistance. In the bathroom, the ceiling is best done with green drywall. The beige will decay when moistened.
Fiberboard strips swell from time to time, paint rises from their surface, so an inexpensive coating has to be changed every one and a half to two years. Wallpaper glued to the ceiling will lag behind under the action of water, their edges will begin to fall off. The fabric on the ceiling will change color, after a while it will become dull and lose its attractiveness.
Inexpensive finishing
There are finishing options that use a minimum of materials, and they do not require large purchase costs.
These include:
- putty with painting or whitewashing;
- vinyl-based wallpaper;
- plastic ceiling.
Chalk whitewashing is an environmentally friendly way to finish the topcoat in a damp room. It will require a preliminary putty to level the surface. Some people use a lime layer that lasts 4 years (chalky 2 years). Lime whitewashing, when applied, tightens small cracks, chalk cannot do this.
Lime disinfects the surface, resists the development of fungi and bacteria. However, it is dangerous to use lime, since the material belongs to allergens.
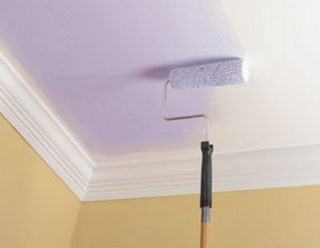
Putty and painting
You can do the finishing with putty yourself, since the implementation of such a coating does not require special skill. For leveling, types of mixtures are used that do not react to moisture.These include finishing and starting putties, which include cement powder. Such mixtures are usually used for facades filler.
After application, each layer must be sanded with special nets, and then primed with adhesive sealants, otherwise the next layer will peel off over time due to dust and the coating will bubble with moisture.
Use paints that can resist moisture without breaking. Acrylic compounds from well-known manufacturers are taken. The cost of a paint is an indicator of its quality. A good paint will cover the ceiling in one go, while inexpensive paints need to be applied multiple times to get an acceptable look.
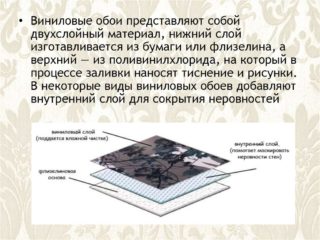
Vinyl wallpapers
Vinyl wallpapers are:
- moisture resistant, which can be wiped with a damp sponge;
- washable - slightly alkaline products can be used;
- super-washable - wet rags with soapy water are allowed;
- super-washable and resistant to mechanical stress.
Symbols indicating the type of wallpaper are placed on the label. The coating is inexpensive, usually 1-2 rolls are enough. You can change the color, texture at will after a short time. For re-pasting, you do not need to level the ceiling with putty, you can carefully remove the old layer.
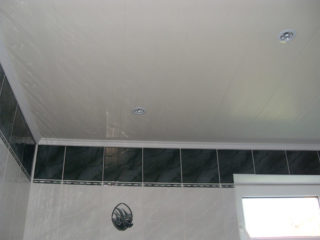
PVC panels
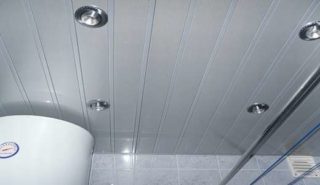
A durable and moisture-resistant coating is chosen by about 80% of users to finish the ceiling of the bathroom. Collecting it is not difficult. You can replace the ceiling by removing the old strips and placing new panels on the frame.
The surface is easy to clean with traditional detergents. The material does not crack from impacts, since the ceiling does not fall into the category of such impact. Poor ventilation in the room will lead to mold in the seams of the plastic, but regular cleaning will eliminate the negative manifestation.
Suspended panels are mounted on a frame made of wooden battens or galvanized profiles. Theoretically, the metal can corrode, but this requires a lot of moisture in the walls, which sometimes occurs on the first floors. According to the instructions, wooden slats are treated with linseed oil or an antiseptic against decay.
The best choice for bathroom ceilings
The aesthetic side plays a significant role in the choice of coverage. For example, white walls and ceilings can resemble a medical institution, and a combination of two or three colors will revive the interior and make it original. Materials of any category are represented by a variety of textures, colors and shapes, so there will be no difficulties in choosing the right type.
From a practical point of view, the following options are better suited:
- slatted PVC lamellae;
- suspended structures;
- mirror and glass panels;
- stretch ceiling.
If the height of the room allows, you can cover in several tiers, install plastic, moisture-resistant drywall as a finish. A combination of several types in a multi-tiered structure is recommended, while spotlights will complement an elite finish. Transverse stripes will visually shorten a long room, while longitudinal stripes will increase the length of a short bathroom.
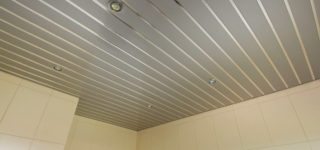
Rack ceiling
Varieties of rack ceiling
- lamellae, in which narrow depressions are made in the same color as the main plane;
- panels with hollows of a different color, for example, made in silver or gold, as a result, white glossy stripes look convex on a mirrored base.
There are lamellas, which have several such shiny depressions along their length. The variety of options opens up space for the designer.
The panels are adjusted in height using a frame, which is attached to suspensions, brackets. The ceiling lowers the height of the room by 6 - 15 cm, depending on whether there will be lamps there or not. The width of the lamellas is from 10 to 25 cm.
Dropped ceilings
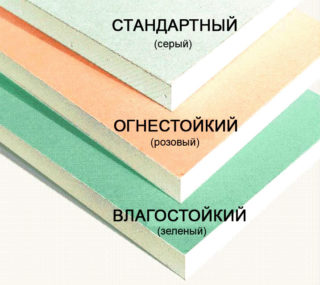
The structure of such a coating is attached to the frame; it is better to use galvanized profiles from the drywall system.
The elements are used:
- profile CD - 60 as bearing girders;
- profile UD - 25 for tying the frame along the contour of the walls;
- mounting bracket ES in lengths of 90, 120, 160 mm.
The coating is green gypsum plasterboard panels, which are chosen with a thickness of 6 - 9 mm, the length of the sheets is 2 m. Lightweight boards are specially produced for installation on the ceiling. After installation, drywall is pasted over with vinyl wallpaper, polyvinyl chloride tiles are mounted on the surface. Ready-made elements are also made from moisture-resistant materials, for example, glass, ceramics, mineral films.
The surface can be putty and painted with acrylic compounds with the addition of pigment to give the desired shade.
Mirrored and glass
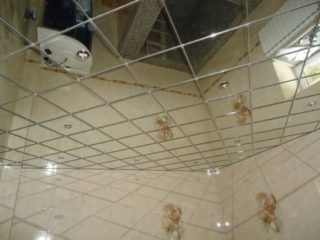
In the bathroom, real mirrors can be mounted on the ceiling. The material of construction is expensive; mirrors require a special mounting system and a reinforced frame, since the coating weighs a lot. Holes are drilled in each tile, which can only be done in a special workshop.
Disadvantages of mirror and glass plates:
- a lot of glitter is not always pleasant and is out of place;
- the coating requires careful cleaning, which is difficult to do on the ceiling.
Glass elements are fixed according to the principle of mirrors, while the reverse side of the tiles is painted in different ways, it can be monochromatic or contain patterns. The system of mirrored ceilings can be assembled by a specialist; beginners will have a hard time.
There are ready-made Armstrong mirror systems, which are assembled in the form of a designer.
Stretch ceiling
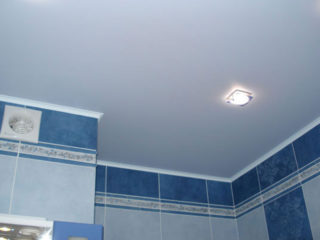
The stretch ceiling is the ideal cladding for the bathroom. The canvas is placed quickly, looks beautiful. Ceilings are mounted according to individual measurements, while the boundary width of the canvas is 5 meters.
In the bathroom, you can make a stretch ceiling in several versions:
- glossy - visually raises the coating and increases the height;
- matte - is a universal way of covering the ceiling for different interiors;
- satin - looks dazzling, white color has a pearlescent tint.
Installation is carried out using gas burners-guns, which heat the canvas to + 70 °, so that the material becomes soft. Then it is stretched on profiled guides, which are fixed around the perimeter of the room. The construction market offers suspended ceilings of various colors and textures.
The disadvantage of a stretch ceiling is its low resistance to low temperatures, but bathrooms are usually classified as heated rooms.
DIY installation
The preparation consists in clearing the space to set up the scaffold in order to work. The old layer can be removed or left if the finish is firmly in place and does not fray.
Installation of the frame begins with marking the strapping line along the perimeter of the walls, for this they use a lace and a building level. The degree of lowering is considered from the lowest point of the ceiling, while providing a place for installing lamps and laying communications, for example, ventilation collectors. Do the wiring before starting the installation.
The ends of the girders are brought into the strapping profile, and the body of the beams is fixed to the brackets with a step of 60 cm. The self-tapping screw "flea" is used for connection. Plastic lamellas are similarly fixed to the profiles. The panels are placed freely so that there is no tension for joining the seams. After installation, all cracks and joints are sealed with acrylic sealant so that they do not stand out against the background of a light coating.

