Clapboard ceiling cladding is a common way to decorate residential and utility rooms. With a competent approach to the design and implementation of work, an interesting and attractive surface is obtained, which is distinguished by practicality and functionality. Having experience in handling household tools, you can do it yourself with high quality and beautiful clapboard ceiling. To do this, you need to familiarize yourself with the characteristics of the material and the rules for its installation.
Varieties of lining and characteristics
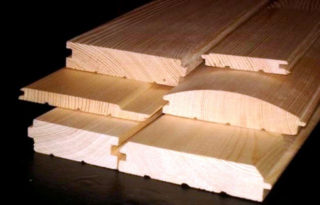
The lining is a strip, on one side of which a protrusion (spike) is made, and on the other - a recess (groove). After joining, the parts form a single shield with no through slots. The lining has a ridge, the length of which is 1-2 cm longer than the size of the recess. Due to this, after assembly, the surface becomes embossed, which gives the room a special style and charm.
On sale are lamellas made of the following materials:
- Wood. Differs in presentable appearance, ecological cleanliness, exudes a pleasant smell. The cost depends on the selected type of wood. To protect against decay and deformation, it is necessary to regularly apply antiseptics and impregnations.
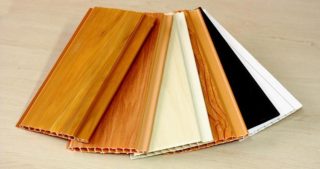
- Plastic. Panels made of PVC vary in size, texture and color. The material is light, the installation of the lining is calm on the ceiling is easily carried out alone. Plastic is impervious to moisture, but tends to fade in the sun.
- Fiberboard. The budget option, which is covered with colored paper or foil, profiles made of pressed wood fibers. The slats naturally imitate natural materials and have good sound insulation properties. They are characterized by fragility, high weight and a tendency to deform in high humidity and wet conditions.
When choosing a material, one should take into account its properties and operating conditions. Pay attention to the price in cases where lamella laying is considered a temporary option.
Advantages of lining
This finishing method is highly popular among private and industrial developers. This is justified by the obvious advantages of the material:
- Versatility. The coating looks great in any type of room. You just need to choose the right model for outdoor use and in high humidity conditions.
- Presentable appearance. The finished surface looks interesting, attractive, organically blending into any interior.
- Ease of assembly. Even a beginner in the field of repair can easily and efficiently hem the ceiling with clapboard.
- Additional heat and sound insulation. All presented models possess these properties.
- Possibility of hidden placement above the flooring of communications, installation of fans and built-in lighting devices.
- Durability, provided that the material is correctly selected, the instructions for its installation, maintenance and operation are followed.
Decorating the ceiling with clapboard is a clean process. During its implementation, various solutions are not used, there is no dirt and dust.
Calculation of the number of parts
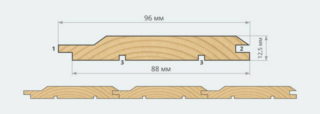
To determine the need for lamellas, you need to have such initial data as the square of the ceiling and the area of one panel minus the value of the ridge immersed in the groove.It remains to divide the first indicator by the second and find out the number of rails. Several units need to be added to the result to compensate for errors, breakages, and clippings.
Another option is to divide the ceiling size by the panel width. If several fragments are used in one, the number is multiplied by one and a half, two or more, depending on the parameters of the room.
Required tools and materials
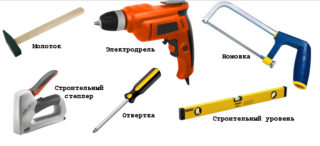
To sheathe the ceiling with clapboard, you should prepare the following tools:
- perforator, grinder, screwdriver;
- a hammer;
- roulette, level;
- mallet;
- hacksaw;
- building corner;
- scissors for metal;
- stapler.
The list of materials is determined by the selected method of fastening and the properties of the frame. It can be made from plastic, wood and metal.
You may need:
- rail and timber 20x40 mm, 40x40 mm, 50x50 mm;
- CD and UD profile;
- cross connectors;
- vertical suspensions.
Anchor bolts, brackets, self-tapping screws, and dowels are used to fasten the ceiling fragments.
Instructions for lining the ceiling with clapboard with your own hands
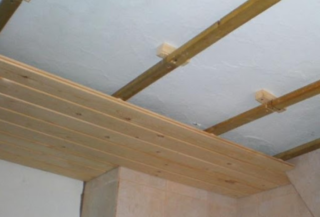
To make a beautiful and durable ceiling from any type of lining, you need to draw up a detailed competent project and a step-by-step plan for its implementation.
- Prepare your workspace. Remove objects from the room that would interfere with the installation or be damaged during installation. Just in case, close the windows with shields or remove the double-glazed windows (frames) from them.
- Carry out the processing of the floor slab. Unstable fragments are removed from it, cracks are closed, joints are sealed. In conclusion, an antiseptic and impregnation is applied.
- Assemble the frame. First, a perimeter is made at a level of 2-10 cm from the lowest corner. Then the vertical hangers are screwed on, the bearing profiles and crossbars are installed. The distance from the slab is selected based on how the space between the panels is planned to be used. It is possible to place a heater, an air duct, and install lamps in it.
- Carry out communications, fix the insulation. All objects are rigidly fixed to the slab with clamps or brackets.
- Fasten the slats to the crate. You need to start sheathing the frame from one of the walls in accordance with the chosen direction. Fragments are made in length 10 mm less than the distance between the walls. This is done to compensate for the thermal expansion of the shield and the building. Wooden lamellas are driven into the grooves with a mallet, and plastic ones - by hand until they click. Fasteners are carried out on self-tapping screws, clamps or staples. The last piece is trimmed to the width and completes the masonry.
- Install skirting boards and appliances, clean the structure from dust and debris.
A separate issue is the impregnation and painting of wood products. Experts recommend doing this before installation in order to exclude the possibility of untreated places on the ceiling.


