Buying an apartment in a building that has served for more than half a century, you need to be prepared for the fact that communications and most of the interior decoration will be worn out in it. As a rule, cosmetic repairs in such cases cannot be limited. Major restoration is required. Replacing the floors in Khrushchev is a rather laborious and expensive undertaking, there is no alternative to it. Over the years of operation, the coating has lost its performance characteristics, a huge amount of dust has accumulated in it, and insects, mold and fungus are likely to start. Replacing the wooden floor in the Khrushchev with a screed is an excellent solution, which is quite feasible on our own.
Devices of a wooden floor in Khrushchev
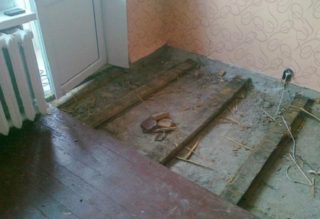
Do-it-yourself floor replacement technology in Khrushchev depends on the design features of this structure. There are several projects for which thousands of houses were built in those days. The differences lie in the structure of the structures and the material of manufacture.
The most common options are:
- Boards laid on logs. The carrier beam was nailed, glued or simply laid loosely. The floorboards were nailed with the so-called weaving. Theoretically, there should be a filler between the lags, but in practice, construction waste was dumped there and perennial dust was collected.
- Concrete slabs, roofing felt and boards. Such a project was approached when it was necessary to commission an object in the shortest possible time, and quality was in second place.
- Parquet glued to the floor slab, assembled individually or from modules. Quite often, solutions with unusually strong adhesion were used as a binder, which retained strong adhesion to this day.
In most cases, the basis is several reinforced concrete slabs placed side by side.
Necessary tools for the job
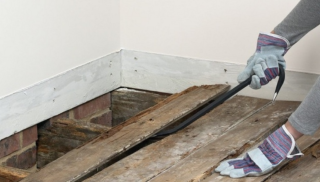
Replacing the floor in a Khrushchev is a complex process consisting of the stages of dismantling, preparing the base and arranging a new coating. Based on this, a rather impressive set of devices for various purposes will be required.
The master needs to have the following tools:
- roulette;
- nail puller;
- level;
- a hammer;
- ticks;
- hacksaw;
- paint brush;
- pliers;
- drill or screwdriver;
- rule;
- putty knife;
- construction mixer.
You should remember about things that will ensure the convenience and safety of work: a respirator, goggles and gloves, garbage bags, a scoop and a broom.
Dismantling the wooden floor in Khrushchev
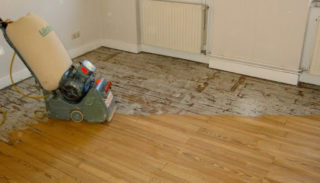
If the floors in a Khrushchev apartment creak, the reason lies in the drying out and deformation of the coating elements. As a rule, this process also captures lags, so complete disassembly is indispensable, even if it is difficult, long and messy. If the wood is still in good condition, it can be reused: replace the leaking floors in the barn, street toilet and other outbuildings, build a small fence, repair the dog kennel, put it on the shelves in the workshop.
First you need to disassemble the flooring in order to free up the area for further activities. The process is simple, even a beginner can handle it without complications.
- Removing skirting boards. If they have remained since the construction of the house, you should not stand on ceremony with them - they have long ago fallen into disrepair.When the products are relatively new, it is best to be careful to reuse them.
- Tearing off the floorboards. This should be done from one of the walls, using a damper opening for pushing in the nail puller. The board should be separated gradually, from log to log, in order to avoid its strong bending and breakage. The floorboard is then removed from the room. The manipulations with the remaining coating are carried out in the same way.
- Removing lag. The timber is of greater value than the slats and should therefore be preserved. When freeing from the glue, you need to act with a spatula and a hammer. If the nails are not pulled out, their caps can be chopped off with a chisel or cut off with a grinder.
- Freeing the boards from nails. First, they are knocked out from the side of the tip so that the cap protrudes above the surface, and then they are captured and pulled out with pliers.
Finally, the premises are cleaned and the lumber is transported to the place of its further use.
New screed
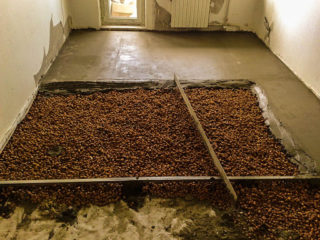
In most cases, reinforced concrete slabs sag significantly over the years of operation. The difference in level can be up to 6 cm. Together with the base, the coating gradually bends. After removing it, the base needs to be leveled and restored. Initially, houses dating from the 50s of the last century were designed for a maximum of 50 years of service, which today is significantly exceeded. Structures, if they did not come to an emergency state, have lost their design characteristics.
It is impractical to solve this problem by simply restoring the boardwalk. It is better to make a modern high-quality floor in Khrushchev using the technology of laying laminate, parquet boards, linoleum or bulk polymer composition. For this, the supporting surface must be repaired and leveled.
Screed manufacturing process:
- Inspect the slab. Mark all cracks, open or broken seams, protruding beads and pieces of nails and reinforcement sticking out of the surface. Clean the defective spots from dust, seal them with a waterproof compound based on cement or polymer.
- Treat the concrete with a deep penetration primer. It is recommended to do this at least twice in order to achieve high-quality strengthening of the surface. This action makes the concrete waterproof and improves its adhesion to substances that will be applied later. After priming, you need to wait at least a day for the base to dry well.
- Set the zero level, which is indicated on the wall by a horizontal line. Make a layer at least 2 cm thick at the thinnest part to ensure the screed has sufficient strength.
- Install beacons. Depending on your own priorities and the configuration of the room, landmarks are selected in the form of heaps of cement, paths from mortar, shaped pipes or factory-made tripods. All beacons are adjusted to the zero level.
- Knead the solution. There are several options for its composition. In apartments of multi-storey buildings, it is better to use a gypsum mixture so as not to make the structure heavier. If the height of the threshold allows, you can make expanded clay concrete fill. In a private house on a solid foundation, it is allowed to use a concrete solution from crushed stone, sand and cement.
- Fill in the forms with the selected solution. It starts off between the beacons, then stretches out with the rule. Irregularities are removed with a wide spatula. After 3-4 hours, the concrete hardens, but remains a little loose. At this point, it is advisable to remove the unevenness remaining after pouring with a float and to strengthen the surface by machining and polishing with the addition of polymer additives.
Gypsum screeds gain full strength within 3-4 days. Concrete takes much longer. Depending on the temperature and humidity of the air, this will take from 10 to 28 days. All this time, the surface must be moistened daily and protected from direct sunlight.
Replacing the wooden floor
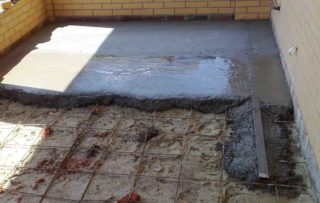
The decision to change the floors in Khrushchev is, as a rule, forced. The peculiarity of this process is that you have to deal with heavily worn structures with irregular geometry.
The coating should be replaced in the following sequence:
- Assess the situation, make a decision, choose a technology, draw up a work plan.
- Make measurements, carry out calculations, purchase the necessary equipment and materials, think over disposal issues.
- Dismantle the old coating. Take him out of the house.
- Prepare the base, repair and seal it. Stir the solution and pour in the screed. Observe the technology of its aging.
If everything is done correctly, the finishing coat will lay down smoothly and beautifully, the screed will last for more than a decade.


It is advisable to indicate that sound insulation should be restored with a layer of expanded clay, mineral slab or sheets of expanded polystyrene. If this is not done, a claim from the neighbors below is possible.