The frieze between the ceiling and the wall is in sight, the quality of its finishing plays a role in the perception of the room as a whole. Smooth areas are easily put on putty or glue. Difficulties arise when they begin to make out the inner or outer corner of the ceiling plinth with their own hands. There are certain tips for doing the joining so that the joining line of the two baguettes has a coherent and neat appearance.
General guidelines for the formation of corners on the ceiling plinth
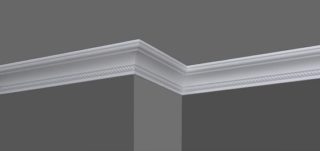
The ceiling frieze is made of gypsum, wood, but more often polyurethane, expanded polystyrene or foam products are used for finishing, and plastic is also used. Gypsum strips are expensive, heavy, and difficult to install on mortar. Modern materials are in no way inferior to them in appearance, but it is much more convenient to work with them.
Recommendations for cutting finishing friezes:
- it is easier to make corners on narrow baseboards, therefore, for standard rooms with a height of up to 2.5 - 2.6 m, products with a width of 6 - 7 cm are taken, and for high ones, a size of up to 25 cm is used;
- rooms with wood in the interior are trimmed with friezes from the appropriate material;
- in wet conditions, plastic skirting boards are placed, but ready-made corners are used for their corner connection;
- you need to familiarize yourself with the properties of the baseboard material before starting cutting, since the products react differently to the action of the sharp edges of the tools;
- the cut is made even, in a straight line, trying not to bend.
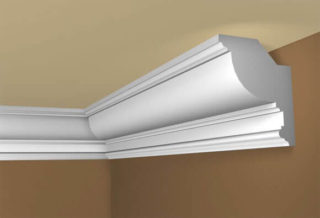
Wood is one of the most durable materials; hacksaws are used to cut skirting boards. Cut wide strips with an electric jigsaw, but put a file with fine teeth. After cutting, the ends are cleaned with sandpaper, since burrs and chips appear.
Polyfoam is a brittle material and crumbles when cut. It is cut with a knife on drywall, while a new blade is often put. Do not press sharply on the knife, since the body of the plinth can be pressed through, and instead of a neat cut, a curved end surface will appear. Fine-grained emery No. 180, 240 is used for cleaning.
The most durable friezes are obtained from extruded polystyrene foam. Such products are easy to cut, while the edge is smooth, without a torn edge. It can be cut with a sharp knife or a hacksaw for metal with fine teeth, cleaning is not required, sometimes emery is used.
Docking methods
Ceiling fillets have a simple or embossed surface. In the first type, it is difficult to draw up the cut site, since it is clearly visible on a smooth wall. The second variety is also complex, since it is required to successfully combine the protruding details of the ornament so that there is no visible disruption in the rhythm of the pattern.
Almost always the angles in the room differ from 90 °, so there is a need for adjustment. The exceptions are cases when the corners between the walls are specially aligned for a rectangular joint. The end surfaces of the joints can be on top of each other, or a gap forms between the edges if the dimension in degrees does not correspond to the norm.
Ceiling friezes fit at the outer and inner corners, so the location of the plinth in the miter box will differ depending on the type.Length measurement is also different for the inner strip or over the outer corner.
Fillets are joined at the corners and joined along the length. Standard dimensions of finishing panels are 2.0 - 2.5 m, and the length of the walls may be longer. Cross-cuts can be made at 90 ° (not recommended) or the ends are formed along an oblique line.
The use of a miter box and its absence
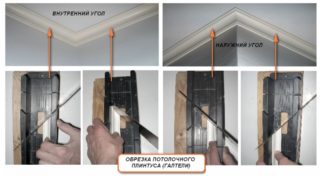
The miter box is a device for cutting profile materials. Made in the form of a tray in which the strips are installed to be cut at an angle of 45 or 90 °. The miter box is made of plastic, wood, non-ferrous metals, for example, an aluminum alloy. Metal fixtures include a saw or a saw holder to rotate and secure at any angle. There is a miter box with a clamp that fixes the strip of material.
The rule of working with the tool:
- used if the external and internal corner joints on the ceiling are 90 °;
- the plinth is laid in the device tray and cut with a saw, which is placed in special slots on two opposite sides;
- the part is pressed to one of the sides, depending on what type of connection the cut is intended for.
To cut without a miter box, you need to use the markings where the skirting board is installed. A finishing panel is applied along one wall and a pencil line is drawn along its edges on the ceiling and wall. Do the same with the second vertical surface, also draw two lines. Control points are obtained at the intersection of the lines. The plinth is again placed in the corner and the marks obtained are transferred to it.
Internal corners and external cuts
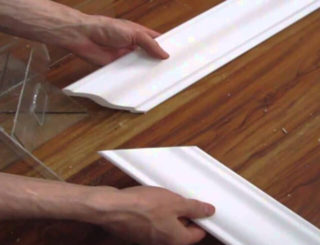
To make an external corner joint, put friezes on both sides and mark the intersection point on the ceiling. From the adjacent glued part to this point, measure the length with a tape measure and mark it on the whole plinth panel. The end cut on the strip in this case is located with a turn from the observer.
The panel is cut in a miter box at 45 °. For this, the device is placed in front of you, the plinth is placed, finding which side it will be turned to the ceiling. The parts are placed in the tray on the right and left as they will stand in the mounting position so that there is no confusion. The frieze is supported on the walls of the miter box and a correct even cut is made.
Finished parts are tried on the ceiling and coordinated if necessary. The inner corner joint is made in a similar way, while the strip is placed in the miter box in the opposite position. When installing, the gap is sealed with putty or glue, then sanded.
Non-standard situations
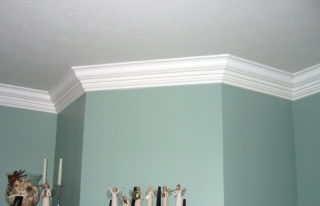
Ceiling friezes are used for framing plasterboard suspended ceilings. The forms and schemes of such multi-tiered structures are diverse, therefore difficulties arise with the installation of plinths.
Types of corner joints in non-standard situations:
- obtuse corners;
- sharp protrusions;
- rounded areas with skirting joints.
In most cases, ceiling markings help. If joints of the same degree are repeated many times, you can cut out a template that is used several times. The use of a ready-made sample speeds up the work, since it excludes measurements and markings of control points.
There are sharp internal corners less than 30 °, which require an individual approach and measurement. Such joints are performed locally, the technology is different each time depending on the complexity.
Obtuse angle
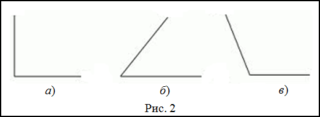
Angles greater than 90 ° are found with non-standard wall protrusions around the perimeter of the room or at the intersection of two walls from different rooms. Blunt joints are more often obtained when protruding bay windows are framed by a plinth.
In the inner and outer blunt junction, the butt on the cut will behave differently.In the first case, it will unfold closer to a rectangular cut, and in the second it will be flatter. This should be taken into account when working with a miter box.
If the squareness is violated by 2 - 3 °, then there is no point in making a special template. Adjustments can be made directly in the miter box. In another case, measurements are made on the ceiling or a workpiece is made in shape, then friezes are cut off along it.
On the inner obtuse corner of the ceiling, stripes are alternately placed so that they rest against the wall with their ends. Lines are drawn along the lines, and their intersection is marked on the sides of the frieze. You can make a corner on the ceiling plinth without a miter box, the cut is made with a hacksaw with fine teeth, and the blade is positioned exactly vertically, otherwise the joint will not come together.
Sharp corner
Wedge-shaped corners are as common as obtuse ones, so their design requires attention. More often, for such work, you need to make a homemade miter box.
Step-by-step procedure for making the device:
- an intersection of lines is found on the ceiling, they are marked on a construction square made of wood;
- the cutting lines are immediately sawn down so that the opposite holes are on the same line, the grooves are made to a depth of 6 cm;
- from the cuts, they retreat in both directions from the middle by 15 cm and make two marks using a protractor, draw lines at 45 ° on the side walls;
- recheck the slope of the lines, then saw through the grooves into which the saw will be inserted when cutting the frieze.
When creating a miter box, you need to carefully choose the slope in order to get the perfect joint of the baguette on the ceiling. You can fill up the gaps and grind, but it is better to make the perfect connection right away.
Rounded
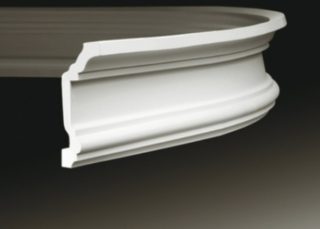
Round shapes on the ceiling create a rich look in the interior and make it interesting. Ceiling skirting boards hide irregularities, and smooth and smooth lines add completeness to the finish.
- The foam plinth is not flexible, it will break at the bend, so it is not used for rounded lines.
- A wooden frieze can only be installed on convex surfaces, while you need to cut out parts in the form of triangular cuts inside - the line will turn out not smooth, but corners. Sometimes this configuration is provided by design.
- Plastic moldings are elastic, easily bend and straighten back. For their fastening, hardware is used, which are then putty. A semicircular shape can be given by heating with a building hair dryer.
If you need to give a small radius of rounding, use special bending machines for moldings, for example, made of wood or plastic. You can glue the radius in pieces, then putty the resulting gaps.
Facilitate work
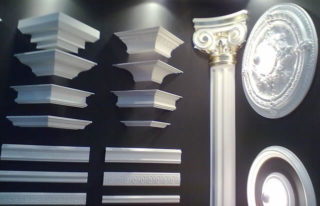
Ready-made corner pieces are produced in the form of decorative elements with various surfaces. They are selected according to the size of the lateral side of the frieze so that the corner after installation is one piece with the strip and does not look like a foreign insert.
Varieties of ready-made corner connectors:
- elements with which the frieze is connected end-to-end, they are used to design right angles;
- details into which the edges of the finishing strips are wound, these corners allow you to hide small errors of the problematic connection;
- the outer corners are glued from above, hiding the baguette joint on the corner section of an irregular shape.
Installation consists in gluing on the turn of the walls. The condition for attaching the baguettes is the complete drying of the glue or putty under the corner.


