Often, the owners of summer cottages and private houses prefer to make a fence from a wooden picket fence with their own hands. This is due to the availability of the material and the simplicity of its installation - one person can cope with the work with minimal construction skills.
Pros and cons of the material
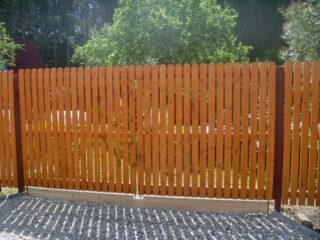
The picket fence is environmentally friendly and has an attractive appearance. It can be treated with paints and varnishes that change the shade or emphasize the wood pattern. Other pluses include:
- the ability to lay elements in different ways, providing room for design creativity;
- low weight of products and ease of installation;
- ease of replacement of damaged elements;
- good air permeability;
- compatibility with many architectural styles.
The disadvantages include the flammability of the material and its susceptibility to precipitation. The severity of these properties can be reduced by using antiseptics and flame retardant impregnations. In addition to the classic wooden picket fence, there are other types - metal with a polymer coating and made of wood-polymer composite.
Quantity calculation and preparation of materials
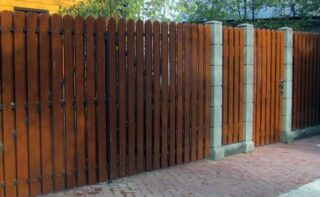
To install a fence from a wooden picket fence with your own hands, you must first prepare a drawing that indicates the location and dimensions of the main structural elements. It is also important to calculate the required amount of material. To do this, you can use the formula: K = D: (D1 + L), where K is the number of pickets, D is the length of the section, D1 is the width of one element, L is the distance between adjacent strips.
Before starting work, you need to carefully inspect the raw materials. Uneven pickets and elements with signs of deterioration cannot be used to create a structure.
Even before painting and priming, the raw material must be impregnated with an antiseptic. It is advisable to do this even before the construction of the fence. When choosing a decorative composition, you should not give preference to oil paints. This coating will crack after a maximum of 2 years. However, any paint will have to be renewed every few years. When using protective and decorative compounds, it is important to strictly follow the manufacturer's instructions.
A modern and original method of protecting wood from damage is treatment with an antiseptic preparation with a coloring agent using the "vacuum-pressure-vacuum" technology. It will protect the material from rotting and pests for a long time, while additional layers of paint and varnish materials are not required to be applied to the pickets.
Territory marking and installation of support pillars
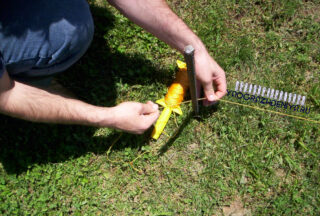
Before erecting a fence, vegetation is removed along the perimeter of the future structure, hemp (if any) is uprooted, and the grass is mowed. If the terrain has a slope, this does not need to be corrected. If the fence has already been installed before, it must also be completely removed. Then, in the places of future supports, pegs (0.6-0.7 m high) are mounted, and a rope is stretched between them, denoting the boundaries. The distance between the posts is 2-2.5 m.
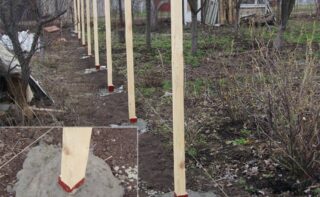
When erecting a fence made of euro-type shtaketnik, buried concrete supports are often used. This is not necessary for a conventional wood panel construction. Here, for the supports, a square bar with a side of 0.15 m is used.This option is also good because, if necessary, the damaged post can be easily replaced. Before installing the first support, a depression of 1-1.5 m is created under it using a shovel or a drill. Then a pillar is placed strictly vertically in it. The evenness of the installation is controlled by the building level. The bars must first be treated with an antiseptic impregnation.
Installation materials and tools
To prepare the site, you will need a lawn mower, pegs, and a strong rope. To install the supports, you need a tool for creating holes - a hand drill or a shovel. The latter is also useful for fixing the pillar in the hole.
You will need nails to secure the pickets. When choosing them, you need to take into account the thickness of the slats and frame elements - total and separately. The fasteners should not be too long (otherwise there is a chance of splitting) or short (then the connection will be unreliable).
Basic types of styling
When the supports are fixed, the transverse components of the frame are nailed to them at marks 1/3 and 2/3 of the length of the picket fences. Another lag can be strengthened between them. This is especially true in areas where there are frequent gusts of wind. Then the pickets can be mounted on the frame.
Staggered
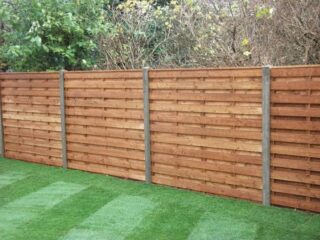
This design involves the placement of pickets on both sides of the fence in a checkerboard pattern. In this case, the same distance between two adjacent elements is observed. Along the length of the crossbars, the sections that are not covered by strips from the outside are in contact with them from the inside.
Vertically and horizontally
The classic vertical version is the easiest to implement. You can make the pickets fit tightly together or leave a gap between them. Horizontal mounting requires additional logs. Another idea is to place the planks in a slide when the tops of the vertical planks differ in height. A tree-like design is obtained when the pickets have tops in the form of sharp triangles.
You can paint the pickets and logs after the installation is complete. But if a metal euro-shtaketnik is used, it is not customary to do this. In this case, the logs are treated with a product that protects against corrosion and allowed to dry. Only after that, painted slats are mounted on them.
Before painting, wooden logs must be primed. The mixture is allowed to soak and dry completely. Periodically, the paint and varnish composition is subject to renewal. Its timing depends on the external condition of the fence. Usually the structure is painted every 2-4 years.


