A reliable and durable fence - insurmountable for violators and opaque for prying eyes - is an obligatory attribute of a country house or summer cottage. A self-made profiled sheet fence meets the main requirements for fences. There are several construction nuances that must be strictly observed.
Advantages and disadvantages of the design
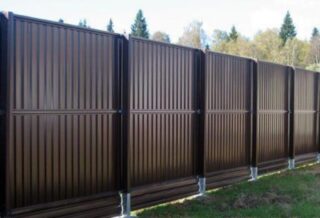
Decking is a popular material for making fences. This is due to the positive properties of steel sheets:
- low price;
- ease of installation;
- a variety of color options, including with a pattern;
- lightness, therefore, reduced requirements for the foundation;
- high anti-corrosion protection;
- in various sizes that can be agreed with the supplier;
- availability at retail outlets;
- resistance to gusts of wind, subject to the installation rules;
- minimal effort during maintenance - polymer paints do not fade in the sun, excluding the annual painting of the fence.
Numerous advantages do not exclude disadvantages:
- the material is easily damaged by vandals, since the sheet thickness rarely exceeds 0.5 mm;
- fastening with self-tapping screws is available for unscrewing, which is excluded by the installation of each sheet with several rivets;
- the wrong scheme and technology of fastening poorly resists gusts of wind;
- if the protective layer is damaged, rust spreads quickly;
- solid sheathing is not blown by the wind, which causes stagnation of air and diseases of cultivated plants.
There are two options for a fence made of corrugated board:
- fencing with solid filling;
- sectional view, when the base is brick or stone pillars.
The final decision is made after analyzing the advantages and disadvantages of the material and execution options.
Varieties of corrugated board
Profiles are classified according to the following characteristics:
- appointment;
- characteristics of steel;
- decorative and protective coating;
- the shape and section of the corrugation - the curved part of the sheet.
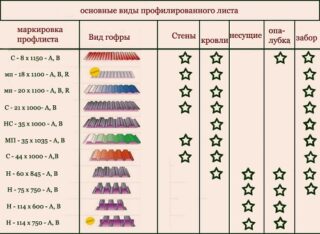
According to the classification by purpose, the profiles are designated by letters:
- H - load-bearing roof decking that can withstand the weight with insulation;
- NP - for decking of steel-reinforced concrete floors;
- NK - roofing decks with a bearing and enclosing function;
- C - for wall fencing;
- NS - for decking and walls.
The marking of standard factory products consists of an alphanumeric code.
For the construction of a fence, the first and second groups are important:
- letter denoting the purpose;
- a group of numbers indicating geometric dimensions.
For fences, brand C is most often chosen, given the lowest price from the entire range.
Popular are:
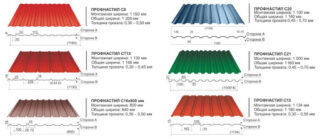
- С-8 - wall profile with a wave height of 8 mm, suitable for fences up to 1.5 m with small spans up to 2 m, as well as temporary fences;
- S-10 withstands gusts of strong wind and the weight of snowdrifts, is installed on fences up to 2 meters;
- S-14 and S-18 are used for high fences with long spans;
- S-20 and S-21 provide the greatest strength and durability of the structure against vandals.
Profiles with the HC marking are used less often due to the high price.
The color palette of sheets according to GOST must correspond to the RAL line, which ensures an easy selection of an element instead of a damaged one.
To protect against corrosion, the sheets are coated on both sides with acrylate, polyester or epoxy primers. The front side over the primers is painted with polyester, polyurethane, acrylate, polyvinylidene fluoride (PVDF) or PVC plastisols.
Often, products are finished with a decorative coating that imitates the structure of wood or stone. These fences don't look monotonous.
Reverse sides can be treated without primer, using polyester or epoxy enamels.
Preparatory work
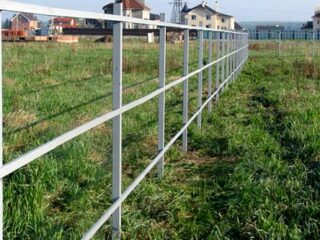
In order for the construction of a fence made of profiled sheet with metal pillars to go quickly, it is necessary to carry out thorough preparation in advance.
Do-it-yourself work on installing a fence from a profiled sheet begins with clearing the territory. Weeds and debris are removed. The path should be flat and not provoke accidental falls as a result of which the sheet will surely become unusable.
When leveling the soil, take into account that in areas with a slope, one sheet is installed 15–20 cm lower than the other.
Step-by-step algorithm for preparatory work:
- They mark the territory with a construction cord, focusing on the boundaries of the site indicated in the plan.
- Beacons are made in the places where the supports are installed. Necessarily provide for pillars of gates and wickets.
- Accurate distance measurements are taken for each side of the site.
Based on the dimensions obtained, a sketch or diagram of the fence, wicket and gate is prepared.
Calculation of the amount of materials and the necessary tools
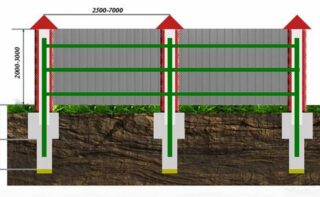
For the construction of a solid filling fence, the following materials will be required:
- Profiled pipe with a cross section of 60x60 mm for fence posts and gates, it is possible to use products of a circular cross section with a diameter of 50 mm and more. They are guided by the weight of the gate and wicket. It is taken into account that it is necessary to deepen into the ground by 1.2-1.5 meters.
- A round or profiled pipe 40x60 or 60x60 cm for each rack, the length should provide for a 1-1.5 deepening into the ground.
- Decking with a total width equal to the length of the fence + 10%. For a fence with brick posts, you can calculate the exact number of sheets. When calculating, the useful width of the products is taken into account, since the fastening is carried out with an overlap.
- Protruba 20x40 or 30x40 mm for logs. Sheets up to 180 cm high are attached to 2 transverse jumpers, more than 3 or 4 - the distance between horizontal parts should not exceed 1 meter.
- Roofing screws or blind rivets at the rate of 9 pieces per meter of fence length when fastened to 2 logs and 13 pieces if there are three crossbars.
- Cement, sand and crushed stone based on the number of supports.
For strip foundations, separate calculations of the amount of materials for formwork, concrete pouring and reinforcement are carried out.
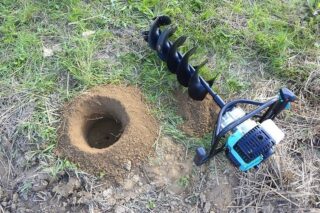
For work you will need:
- bayonet shovel for digging holes (or yamobur) and shovel for mixing concrete solution (concrete mixer);
- trowel, trowel, mortar container;
- level, plumb line, ramming;
- welding machine, grinder, drill with bits for the size of the head of self-tapping screws;
- brush, anti-corrosion primer and paint for outdoor use;
- a special device for holding sheets if you have to work independently.
To fasten the profiled sheet with rivets, they purchase a special tool and drills with a diameter of 0.2–0.3 mm larger than the size of the rivets.
Building recommendations
After the preparation of the territory, the procurement of materials and the acquisition of tools, they proceed directly to the construction of the fence.
The step-by-step instruction consists of several points:
- Territory markings.
- Installing supports or pouring a foundation with built-in pillars.
- Installation of transverse profiles.
- Fastening the profiled sheet to the logs.
- Manufacturing of gates and wickets.
Before starting work, all metal pipes are treated with an anti-corrosion primer and painted with paint for outdoor use.
Installation of supports
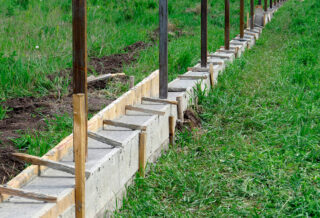
Higher requirements are imposed on the quality of the installation of supports. If the depth is insufficient, the fence with high windage can be blown down by gusts of wind.
Single pillars deepen at least 1.2-1.5 meters.
The order of work is as follows:
- Exactly in the marked place, they dig a hole 1.5 m deep and 15–20 cm in diameter. Use a bayonet shovel or a mechanized yamobur. In places where there are tree roots, exercise caution - a powerful tool, if it gets stuck, you can get serious injury.
- The bottom of the recess is covered by 10-15 cm with a mixture of crushed stone and sand, which is tamped.
- A support is installed on the pillow using a level, the post is placed strictly vertically and secured with spacers.
- Butting is carried out (backfilling with gravel and sand with tamping) or an empty space in the pit is concreted. The weight ratio of cement: sand: gravel should be no less than 1: 2.8: 3.8. The mixture should be 10-15 cm above the ground surface, it is formed in a slide so that the water flows down from the column.
To arrange the foundation, you need to do it differently:
- A trench is dug along the perimeter of the site from 50 cm in depth and 20-25 cm in width.
- Formwork is made of the required height.
- Reinforcement is carried out with a metal or composite rod with a diameter of 10 mm.
- Install and secure the pillars.
- The formwork is poured with concrete with a strength of at least M150.
The full set of concrete strength occurs after 28 days, but being careful, you can install the logs 5-7 days after pouring. You can tie the buffered posts right away.
Mount lag
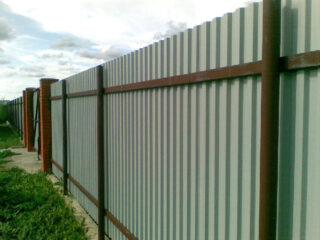
The crossbeams are fixed strictly horizontally. For marking, a hydraulic level is used, with the help of which marks are applied to the supports.
For the convenience of working alone, clamps or rigidly fixed templates are used. Cross members and pillars are fastened by welding or bolting. The first option is preferable, since pieces of bolts and nuts will not be visible on the inner surface of the fence. In addition, welding is faster and easier to work with.
The distance from the ground (foundation) to the log is chosen 25–35 cm. The upper crossbar should be 20 cm below the sheet level.
After installation, beads of molten metal are removed from the welding sites, the surface is cleaned with a grinder. If necessary, weld on poorly connected parts. Welding points are primed and painted.
Installation of a profiled sheet
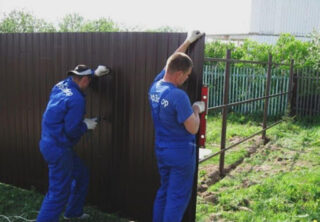
The professional sheet is attached to the logs with roofing screws, rivets or bolts. The first option is the most widespread and technologically advanced. Experienced craftsmen drill the self-tapping screw right away. For those who do not have sufficient skills, it is better to first drill a hole in the sheet and pipe. This will avoid slipping the self-tapping screw and damage to the surface. For 1 running meter, lags use 3 self-tapping screws. The number depends on the number of waves, they are attached through one wave.
For rivets, a hole with a diameter of 0.3 mm larger than the diameter of the rivet itself is drilled and installation is carried out using a special tool.
Fastening with bolts has not found a popular application, since the procedure is laborious, it is necessary to drill a through hole in the sheet and two walls of the pipe.
Self-tapping screws are easy to unscrew and steal the profiled sheet. For protection, it is advisable to make 2-3 attachment points for rivets or bolts along the edges. In this case, the cybercriminals' task will become much more complicated.
Hanging the gate
For fences made of profiled sheet, when making them with your own hands, swing gates are often made. To do this, it is necessary to make a frame according to the size of the flaps and reinforce it with transverse stiffening ribs. Use metal profile pipes with a cross section of 20x40 mm. The upper parts of the hinges are welded to the sash.The gate is applied to the support post, a mark is made for the lower hinge element, and it is welded to the post.
Sheathing is carried out after hanging the gate, after the end of all welding work.

