For most vehicle owners, a garage is more than just a storage, repair and maintenance facility. Here you can retire, relax, do your hobby and just spend your leisure time with friends. It is uncomfortable to do this in the cold, and temperature drops have a negative effect on the room with all its contents. The solution to the problem of frost, dampness and condensation is to install a stove in the garage. This procedure is simple, but it requires taking into account many small but important nuances.
Features and principle of operation of the stove
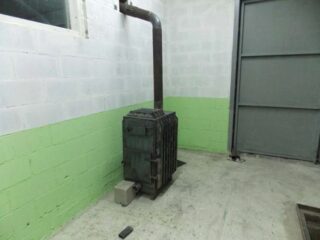
Autonomous mobile stoves (potbelly stoves) have a long history and a wide range of applications. Despite the development of technologies and the invention of new efficient and compact heating devices, they do not lose their relevance. Working on almost all types of fuel, stoves do not depend on the availability of electricity, water, gas, season and weather conditions. Despite the low efficiency (up to 0.7), products are often the only means of heating small rooms, both within the boundaries of a settlement and in a completely deserted area.
A traditional potbelly stove for a garage has such a device:
- body;
- the combustion chamber;
- ash pan;
- chimney.
The principle of operation of the products is simple. Solid fuel is loaded into the furnace and ignited. Combustion is supported by fresh air entering through the ash pan and grate. Ashes fall into the ash pan, smoke goes out into the chimney, the walls of the body and the chimney exude heat and heat the room. In the process of work, new portions of fuel are added, the ash is removed from the chute and placed in a waste container.
Pros and cons of using stoves for heating
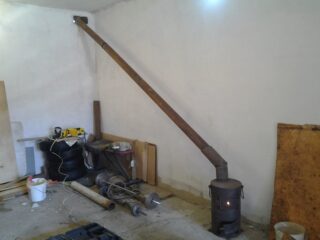
The decision to put a stove in the garage is made by motorists quite often, and there are numerous reasons for this:
- complete autonomy, independence from internal and external conditions;
- quite decent heat transfer in relation to the consumed fuel;
- rapid heating of the case, and accordingly the room;
- no need for complex installation - only a flat base and a hole for the pipe;
- no permission is required;
- the possibility of upgrading for mining and a gas burner.
The heater also has disadvantages:
- simple and even unpresentable look;
- low efficiency due to the loss of half of the thermal energy in the literal sense of the pipe;
- a high chimney is needed to ensure good draft;
- the need for frequent cleaning of the body and pipes;
- you need to load fuel frequently;
- risk of carbon monoxide poisoning.
With the right approach to installation and operation, almost all problems can be fully or partially solved.
Preparatory work
After choosing a finished product or drawing up a homemade project, you should decide on the installation site and prepare it. It is advisable to install the installation against the far wall in the corner or in the middle. This way, the generated heat will not escape through the door, but will be reflected from the walls and will fill the room.
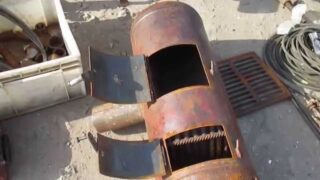
You should consider the following points:
- If the floor is earthen, it is necessary to make a separate foundation for the hearth. A steel sheet will need to be laid on a wooden or polymer base.
- In the part of the building opposite from the stove, in the lower part, you need to make an outlet. It is needed to ensure good traction and oxygen flow into the furnace.
- It is necessary to retreat from the wall by 50-60 cm - this will reduce heat losses. If they are made of flammable material, sheathing with iron or asbestos will be required.
- Consider in advance the place of passage of the pipe through the supporting structures. The best option is to exit through the wall at two angles of 45 degrees.
- Provide an umbrella on the chimney. This detail will save it from snow, debris, birds and strong gusts of wind.
In addition, options such as heat exchanger, water circuit and external radiators can be developed.
Calculation of basic parameters
Heater parameters are calculated based on criteria such as the size of the garage, the availability of free space and the climatic conditions of the region. One of the points is to determine the height and diameter of the chimney. A section of 100-150 mm is considered optimal. To reduce the amount of carbon deposits as much as possible, it is better to overpay, but install porcelain or coaxial pipes.
Required materials and tools
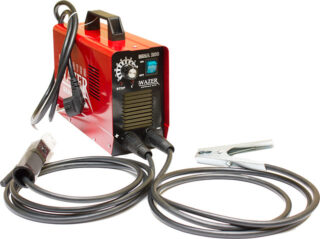
To assemble a garage potbelly stove with your own hands, you will need the following devices:
- grinder with cutting and grinding disc;
- welding machine;
- roulette;
- level;
- drill;
- screwdrivers;
- spanners;
- puncher;
- a hammer;
- ladder.
The following materials are needed:
- old gas cylinder;
- sheet metal 3-5 mm;
- iron handles;
- fittings;
- iron pipes;
- clamps;
- bolts and nuts.
To ensure safety, you should prepare a robe, a protective mask and goggles, a gauze bandage or respirator.
Step-by-step instruction
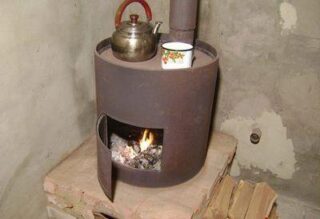
The standard sequence for assembling a potbelly stove:
- Drawing up a diagram, calculations, purchase of building materials, preparation of tools.
- Cleaning the shell blank. Remaining propane is discharged from the old gas cylinder. The lid is twisted, the inside of the container is washed several times with soapy water.
- Cutting a hole for the firebox. It is done at a height of at least 15 cm from the bottom. This clearance is necessary for the ash pan to run freely. You can immediately cut an opening for a drawer for ash.
- Manufacture or purchase of factory-made grates. With their own hands, gratings are made from reinforcement or sawn and welded strips of cast iron.
- Welding to the body of the supports. They should be 10-15 cm high. The metal must be chosen strong and thick so that it is possible to put reliable seams on it with electrodes No. 3-4.
- Welding of grate supports. The best option is a 20x20 mm corner. The distance between the shelves should be taken 3-4 mm more than the width of the grate - for its thermal expansion under strong heating.
- Manufacturing of ash pan, doors and poker.
- Screwing the door to the body. Inserting the ash drawer into the opening.
- Assembly and output of the chimney to the street.
In conclusion, a control firebox is carried out. If there are smoke leaks, clamps and an asbestos cord are applied to these places.
Safe installation of the heater
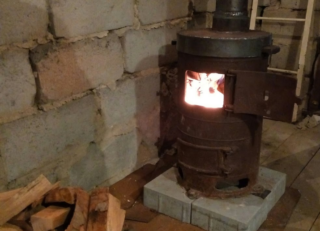
When installing and operating the oven, the following safety precautions must be observed:
- install protective screens made of sheet iron under the hearth and at nearby objects;
- insulate the passage through the wall with non-combustible compounds - clay, brick, asbestos;
- do not make right angles on the chimney, avoid horizontal sections more than 200 cm;
- it is forbidden to melt fuel with explosive substances - alcohol, acetone, gasoline;
- keep the fuel no closer than 100 cm from the working firebox.
If possible, you should not leave the potbelly stove unattended.
Operating rules
Theoretically, you can heat the stove with anything that burns. But the best option is firewood, which can often be collected in sufficient quantities for free.
The following rocks burn with minimal fuel emission:
- Birch;
- cherry;
- acacia;
- apricot;
- willow;
- aspen;
- oak.
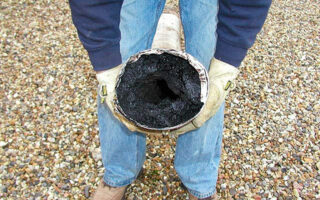
It is recommended to avoid conifers such as spruce, pine and larch. When they burn, creosote is formed on the walls of the chimney, which can ignite when heated strongly.
Cleaning should be carried out in the firebox and chimney. This should be done with constant use on a monthly basis, and with periodic use - every 20 furnaces. The best option is a plastic, copper, or brass brush. You need to start cleaning from above, gradually, as the lumen is cleared, going down. If complications have arisen with the mechanical option, carbon deposits can be burned out with potato peelings or aspen wood. It is even easier to use specialized household chemicals.


