Your own sauna is a source of positive energy and health. In order for it to please its owners for many years, you need to take care of choosing the right insulation and decoration. High-quality thermal insulation saves fuel, and the correct cladding creates a favorable microclimate and mood. Wooden lining is the best option for decorating the interior of the bath. The material has medicinal phytoncides released when heated. A wide range of shades and textures of wood allows you to create a unique interior.
- Nuances of bath insulation outside and inside
- Features of the material for decoration
- Suitable wood species
- Foil for thermal insulation of steam rooms, baths and saunas inside
- Varieties of foil for bath cladding
- How to calculate the amount of material
- Do-it-yourself lining of the steam room with clapboard
- Methods for fixing the lining
- Sheathing device
- Thermal insulation of sauna walls and ceilings
- Decorating near the stove in the steam room
- Wall cladding
- Finishing
- Helpful hints
Nuances of bath insulation outside and inside
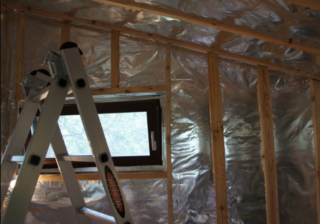
The walls of the bathhouse are built from different materials, a blockhouse made of thick logs requires minimal insulation, and a building made of bricks, foam blocks or a frame structure needs high-quality thermal insulation. The cladding from the inside and outside will protect against the penetration of cold, drafts, and reduce heating costs.
It is recommended to arrange the external cladding as a ventilated facade. The design requires a frame, laying a heat insulator and finishing. Mineral wool slabs and expanded polystyrene are used as insulation. They are fireproof, durable, and have low thermal conductivity. The cladding is a block house, lining, siding.
Special requirements are imposed on the materials of the inner lining and insulation. Products must be environmentally friendly, not have toxic emissions when heated, resistant to moisture and high temperatures. The optimal choice is wood lining and foil-coated basalt wool. The use of boards based on polystyrene is possible only in the rest room and dressing room, rooms where the temperature does not rise to high levels.
Features of the material for finishing

A special microclimate is created in the bathhouse and sauna, characterized by high temperature and humidity. For their decoration, a material is needed that can withstand such conditions, aesthetic and safe. The best option is wood. Decorating the bath with clapboard will provide comfort, healing phytoncides and attractiveness of the interior. The material has low thermal conductivity, does not burn the body upon contact, and dries quickly.
Lining is a thin board with a longitudinally located spike and groove. After assembly, no gaps or gaps remain on the surface. One of the varieties of lumber is eurolining. The lamellas have 2 grooves on the back side, which serve to drain moisture and prevent deformation during drying. They are made only from dried sawn timber, the tongue-and-groove connection is characterized by an increased size - up to 8 mm. The use of euro lining improves the ventilation properties of the cladding, its durability and quality.
The advantages of using lining in the bath:
- Environmental friendliness and safety of the material, under the influence of high temperature, substances beneficial to health are released.
- Decorative attractiveness of cladding, wide possibilities of decoration.
- Resistant to moisture, temperature fluctuations and mechanical damage.
- Availability of self-assembly without the involvement of specialists.
- Long service life without loss of performance.
- Excellent heat and sound insulating properties.
The cost of the material per square meter depends on the type and type of wood. Rare wood (Canadian cedar, oak, abash) will cost more, but it has excellent performance characteristics. Budget options (pine, spruce, aspen) are more popular due to their affordable cost.
Suitable wood species
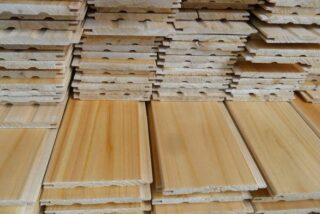
When choosing a wood species for clapboarding a bath, take into account the purpose of the room. Coniferous boards are not recommended for cladding a steam room. Due to the high temperature, they release resin, which causes burns upon tactile contact, and aromatic components, which in high concentration provoke an allergic reaction. The steam room is decorated with hardwoods:
- Linden - the low heat capacity of lumber, the pleasant aroma and golden hue of the boards ensured the popularity of the lining when decorating saunas. The wood is durable, easy to work with, it serves for a long time in extreme conditions.
- Alder - lamellas have a reddish tint; when heated, they release healing tannins. The tree dries quickly and is resistant to moisture. It has a soft texture with few knots. One of the advantages is the democratic cost.
- Aspen - the breed has a light shade, does not deform from moisture and temperature fluctuations. The lining heats up slightly, it is safe when used in a steam room.
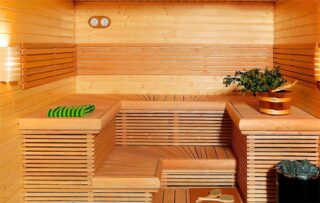
For other rooms, the lining of the bath from the inside with clapboard is performed by any type of wood:
- Larch - wood is the most resistant to moisture, has a solid structure and a beautiful pattern. Due to its strength, it is difficult to process.
- Pine - has a pleasant aroma, does not rot. The material is strong and durable, suitable for facing dressing rooms and rest rooms.
- Spruce - the board is distinguished by a small amount of knots and emitted resin, a light shade does not darken over time. The advantage is low cost.
- Cedar is an expensive reddish-brown material that gives off a pleasant aroma with medicinal properties. The tree is not afraid of moisture, it has high thermal insulation characteristics.
When choosing a lining, its grade is taken into account. For the steam room, material of class A or extra is required. Such lamellas have a smooth surface without knots and defects, which during operation become a source of cracks and deformation. In the rest of the premises, it is allowed to use class B products with minor surface defects.
Foil for thermal insulation of steam rooms, baths and saunas inside
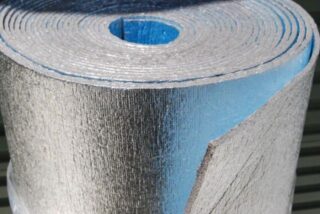
The lining of the bath rooms from the inside with foil and clapboard allows you to keep warm as much as possible. The aluminum coated material has the ability to reflect up to 97% of infrared radiation. You can cover not only the walls with foil, but also the ceiling. The pluses of the material include:
- resistance to moisture and corrosion;
- vapor permeability;
- light weight;
- affordable price;
- health safety;
- incombustibility.
Foil is produced in rolls 1-1.5 m wide and in sheets, it can be soft and hard. For saunas, products with a thickness of 50-300 microns are recommended. If the building is made of thick timber, then only the space near the stove can be sheathed. Considering the vapor barrier characteristics of the material, the choice is optimal for any bath. Brick and frame structures must be insulated, in this case, a thin sheet is not enough, the installation of foil-clad products based on mineral wool or expanded polystyrene will be required.
Varieties of foil for bath cladding
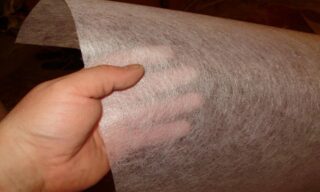
Aluminum foil is a thin material that breaks and crumples during installation, therefore, for ease of use, it is made on a different basis:
- Kraft paper - the material has elasticity, excellent vapor barrier properties, easy to cut, fastened with staples.
- Fiberglass - the canvas can withstand temperatures up to 500 ° C, does not allow moisture to pass through, and is resistant to mold. Butt-mounted, can be used near the stove.
- Expanded polystyrene - insulation with a layer of foil is sold in sheets measuring 120 × 60 cm, 2-10 cm thick, it is recommended for interior decoration (except for the steam room).
- Polyethylene foam - roll cloth with one-sided or double-sided aluminum spraying is intended for operation at temperatures up to 100 ° C.
- Mineral wool - foil-coated products are produced in the form of mats and rolls, they have high thermal insulation properties, are suitable for installation in all sections of the bath.
Foil is a versatile material used for walls and ceilings. Products based on foamed polyethylene, polystyrene and mineral wool perform the functions of steam and thermal insulation.
How to calculate the amount of material
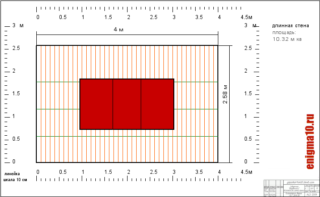
The simplest option for calculating the amount of material required for sheathing and insulation of a bath is by the area of the premises. You will need to measure the height, width and length of the rooms.
The area is calculated by the formula S = 2HL + 2HDwhere:
- H - height;
- L - length;
- D - the width of the wall.
The area of the existing window and door openings is subtracted from the result. The area of the ceiling is calculated separately - its length and width are multiplied.
You can count the number of lining in square meters manually or using an online calculator. It is worth adding 15% to the amount received for a margin in case of damage to the lamellas.
Do-it-yourself lining of the steam room with clapboard
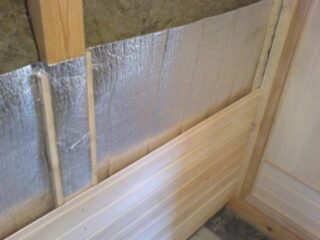
You can decorate the bath from the inside with your own hands, following the instructions for installing the casing. This is a step-by-step process:
- waterproofing is fixed;
- a wooden frame is installed;
- thermal insulation of walls and ceilings is carried out;
- the foil is stretched as a vapor barrier;
- lining is attached.
Before sheathe the steam room and other rooms in the bath with clapboard, the direction of the lamella placement is decided. The decor can be vertical or horizontal. In the first case, the height of the room visually increases, the joints of the boards are hardly noticeable, it is easier and faster to mount the lamellas. The disadvantage of this method is the emergence of difficulties when replacing the lamellas. In the lower part of the room, the humidity is always higher, so the casing may deteriorate. When repairing, you will come to saw off the lower part of the lining. Experts advise the vertical method for the rest room.
When mounted horizontally, the products are positioned with a spike upwards, which reduces the likelihood of moisture getting into the finish. This method involves vertical installation of the battens, which provides free air circulation for ventilation of the room. If the lower strips are damaged, they can be easily replaced without disturbing the overall structure.
Methods for fixing the lining
The planks are fixed in two main ways:
- Cleamers are a safe option for fastening using a special bracket with holes that is put on a groove. Self-tapping screws are screwed into the bracket, they touch the tree, do not spoil its surface. Kleimers are made of steel or galvanized iron.
- Nails or self-tapping screws - fastening is carried out by an open and hidden method. The first option is simple to perform, but less aesthetic; there is also a risk of burns on a heated nail. With hidden installation, the fasteners are hammered into the lining spike. To prevent cracking of the board, a hole is pre-drilled. Self-tapping screws are screwed in the same way. The optimum length of nails is 50-60 mm.
The fasteners should be invisible and moisture resistant.The use of zinc-coated nails and self-tapping screws is recommended. When working with nails, it is better to use an air gun.
Sheathing device
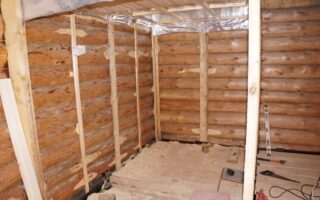
Installation of the frame allows you to place the insulation and create a ventilation gap between it and the skin, in which air will circulate. The lathing is made only of wooden beams. The cross-section of lumber depends on the thickness of the thermal insulation, on average it is 20 × 50 mm. First, a waterproofing sheet is nailed to the walls. Then, starting from the corner, with a step of 50-60 cm, the bars are packed. The lumber is pre-treated with a fire retardant and antiseptic.
You can use a coniferous timber, the resin emitted by it will not create inconvenience. The guides are fastened with galvanized nails or self-tapping screws. The lathing is set in level so that an even finish layer is obtained. A beam under the lining is packed perpendicular to the direction of the boards.
Thermal insulation of sauna walls and ceilings
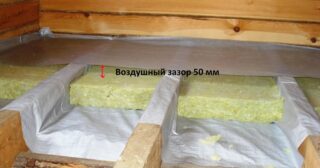
You can start the improvement of the premises with insulation. The best option for thermal insulation is basalt wool. Fiber boards do not burn, have a water-repellent impregnation, are easy to install, withstand temperatures up to 1000 ° C. Mineral wool manufacturers offer specially designed series for these purposes: heatKnauf bath, Rockwool sauna butts. The slabs are cut with a knife, it is recommended that the width exceeds the step of the lathing by 2 cm. In this case, the insulation will fit tightly into the frame. Laying cotton wool starts from the floor, the layers overlap each other.
At the end of the installation, the insulation must be covered with a vapor barrier sheet that protects against moisture. Foil works best with this. The material is attached to the crate with a stapler, the canvases are laid with an overlap of up to 10 cm, they must be glued with metallized tape.
For the insulation of the premises, polyurethane foam plates with double-sided foil coating are used. They do not absorb moisture, have a small thickness, and reflect heat. The material is glued to the walls, forming a solid coating, and additionally fixed with self-tapping screws. Seams are sealed with polyurethane foam. Thermal insulation does not require additional installation of the curtain to prevent wetting. At the stage of wall insulation, ventilation is installed. You need to cut two holes for it: one under the ceiling, the second 15-20 cm from the floor. An aluminum corrugation with a diameter of 100 mm is suitable for the duct.
Decorating near the stove in the steam room
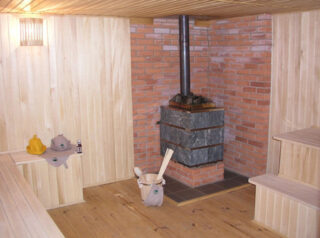
The stove serves as a source of heat in the steam room, the bulk of the heat falls on the sections of the wall closest to it. If the lining is located close, the material may char or catch fire. To prevent problems, the stove is installed at a certain distance:
- metal - 100 cm;
- metal lined with brick - 70 cm;
- brick - 32 cm.
A good choice would be a brick or metal protective screen, installation of stainless steel cladding, ceramic tiles, porcelain stoneware near the oven.
Wall cladding
Before sheathing a bath or sauna inside with clapboard, you need to bring the lumber into the room to adapt to the microclimate. During the day, the tree is acclimatized to the level of temperature and humidity. They begin to decorate the steam room from the ceiling, then sheathe the walls. The first board must be fixed at a distance of 20 mm from the wall, this distance is necessary for the free expansion of the tree when heated. The rest of the strips are mounted close to each other. To fix the lock connection, the parts are knocked out with a mallet with a rubber tip.
First, one end of the lining is nailed, after checking the level, the rest is fixed. Wall and ceiling cladding is carried out using the same technology. You need to decorate the room from the door. With horizontal installation, the lining is led from bottom to top, with vertical installation - from right to left. When fixing the first plank, 20 mm retreat from the floor so that moisture does not rise along the board.The gaps are subsequently covered with decorative elements.
Finishing
In order for the finish to retain its original decorative appearance for a long time, it is necessary to treat it with an antiseptic composition. It can be water-based products, acrylic varnish, wood oil. All preparations have a special marking - for baths and saunas. Such compositions protect the boards from moisture and decay, while they do not emit toxic substances. All wooden parts, including the frame, are processed. To reduce the consumption of varnish and stain allows preliminary application of the primer.
Helpful hints
Decorating with wooden clapboard is expensive, in order to reduce costs, experts give several tips:
- Use lamellas of small length (up to 1.5 m), which are cheaper, connecting them at the docking bar.
- Install a hardwood board only in the steam room, sheathe the rest of the premises with budget coniferous sawn timber.
- Combine the varieties of lining, in the steam room, where the quality of the material is important, install extra-class lamellas, and use class B in other rooms.
- Perform concealed fastening of the lining by driving a nail at a 45 ° angle into a groove or tenon. This will prevent metal-to-water contact and slow down corrosive processes.
- Thermal insulation during the construction phase seems like an unnecessary expense, but it will quickly pay off thanks to the fuel economy.
A step-by-step plan will allow you to do all the work yourself.


