Fences around the site are made of a variety of materials: corrugated board, forged lattice, wooden picket fence. However, such sections must be supported on solid supports. The best option is concrete pillars for a do-it-yourself fence.
Advantages and Disadvantages of Concrete Fence Poles
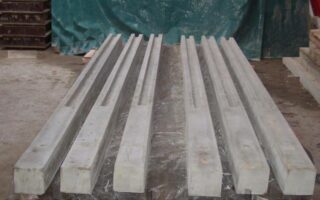
Concrete is a durable, reliable and affordable material. The concrete mix can be bought ready-made or made by yourself. In a semi-liquid form, the mass has the highest plasticity and, when solidified, takes any shape.
Concrete supports have a lot of advantages:
- high bearing load - sections of the fence can be made of any material;
- the stone is resistant to rain, snow, wind and sun, which determines the durability of the fence;
- concrete is not subject to corrosion and other damage;
- supports of any size and shape are cast from the material, this allows you to equip fences in a variety of styles;
- concrete is not afraid of temperature changes, therefore it is used in both southern and northern regions;
- supports do not need special maintenance: they do not need to be painted, primed, treated with impregnations;
- the cost of the material is extremely low.
Minuses:
- The main drawback is the large weight. You can make and install one pillar together, but for the installation of an entire section you will need the help of the team.
- The concrete looks unattractive.
For fencing made of lightweight materials, only support posts are required. If the fence is being built heavy - stone, brick, for example, it is necessary to erect a fence on the foundation, with a basement section. This option is much stronger, but also more massive. It will take much more time and effort.
Preparing for installation
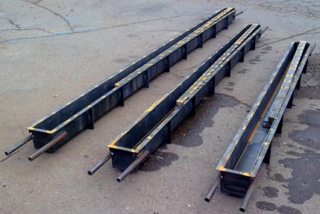
There are 2 options for erecting a fence from concrete pillars: using ready-made models and making supports yourself. In both cases, the preparatory work and the construction of the foundation are carried out in the same way.
The pillar rests on a foundation. In the simplest case, the support is buried, or rather driven into the ground. However, on soft soils - sandy, peaty, this is impossible. More often, the support is installed in a prepared pit and reinforced with concrete, sand and crushed stone bedding. The last method is considered the most reliable. Especially on heaving soils.
Laying the foundation for the fence is done as follows:
- Mark out the site. The distance between the supports is determined by the material of the sections. The lattice metal base has a minimum windage and only its weight affects the distance between the posts. The wind loads on the profiled sheet are enormous, so the pitch between the posts is smaller here. Although the weight of the section is lower than that of the forged grating.
- Mark the site with stakes. First, set the corner, denoting the border of the site. A rope is pulled between them and pegs are placed along the resulting line.
- A trench is being dug under each pillar. Its depth exceeds the freezing point of the soil by 10-15 cm. The data can be found in the reference book. In fact, the depth of immersion of the pillar by 80 cm is considered sufficient. A trench is dug, respectively, with a depth of 90-100 cm.
- A layer of sand and gravel up to 20 cm is tamped to the bottom. The mixture is moistened with water and compacted again.
- The trench is lined with a layer of roofing material.
- A profile pipe is driven into the resulting blanks - more often asbestos-cement.Rarely, PVC or a frame is mounted if the concrete supports are made by hand.
On soils prone to heaving, the depth of the pillars is 120–160 cm.
Required materials and calculation of a concrete post
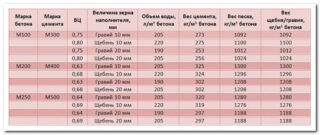
For the manufacture of concrete supports and a foundation for them, you will need:
- cement, sand, fine or medium crushed stone;
- reinforcing bars 8–10 mm thick;
- container for mixing concrete, construction mixer or concrete mixer;
- wooden boards or OSB for formwork;
- welding machine;
- Bulgarian;
- level and plumb line.
During welding work, you must wear a protective mask, gloves and an apron.
The dimensions of the pillars are determined taking into account the mass of the entire structure. The load of the two sections is distributed on the support and the load created by its own weight, also takes into account the windage of the structure and the type of soil. Factors affect the diameter or section of the column. The height is determined by the height of the fence.
Formwork manufacturing technology
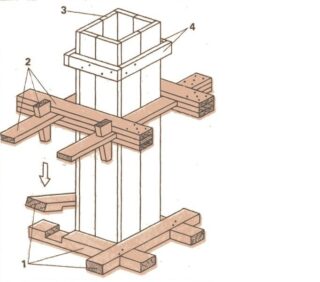
Do-it-yourself concrete fence posts are not so difficult to make. The foundation and the concrete support make up a kind of whole, since both elements are poured with concrete at the same time.
The formwork for the post is made of wooden planks or asbestos-cement pipe. Wooden formwork is removable, after hardening it must be removed. You can leave the pipe.
Work is performed according to the following scheme.
- Collect the formwork of the desired shape and size. Installed at the bottom of the trench.
- A frame is welded from rods - square or round in cross section. You can tie the rods with copper wire.
- The frame is placed in the formwork so that 2-3 cm remain from the rods to the edge of the formwork.
- The support and foundation are poured with concrete.
The foundation frame and supports must be tied together. This increases the durability of the entire structure.
It is recommended to immediately lay metal plates or wooden slats into the formwork, which can serve to fix the guides. The same is done when it is supposed to install ready-made reinforced concrete pillars or metal ones. The mortgage includes pins, a plate, pins or other seat for a wooden, steel post.
Stages and nuances of pouring forms with concrete
Concrete is prepared from fine crushed stone, sand - better than river, cement grade at least 300, but better than 500. The components are mixed in a ratio of 1: 2: 2, that is, for 1 part of cement, 2 parts of crushed stone and sand are needed. Water is added in such an amount that the mixture remains viscous. Plasticizers are added as desired.
- The filling is done in 1 or several days.
- The mixture is carefully poured into plywood or sewer formwork. Try to prevent bubbles from appearing. Then, with a rod of reinforcement, they pierce the mass to the very bottom in several places. Thus, concrete is compacted.
- It is more efficient to use a hammer drill in the mode of a jackhammer or a vibrator. It is enough to process the mixture for 5 s for the concrete to compact.
The formwork is removed after 2 weeks. Concrete will gain full strength only after 4 weeks.
Decorating
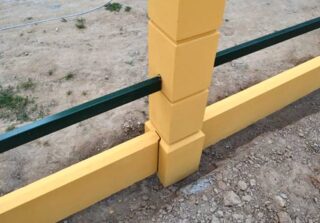
Concrete pillars are not very attractive. The color of the material is gray, the texture is uneven. To give the fence a more beautiful look, the supports are plastered or painted.
For the first method, almost any plaster is suitable. In terms of practicality and reliability, the first on the list will be lime-gypsum. This finish has antiseptic properties and creates a smooth, light surface. Often they use some kind of decorative plaster. Very effective mosaic. This mixture contains small to medium colored grains. When solidified, the finished plaster layer, as it were, consists of colored pebbles.
A concrete pillar can be simply painted in the color of a metal sheet, euro shtaketnik. The composition is chosen taking into account the weather conditions of the region.
If the support has a rectangular cross-section, it can be finished with facing tiles, brick, stone.In the photo of construction sites, you can find good examples.


