The modern version of the gate is a design with a sliding mechanism. Such a sash does not swing open, but moves along the fence. This is a convenient and economical solution in areas where there is no space for plowing outside and in the yard of the house.
Design features and principle of operation
In the vast majority of cases, such gates consist of only one leaf. When opened, it moves to the side along the fence. The canvas moves along the guides, rollers act as a means of movement.
Depending on the type of guides and rollers, there are 3 design options:
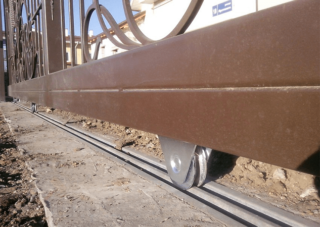
- Rail - the gate rests on rollers. The movement is carried out along a rail embedded in the foundation or surface of the site. The rail does not interfere with the movement of the car, since it practically does not rise above the ground. The vertical position of the sash is supported by a bracket with a side rolling roller. The main disadvantage of this solution is the need for frequent cleaning of the rails. It lies below the ground and gets dirty very quickly.
- Suspended - the sash is suspended on top rollers. The displacement is carried out along the upper beam with a guide. Such a canvas does not touch the ground. However, the beam restricts the passage under it, therefore, for example, it is impossible to equip the suspended doors if the passage of freight transport or minibuses is expected.
- Cantilever - in this model, the sash is suspended, but not on the upper beam, but on a special reinforced structure. In this case, the sash is 1.5 times longer than the opening, and this "margin" acts as a counterweight of the suspended part. It is held on rollers and slides along a rail mounted on the side of the opening. In the vertical position, the canvas is held by the upper bracket with rollers.
The easiest way is to equip a conventional rail gate. However, the cantilever ones are considered the most practical: they do not touch the ground, the rail installed on the foundation of the fence does not get dirty, the passage is not limited by anything.
Advantages and disadvantages of sliding gates
Sliding gates have many advantages:
- The sash moves to the side rather than swinging open.
- Entry is possible at any angle, since the car does not interfere with the doors.
- In strong winds or heavy snow, the gate is just as easy to open as it is in clear weather.
- To automate gates, only 1 electric drive is needed, and not 2, as for swing gates.
- The possibility of damage to the car when hit by the sash is excluded.
- There is no need to place stops in the center of the gate, as with swing gates.
There are also disadvantages:
- The design is noticeably more expensive than the swing one, especially if it is a cantilever model.
- Gate installation takes more time and is more expensive.
- Guides, especially on rail models, need to be cleaned frequently.
The material of manufacture is not limited.
Selection of parts for the rollback mechanism
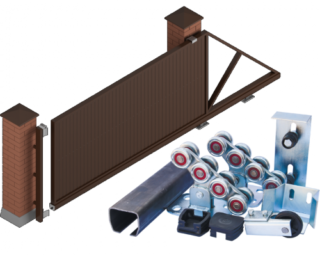
For sliding gates you will need:
- Channel - serves as a guide for rail models.
- Profile - U-shaped structure, which is placed on the lower edge of the canvas and rollers are inserted into it.
- Roller supports are plates on which bearings are mounted.
- The carriages are the actual roller mechanism. It takes all the load from the weight of the sash and when it is displaced.
- Supporting rollers are side rolling.They are mounted on support pillars and are designed to reduce vibrations.
- Catchers - fix the canvas in extreme positions and prevent the sash from rolling out of the guide.
- The knurling roller is the second part of the retainer. It kind of rolls over the catcher and stops the movement.
The gate can be equipped with an electric drive. In this case, you will need an engine, automation and a remote control.
How to choose accessories
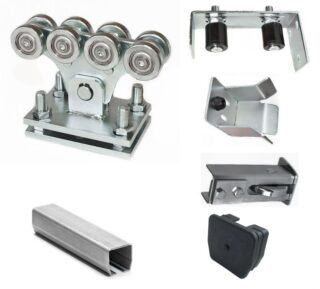
Do-it-yourself or purchased rollers for sliding gates must meet a number of requirements:
- The roller mechanism is selected according to the weight of the structure. Otherwise, it will quickly fail.
- The recommended amount is 5, one of which is transverse to prevent the blade from swinging. 4 castors distribute the load. Even if 8 rollers are installed on the sash, it will only rest on 4. It is important to choose the correct quantity, not the size.
- It is important to choose support brackets that are conveniently fastened and adjustable. In this case, their effectiveness does not depend on the distance between the supports.
- The knurling roller must be metal. Plastic wears out too easily and quickly.
- The load-bearing beam is also selected by weight. If the mass of the gate is less than 800 kg, take a beam with walls 4 mm thick. If the weight is more - 5–6 mm.
The electric drive is selected according to its power.
Do-it-yourself rollers for opening the gate
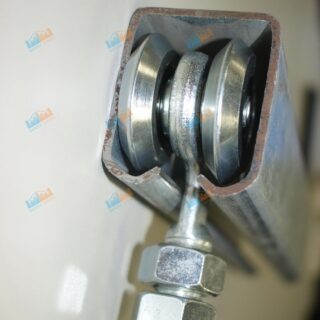
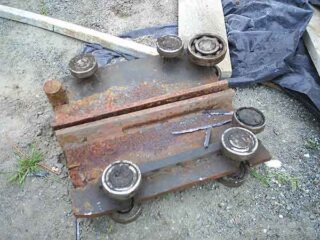
Rollers for sliding gates are assembled by hand according to a sketch and exactly following the step-by-step instructions from the manufacturer. This work is painstaking, but doable.
For manufacturing you need:
- accessories for fittings;
- support pipes;
- electric drill;
- steel corners;
- wrench, set of drills.
You may need an electric drive and accessories.
On the forums you can find photos and diagrams using which you can make homemade wheels. However, in terms of quality, they are often inferior to purchased ones. In addition, the carriages are time consuming to manufacture.
Assembling the gate on rollers
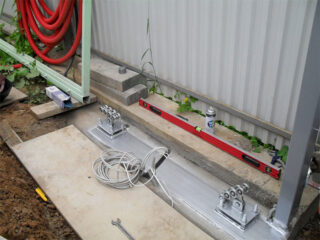
Work begins after the installation of the supporting side pillars and the manufacture of the canvas. Collect videos according to the instructions. In most cases, this is a finished part.
- A guide is welded to the lower edge of the sash frame.
- The wheels are inserted into the groove of the profile and fixed, evenly placing them along the length of the canvas. Before fixing them tightly, the canvas is inserted into the channel and check how freely the sash moves.
- In the upper part of the support pillars, holes are drilled and a bracket is placed, and a support roller is welded onto it. It reduces vibration and swaying of the blade when driving.
- Install the rolling roller. Plugs are attached to the end of the channel.
- In the extreme permissible positions of the sash, the lower catchers are mounted. You can duplicate them with the upper ones, but the latter are intended, rather, to provide a smoother ride than to limit it.
- The canvas is installed in the groove of the beam and the vertical position and smoothness of the movement are checked. In case of difficulties, the position of the blade is corrected by changing the position of the wheels. To do this, use a wrench.
Installation of sliding gates is quite complicated. Their functionality strongly depends on the quality of the fittings and on the correctness of its installation, so this work must be done carefully.


