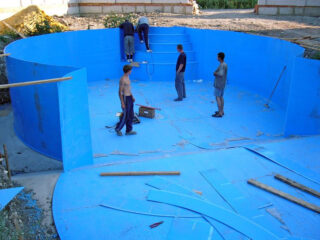
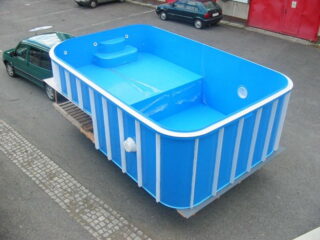
A do-it-yourself polypropylene pool is a good alternative to the usual film or concrete. The main advantage is decorative: the pool can have a very complex and interesting configuration.
Feasibility of the idea

Polypropylene is a material obtained by polymerizing propylene. It is produced in the form of powder or granules. The latter are used as raw materials for the manufacture of products, including bowls for swimming pools.
Thus, most of the difficulties in the construction of a film reservoir are solved. There is no need to stack the fragments and glue them. There are no seams that act as a weak link in the structure, since the technology allows the entire pool frame to be cast. If the master has a polyfusion welding machine, the installation can be done independently.
Another feature is insensitivity to the sun. Plastic does not change color and texture for 30 years. It does not absorb dirt, does not allow water to pass through, and does not promote the growth of bacteria or spores. It is chemically inert, which allows the pool to be cleaned by any means.
Finished structures are made within a few days. In this case, the construction of the reservoir will require no more than 10 days.
Advantages and disadvantages of polypropylene

A polypropylene pool has a number of undoubted advantages:
- The material is lightweight. Even a large structure does not create a large load; it can be placed on any ground.
- Polypropylene keeps you warm. No extra effort is needed to maintain the temperature.
- The material is not susceptible to impacts, it is extremely difficult to cut through or damage it.
- Polypropylene easily withstands significant temperature changes. It doesn't need to be protected for the winter.
- The polymer is not sensitive to the sun, the action of salts, and household chemicals.
- Cleaning the pool is often unnecessary as the non-porous polypropylene does not absorb dirt.
- The reservoir retains its color and shape for decades.
There are also disadvantages:
- The installation of a polypropylene pool is carried out directly on the ground, but its walls need to be concreted, so the cost of installation is slightly less than when constructing a concrete bowl.
- There must always be water in the reservoir, otherwise the container jars. Water should be left even for the winter.
- The seams between the polypropylene sheets are as strong as the material itself. But if cracks appear during warping, they can no longer be soldered.
A polypropylene pool is more suitable for indoor use rather than outdoors.
Calculation of materials, determination of size

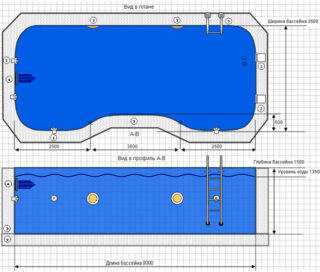
The size of the reservoir depends on the number of users. According to SNiP norms, for 1 adult in a swimming pool there is a strip of water 1.8-2.2 m long at a depth of 90-100 cm. For children, the norm is less - a depth of 60-70 cm. Usually, at a summer cottage, a pond is used for swimming , therefore, the norms are not followed accurately.
For mounting the bottom of the bowl, use a thin sheet, for the walls - reinforced. In addition, the side parts are reinforced with stiffeners. Calculate the number of sheets and make an estimate based on the size of the reservoir.
Standard sheet dimensions are 150 * 300 or 200 * 400 cm with a thickness of 8 mm to 15 mm. To determine the number of sheets, the area of the bowl is divided by the area of the material.If the bowl has a complex shape, it is better to divide it into sectors with a simpler configuration.
Preparation of materials and tools
To install the polypropylene pool itself, you will need:
- shovel, mallet, concrete mixer, knife;
- extruder or apparatus for polydifusion soldering, nozzles for it;
- tape measure, building level, pegs and cord;
- wooden bars.
If the area of the reservoir is large, it is better to dig a hole not by hand, but to use an excavator.
Step by step instructions

To build a polypropylene pool in the country with your own hands, you need to prepare the equipment in advance: a pump, pipes, filters, bottom drains, lighting. Then they start building.
- Mark out the outlines of the reservoir on the site and dig a trench to the required depth. The penetration depth is 50 cm deeper.
- Drainage is arranged: the bottom of the trench is tamped, covered with geotextile and crushed stone is poured in a layer of 30 cm. The stone is tamped.
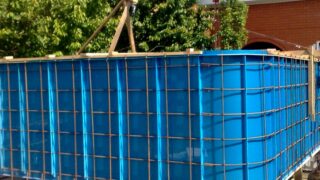
- The frame is mounted from the reinforcement. The rods are placed on the bars so as not to come into contact with the ground. The finished structure is poured with concrete 20 cm thick.
- It is possible to assemble the frame for the pool from plastic pipes and weld the sheets both in the pit itself and on the surface. If the reservoir is large, it is better to mount it directly in the trench.
- Templates for sides, walls, bottom, relief areas are prepared in advance. Parts are cut from polypropylene sheets according to the patterns.
- First, the fragments of the bottom are connected using adhesion. Leave allowances on all sides. Then the sides are fastened. Welding will be performed from the inside and outside - a double seam. An extruder is most often used for installation, since it is easier to handle. However, when using it, an additional substance is required - usually a polypropylene wire. You can also use a hair dryer if the latter generates an air stream with a temperature of 170-180 C.
- The main method of joining sheets is considered to be a polyfusion welding machine. It provides stronger seams. However, such an apparatus is similar to a moving table. That is, in this case, the bowl must be made separately, and then installed in the pit.
- Stiffeners are welded perpendicular to the walls - elements of a polypropylene rod, with a step of 50–70 cm.
- Holes are drilled for pipes and communication is carried out. Then you need to install the plums. All pipes are thermally insulated.
- Before the next stage, the functionality of the pool is checked: they start the water and test the pump, water outlet.
- The edges of the bowl are fixed with wooden struts, and formwork is mounted around it.
- The formwork is poured with concrete in several layers. To avoid deformation, after concreting, a layer of water of the same thickness is poured into the reservoir.
- After drying, the voids between the walls of the pool and the pit are filled.
- The reservoir is equipped with boards - wooden, concrete. The risk of overflow is prevented by mounting the drain holes at different levels.
A pool in a country house made of polypropylene can be pasted over with foil, tiled paths. The standard color of polypropylene is intense blue, so they usually manage to decorate the banks.


