Artificial reservoirs made of monolithic concrete attract owners of suburban land plots with low cost of materials, a variety of design, strength and durability. You can build a concrete pool with your own hands. All this will require hard and painstaking work from the owner of the site, but the result is worth it.
Advantages and disadvantages
The process of building a concrete pool with your own hands is expensive. It is necessary:
- develop a project;
- rent special equipment for digging a pit and mixing mortar;
- carefully monitor the implementation of all technological processes.
When arranging such a reservoir, special equipment and a technical room for its placement and consumables will be required.
A well-equipped pool will have the following qualities:
- durability;
- originality;
- functionality;
- comfort.
High-quality concrete can reduce vibrations and drown out the noise of operating equipment.
The advantages of concrete pools will be fully manifested only with competent project development and careful selection of the necessary materials.
Choosing a location for the pool
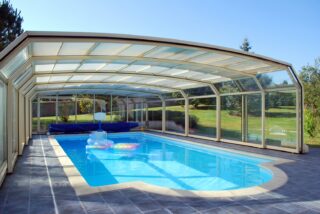
The place for an artificial reservoir is chosen based on its purpose and ease of use. An outdoor pool for a submerged summer cottage can be placed under a canopy or in an open place, next to a bathhouse or a house, as well as at a distance from them. It is necessary to clearly imagine the system of supplying engineering communications to it.
An artificial reservoir should be located in such a place that melt water does not flow into it and leaves from nearby trees do not fall. Otherwise, the water will quickly become polluted, and debris will accumulate at the bottom.
The area set aside for the pool should initially be much larger than the size of its bowl, since in the immediate vicinity it is necessary to provide a place for an auxiliary room. Engineering communications should also be laid here.
The location of foundations of adjacent buildings and structures is of great importance. After all, a deep pit, dug under the bowl of the pool, can affect their integrity.
The water in the pool should not be shadowed by the buildings on the site - this will allow the use of solar radiation to heat the water.
When preparing a place for a pool, you must also take into account the surrounding landscape and the level of occurrence of groundwater.
Making a concrete pool with your own hands
Before starting work, you need to think about what equipment you need. After all, it will be impossible to install most of it at the end of the work. This stage can be skipped if the construction of an ordinary font is planned, where water will be drawn using a garden hose, and pumped out with an ordinary drain pump.
In the general case, the arrangement of the pool begins with the preparation of the pit for the bowl and its pouring with concrete.
Excavation
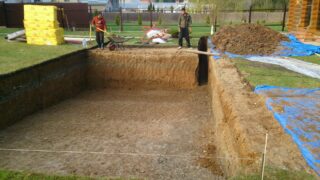
Before digging a pit, they clear the area from large stones and bushes, cut off the branches that will hang over the pool. Then, with the help of wooden pegs and a rope stretched between them, they mark the contours of the future foundation pit. The length and width of the latter should be about 20 cm larger than the size of the pool.
The pit depth is calculated based on the backfill layer and the thickness of the concrete bottom. The presence or absence of sides protruding above the ground matters.
The bottom of the pit should have a slight slope towards the drain. The walls should have a deviation from the vertical in order to avoid shedding the earth inside the already dug pit.
It is better to use an excavator to dig a pit. If you are building a small and shallow pool, you can dig it up by hand.
The bottom is carefully tamped, and then covered with a 30-cm layer of sand and a 10-cm layer of rubble. Sand and crushed stone are also compacted in turn, while maintaining the previously created slope.
Before continuing work, a drain pipe is placed in the lowest place through which contaminated water will be pumped out in the future. It must be taken out of the pit.
Having completed the excavation work, the bottom and walls of the pit are lined with several layers of roofing material with the obligatory exit of the latter to the surface of the earth. In this case, the sheets of roofing material are laid with an overlap, overlapping the edges by 10-15 cm. Then the joints are glued with bituminous mastic or soldered together with a powerful construction hairdryer.
Reinforcement
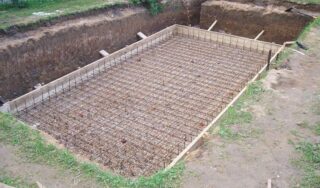
All engineering communications are laid before reinforcement. This procedure is simple, but requires adherence to the following sequence:
- At the bottom of the pit, two layers of mesh made of reinforcement with a diameter of 14 mm are laid.
- Two layers of the same mesh are installed along the walls of the pit. In this case, the ends of the reinforcement must be bent and brought under the mesh lying at the bottom.
All elements of the reinforcing mesh must be connected with a knitting wire. It is impossible to weld them together, since due to the strong internal stresses arising from the rigid connection of the reinforcing bars, cracks will appear on the concrete surface.
Assembling the formwork
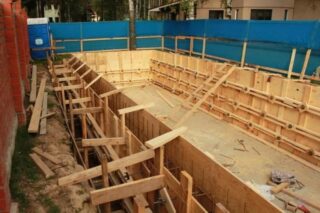
The formwork is assembled from scrap materials, which can be used as:
- Rolled or painted boards, beams or moisture resistant plywood.
- Ready typesetting elements.
The structure of the formwork must be designed in such a way that the pouring of the bottom and walls of the excavation is carried out at one time.
It is recommended to tighten the inner surface of the formwork with foil.
Along the walls of the pit, the formwork is installed so that its upper edge is higher than the reinforcement pins. The formwork should be approximately 5 cm away from the reinforcing mesh.
In order for the formwork to withstand the pressure of concrete, it is reinforced with special struts. If the formwork bursts, tons of concrete will be spoiled.
Pouring the pool bowl
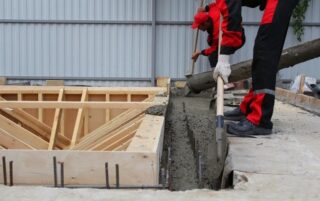
The pool frame must be poured in one go. Only in this case will its complete tightness be ensured. In general, the construction of concrete pools is carried out using heavy concrete grades M350 ... M400. Moreover, their indicators must comply with the requirements of GOST 26633-2015:
- for water resistance - not lower than the W6 brand;
- frost resistance - not lower than the F100 brand.
It is better to order the right amount of concrete from a specialized enterprise in order to pour the bowl in one go.
If there is no opportunity to order ready-made concrete, you can make it yourself. To obtain one cubic meter of such concrete, you will need:
- cement grade M400 - 600 kg;
- medium fraction sand - 1600 kg;
- fiberglass - 800 kg;
- microsilica - 60 kg;
- plasticizer - 1 kg;
- water 180 l.
The bottom is poured, after the solution has set, - the walls. The tightness of the joint along the bottom perimeter is ensured by means of a hydrophobic self-expanding cord.
Having finished pouring the bowl, the solution is allowed to settle until the concrete has completely set. To avoid the destruction of the concrete layer from moisture or temperature, it is better to cover it with something. Periodically you need to wet the concrete with water.
Bowl waterproofing
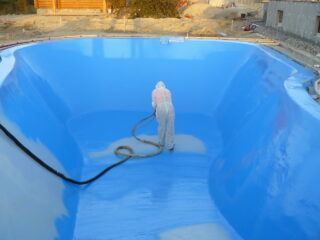
The pool bowl is waterproofed by special means (liquid rubber, polymer-cement mixture, liquid glass), between the layers of which a reinforcing mesh or fabric is laid. Before applying the solutions, the surfaces of the bowl must be cleaned. This is done by hand or using special grinding machines. You also need to close up all chips and cracks on the concrete surface. For this, epoxy resin is used, which is applied in 2-3 layers.
When waterproofing the pool, special attention is paid to the joints at the points of entry of communications, as well as between the bottom and walls of the bowl.
Complete the waterproofing by checking the quality of the work performed:
- The pool is filled with water.
- Measure the fill level of the bowl.
- Arrange a technological break for a period of 2-3 weeks.
- Measure the water level again.
A significant change in the level of filling the pool with water indicates the presence of leaks. To eliminate them, the work will have to be repeated. The evaporation volume of the water should be considered.
Finishing
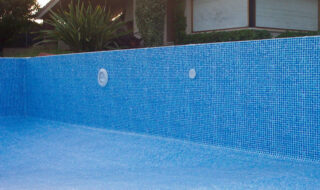
For finishing the pool bowl, the following are most often used:
- facing tiles;
- glass mosaic;
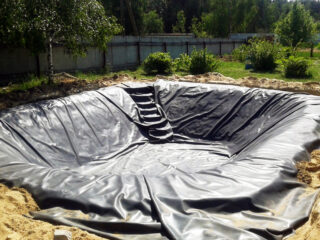
- PVC film.
PVC film and its analogs can be simultaneously used for waterproofing the pool, but this process requires the use of special equipment and the involvement of specialists.


