Do-it-yourself suspended sliding gates are quite difficult to make. Manufacturing requires step-by-step instructions, a detailed drawing and metalworking skills. The product is durable and highly functional.
Features of the model and scope
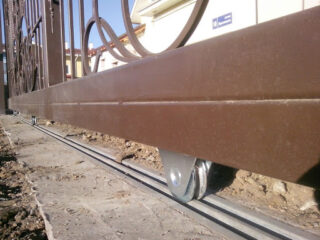
The gate is a type of sliding structure. The principle of operation is based on the departure of the canvas to the side along the fence outside or the wall inside the room. The beam is attached to a support post in the upper area of the opening.
Hanging gates include leaves or sashes, as well as accessories. The accessories are made up of rollers, brackets, fasteners and guides. Correctly selected parts provide a high level of functionality, reliability, attractive appearance and durability.
Hanging gates on rollers are reliable. They can be used both for private garages and country houses, and for factories and warehouses. The model is comfortable and can be used at any temperature.
Installation is not recommended in the case of gates used as doors or wickets, since multiple closing and opening contributes to a reduction in the service life.
Pros and cons of the device
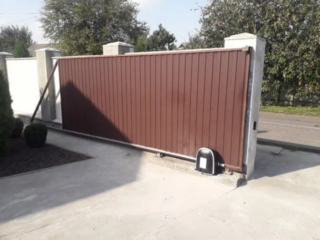
The design has negative and positive indicators. The advantages include saving space near the entrance. In winter, the surrounding area does not need to be cleaned before opening. The gates are resistant to low temperatures and gusts of wind.
The main disadvantage of the sliding model is the limitation of the height of the guide bar. This element must always be cleaned of snow, otherwise the flaps will move with difficulty or not open at all. To install such a mechanism, free space is required along the fence.
Material selection
One of the most common materials for manufacturing is metal. A professional sheet is also used. Plastic is often used, which is purchased in the form of separate panels, and then assembled into a single piece. The groove-comb principle is used. If there is a goal of retaining heat indoors, sandwich panels can be taken as the basis of the canvas.
Choice of fittings
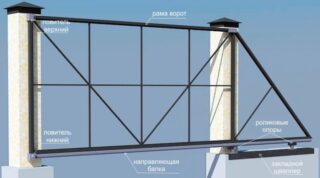
Do-it-yourself hinged sliding gates are complemented by fittings. A number of factors are taken into account when choosing parts.
The main indicators include:
- The weight of the canvas. The weight of the gate can be different. This factor affects the functionality of the rollers and gears. Ensuring high quality performance is possible by installing metal-based support rollers, which take the main load. The higher the weight of the blade, the more supports of this type are used.
- Wind load. You should choose rollers made of high quality metal.
- Guide quality. The element takes the main load. A high-quality product should have a uniform cross-section and not have distortions. Chips or bumps can cause the rollers to block while driving.
- Support beams. Strong structural steel should be the basis for manufacturing. The thickness is selected depending on the weight of the canvas.
It is recommended to use beams with a weight reserve that exceeds the actual door mass by 1.5 times. The guide bar is not load-bearing and must be firmly anchored. When hanging gates are used in a building, an internal wall or a facade opening acts as a support. In this case, the guide bar is not needed.
What you need to work
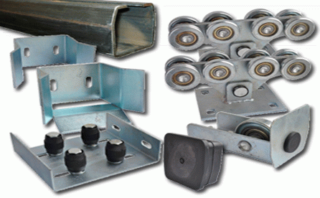
Do-it-yourself hanging gates on rollers can be made from corrugated board. You will also need tubing squares, a guide rail, a mortise lock and rollers. You can purchase an automation kit.
Of the tools, the master will need a grinder and a welding machine. Usually the mounted model has one sash. If the width of the product is less than 3 meters, it is not necessary to make the second sash. Usually, this width is enough for a car to enter.
If it is decided to install a wider gate, it is better to resort to assembling a two-leaf structure. Otherwise, the guide bar cannot handle the load. The rollers, with the help of which the flaps will move, should not be made by yourself. They are purchased ready-made together with guide parts.
Ready-made suspended sliding gates with your own hands can be supplied with an automatic kit. They can be opened and closed by remote control. In this case, no physical effort is required.
Frame installation
The base of the gate frame is made of metal tubes. Usually, products with a width of 4 cm are used. With a known height indicator, pipes should be cut to the appropriate length. After the identical fragments have been prepared, they should be laid on a horizontal surface at the same distance from each other, and then welded by means of spot welding. To check the evenness of the frame, it is recommended to measure both diagonals. They must be the same. If their indicators are different, in order to level the frame, it is recommended to knock with a hammer in the corners. After the pipes are completely aligned, you can start welding them.
After that, another frame is assembled from tube-squares. But in this case, the indicator of the width of the pipes should be 2 times less. The structure will be attached to the base from the inside.
After the end of all welding work, the frame must be primed, and then wait until the coating is completely dry. After that, you can proceed to the main staining. Special paints are used for metal surfaces.
Fabrication of canvas
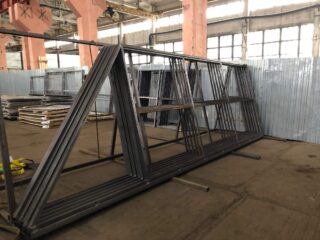
The canvas should be cut from a profiled sheet and attached to the frame by means of self-tapping screws or rivets. The area of the canvas should be larger than the opening and overlap both sides by about 20 cm.The upper part should protrude by 10 cm.A gap of 5 cm is left between the ground and the canvas at the bottom.
It is necessary to designate the place where the mortise lock will be mounted. It is better to install it right away. When installing, follow the instructions.
Installation of the frame and pillars for support
The next stage in the installation of hinged gates is the manufacture of the frame. The basis of the part is a metal pipe with a square cross section and a width of 12 cm. The connection is carried out by means of welding. If there is one sash, the upper beam must have a length equal to its width.
If the gate has a double-leaf design, two parts are used. The length of each must match the width of the corresponding sash.
Metal pipes are also used as pillars for support. They are buried in the ground to a depth of more than 1 m, and then poured with concrete mortar. It is necessary to make sure that the supports are in a vertical position, using a building level or a plumb line.
Installing the guide rail and rollers
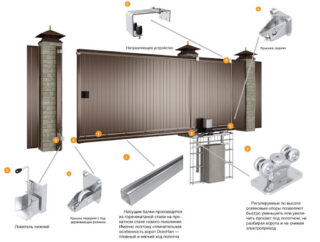
Fastening the guide rail is the last step in installing the hinged door.The element is connected by means of special brackets. The side of the guide along which the sash will move on the rollers should be located at the bottom. Usually the length of the part is no more than 6 m.
For the manufacture of beams of greater length, they resort to welding. Make sure that there are no curvatures in the guide. Otherwise, when moving, the sash will start to get stuck. A building level is used to level the guide beam.
Once the part is in the desired position, the rollers can be installed. They are attached from both sides of the sash - from the front and back. The gate must be installed with the rollers upwards so that they fit into the guide rail.
To prevent the sash from moving too far, limiters are installed on the guide beam, which are included with the rollers.
Design features of rollers
When choosing rollers, the weight of the door and the material from which the support is made are taken into account. Depending on this, metal or polymer products are selected. Steel rollers are treated with a special low-temperature grease. Polymer products do not need this. The movement of such devices is soft. The material can withstand temperatures from -80C to +100 ° C.
Metal rollers are used for massive structures over 800 kg based on steel.
Polymer products are cheaper than iron products. The rest of the indicators depend on the brand and maximum load.


