Even in the simplest garage box, you need to install lighting. Cars should be periodically inspected, oil changed, tinted. Yes, and driving in and out of a dark room is inconvenient and unsafe. You can connect the lights and sockets in the garage yourself.
How to properly plan your garage power supply
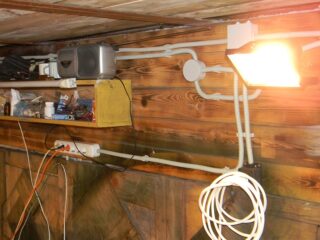
For servicing 1-2 vehicles, it is enough to install several lighting fixtures and a power outlet group in order to connect power tools. The power of the latter is small, so a single-phase power supply with a voltage of 220 V is installed in the garage.
If the garage is a car workshop and powerful equipment is installed here - heating boilers, welding devices, machine tools - you need to install a three-phase power supply with a voltage of 380 V.
It is also necessary to correctly calculate the number of lighting fixtures, it depends on the size of the box, the presence or absence of a basement and a viewing pit. It is also important to keep in mind the type of garage. If it is, for example, a part of a garage cooperative, its own substation is installed to service the garages. If the building is placed in a summer cottage, the cable is installed from the house.
Schema creation rules
Do-it-yourself garage wiring includes the following components:
- power distribution board, better with an RCD;
- metering devices;
- wires;
- lighting devices - lamps, spotlights, and switches;
- sockets.
If there are other consumers in the garage, like a heater or a heat gun, they are also included in the scheme.
How the project is composed
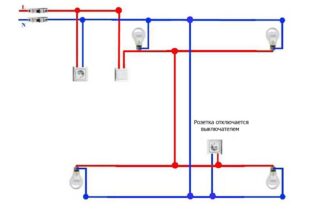
The wiring diagram is developed taking into account the dimensions of the room and the car, the place of installation of electrical devices and the location of the dashboard. The plan is displayed in the drawing, where the true dimensions are indicated.
To calculate the correct circuit, a step-by-step algorithm is used.
Make a scale plan of the garage. For each wall, floor and ceiling, make its own sketch.
- Mark the coordinates of each lighting fixture. If the garage has a basement or a viewing pit, they are equipped with their own lamps. It is taken into account that an ultra-low voltage current of 42 V and less can be used to illuminate them. To do this, step-down transformers are included in the circuit. Luminaires or tools that are supposed to be used in the inspection pit must be rated for this voltage.
- They mark the place of installation of the switchboard and, according to the scheme, find the optimal routes for laying the wires. Here they determine where it is more convenient to install sockets and switches.
- Depending on the number of electrical appliances, a protection system is developed: RCDs, voltage control relays, voltage limiters, step-down transformers.
- If the garage is a separate building, they provide grounding along the contour and indicate this on the plan.
Usually, car owners are limited to installing an RCD in the switchboard. But if the wiring in the garage is airborne, voltage limiters need to be introduced into the circuit - they prevent a sharp increase in voltage. If the garage box is located in a long row of cooperatives, it is better to install a control relay.
Home craftsmen experimenting in their garages sometimes cause zero breaks in neighbors.
Selection of wires and cables by power

To make the correct electrical wiring in the garage, determine the total and individual power of the consumer. The main supply cable must correspond to the total value. In addition, the way in which electricity is conducted is taken into account. So, from a private house there is enough self-supporting insulated wire - aluminum for 16-24 sq. mm or copper for 8-10 sq. mm.
To illuminate the main room, you need lamps with a power of up to 500 W, for this a copper cable of 1.5 square meters is enough. mm.
The sockets are designed for 16 A, so they take a wire of 2.5 sq. mm.
The more powerful consumers there are in the garage, the larger the cable should be used. General recommendation: install only copper conductors.
Required tools for installation
For wiring in a private garage according to a circuit with a voltage of 220 volts, you will need:
- hammer drill and electric drill, grinder;
- hammer, chisel;
- pliers, side cutters, screwdrivers;
- electrical tape and indicator screwdriver.
For working with wires, it is better to use tools with rubberized handles.
Installation of electrical wiring
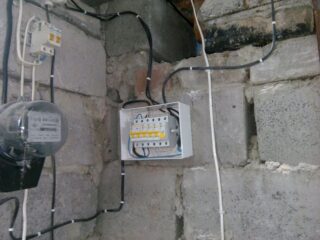
Installation of electrical wiring in the garage begins with preparation. Check the circuit, making sure, for example, that the cables are located only vertically and horizontally, the sockets are placed at a distance of 60 cm from the floor, and more. The installation locations are marked on the walls and ceiling. Flammable materials and large objects are removed from the room before installation.
- The wire in the garage is laid underground at a depth of 30 cm below the freezing level of the soil. The cable is laid in a corrugated plastic pipe. You can connect the garage to the electrical network by air: in this case, the wire is pulled between the support pillars.
- The cable is inserted into the box through a hole in the wall of 20–30 mm in diameter. The hole is made with a puncher, and the wire is laid through a PVC pipe.
- In the garage, strobes are made with a chisel and a hammer according to the marks in the walls. Lay the wires in plastic tubes. If the garage is wooden, the cable is laid in an open way.
- For the shield, 4 holes are drilled in the wall and the body of the device is fixed. Before that, all modules are removed from the device. After installation, they put a din-rail and fix the modules back. It is recommended to label them.
- The upper contacts of the modules are the input for the phase wires, the lower ones are for the outgoing ones to the socket and lighting.
- Connect the zero wires from the meter and the RCD. The power supply cable is connected last.
- Install lamps, sockets and switches. Connect wires to consumers.
- Check the isolation and correct connection of the devices. Power on and test the system.
380V line is made from 4- or 5-core copper cable.
Safety regulations
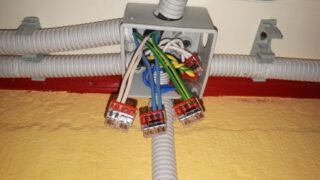
When doing wiring in the garage, observe the following safety rules:
- the cable inside the garage is installed in a gate or protective box;
- insulating corrugations are used in a metal box;
- lighting lines and power group are bred to different circuit breakers;
- the electricity supply line of the inspection pit is equipped with its own protection;
- when choosing lamps, devices and wire insulation, the destructive effects of dampness, low temperature and corrosive substances are taken into account.
Installing electrical wiring in a garage is a tricky job. It is important not only to stretch the wire itself, but also to calculate the correct circuit, choose cables with the required cross-section, and organize a protective system.


