Plastering the ceiling for painting is a rather complicated matter. Newbies in the repair industry prefer not to mess with him, hiring professionals. Their services cost decently, as a rule, more expensive than the material itself. Knowing the theory of this issue, it is quite possible to translate it into reality. To do this, you need to familiarize yourself with all the nuances of the puttying technology and correctly apply it in practice.
Features of ceiling putty
The concrete slab, which is the ceiling in the rooms of city apartments and most private buildings, is not perfectly smooth. As a rule, its surface is covered with many projections, pits and cracks. Distortions and sagging are observed in older buildings. It is pointless to apply a decorative coating on such a base without preliminary leveling, since the defect will be conspicuous and spoil the appearance of the room.
Do-it-yourself ceiling putty for painting is characterized by the following features:
- Working at height with your arms constantly raised up requires a reserve of strength and endurance. You should not take on it, being in a painful and fatigued state.
- Application of the solution involves the application of significant physical effort. You need to prepare a solid, stable and large enough base. The best solution would be building trestles with a length of at least 250 cm.
- The mixture is affected by gravity. It tends to break away from the plate and deform. Therefore, it is necessary to carefully prepare the mortar and substrate in order to achieve maximum adhesion.
It is necessary to properly putty the ceiling in one go, so that the coating is monolithic, without cracks and delamination. Adequate supply of material and time should be kept.
Required tools and materials

To level the floor slab, inexpensive tools are needed in small quantities.
To properly putty the ceiling for wallpapering or painting, you will need:
- wide and narrow spatulas;
- rule 200 cm;
- paint brush;
- roller;
- puncher;
- construction mixer;
- scissors for metal;
- a hammer;
- screwdriver;
- starting and finishing putty;
- perforated corner profile;
- self-tapping screws;
- plastic dowels;
- deep penetration primer;
- a bucket for mixing the solution;
- container for rinsing tools;
- bowl for the finished mixture.
You need to work in an assembly helmet, goggles and rubber gloves.
When buying a putty, you should pay attention to the thickness of the minimum layer, which it can be applied once. The best quality glue-based mixtures can eliminate differences in thickness of 50-75 mm.
Surface preparation
Since the leveling of the ceiling for painting is accompanied by the formation of a huge amount of dirt and dust, it is necessary to take measures to protect walls, floors, furniture and interior items. All that is possible should be taken out, the rest should be covered with cellophane wrap.
In order for the mixture to lie evenly and firmly on the surface, it must be properly and carefully prepared.
- Remove curtains and curtain rods. Turn off the light, disconnect the chandelier, insulate the wires.
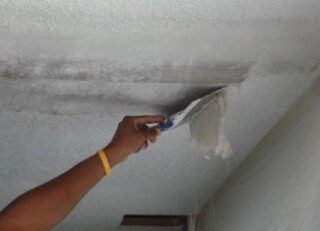
- Remove old trim. The plaster is cleaned off with a spatula or grinded down with a grinder. First you need to moisten the wallpaper well several times, then remove it in strips, prying it with a spatula. Rinse off the remaining glue with warm water right down to the concrete.
- Inspect the floor slab. Remove greasy stains with acetone or erase with sandpaper. You also need to get rid of rust stains and other foreign deposits.
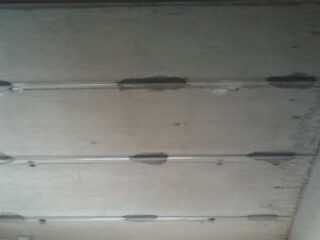
- If there are cracks and holes, they need to be expanded and sealed with cement mortar or sealant. Particular attention should be paid to openings along the walls and pipe passages. Carefully insulating them will help prevent flooding in the event of an emergency at the neighbors upstairs.
In conclusion, the ceiling must be treated with an antiseptic to avoid the development of mold and mildew.
Do-it-yourself ceiling putty
After the concrete has dried from the applied antiseptic, it is necessary to prime the surface. For this, a special solution is purchased, ready for use. It is better to distribute it with a roller, brushing corners and hard-to-reach places. You need to cover the base with a primer twice - first in one direction, then perpendicular to the original direction. It is necessary to strive so that there are no drips and omissions.
If there are large irregularities on the plate, beacons should be installed, otherwise it will not be possible to reach the horizontal.
Landmarks are set using the following method:
- The zero level is set. The lowest corner is located, 1 cm is measured down from it and a control point is set. Then a line is drawn from it along the perimeter of the room.
- The gypsum solution is mixed. Bumpers are laid out from it at the zero level. The distance between them is taken 20-30 cm less than the length of the available rule.
- Perforated aluminum corners are applied to the mixture and pressed in so that the solution appears through the holes.
You can start to putty the ceiling after the beacons have a good grip and will not move under the pressure of the mass of a heavy mixture.
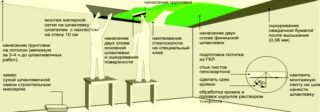
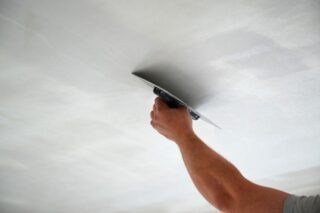
The next step is to apply the starting putty. This substance is characterized by high strength and fast solidification. Therefore, you need to cook it so much that it can be applied within 5 minutes. It is better to stir the starting solution with a mixer, adding the powder to the water until the consistency of thick sour cream is reached. The mixture is applied between the lighthouses slightly more than their height. Then the rule is carried out along the guides with a clamp. The excess substance is removed with a spatula and returned to the container. Similar actions are performed until all cavities between the beacons are filled. In the period when the mass has not yet completely solidified, minor defects should be eliminated - to remove the protrusions and sagging, to close up the grooves on the surface. It must dry completely before the next leveling steps. This time is indicated by the manufacturers in the instructions for use.
After the first layer is completely dry, it should be wiped off dust and covered with a primer. It will strengthen the surface and increase its adhesion to the next type of coating. The primer should be absorbed and dry well.
Painting can only be carried out on a perfectly smooth surface, since all its flaws will be conspicuous and spoil the impression of the entire design of the room. Grinding is carried out with a float with meshes of various grain sizes. It is better to start the process from one of the corners on the side of the window. Moving to the door, it will be convenient to control the quality of the work performed. After removing irregularities, the ceiling is polished.It uses zero grit sandpaper.
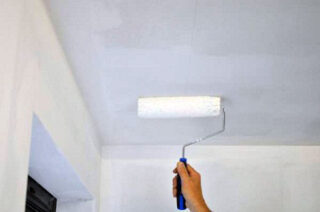
The end of the filling is the surface priming. All dust is preliminarily removed from it. This can be done with a vacuum cleaner, but it is more advisable to use dry soft rags so as not to spoil the expensive equipment. The finishing putty is highly hygroscopic. Once the primer is applied, it will not be enough; at least two passes will be required.
After the ceiling is completely dry, you can paint it. The best option is water-based paint, which is completely safe for health, fits perfectly on the base, looks good and is easy to clean. You will need to apply two layers - the first along the line of the window, and the second towards it. If a skirting board is provided, it is glued after applying a primer and painted along with the ceiling.
Fighting ceiling fungus
Fungus and mold are the enemy of finishing, and their spores are extremely harmful to human health. The cause of these phenomena is high humidity. Initially, it is necessary to provide for ways to eliminate it in order to exclude the prerequisites for the development of pathology. Another approach is the use of antiseptics, which are applied to concrete, starting and finishing putty.
Adding a primer to the solution makes it waterproof after crystallization and removes hygroscopicity.
Useful Tips
Floor slabs have the peculiarity of bending under their own weight during operation. To prevent the formation of cracks, a bandage nylon mesh must be glued to the entire surface of the finished ceiling.
When choosing a plinth, you should correlate its size with the area of the room - they should be proportional. It is advisable to glue the plinth on white liquid nails. This composition will securely fix the products and fill the gaps remaining after application.
Drops of primer will fall on the floor, clothing, interior elements. This substance is very difficult to wash off after drying. Therefore, every 10-15 minutes of work, you need to pause and wipe with a wet rag all the places where the primer has got.

