The construction market offers many materials for ceiling repair. However, drywall structures are not going out of style. Their advantage is the possibility of self-assembly, ease of decoration, relatively low cost. Putty plasterboard ceiling for painting is not difficult if you follow the technology of the work.
Varieties of ceiling putties and their application
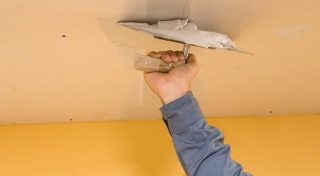
The putty can be classified according to its purpose (starting, finishing, universal), as well as the material of manufacture. If the composition is used to level the base, it is applied in a thick layer. The finishing mixture is applied before painting. It hides the smallest defects.
Cement
Cement-based putty is versatile. It is allowed to be used indoors and outdoors. The material is suitable for repairs in residential and technical buildings. It adheres well to the surface of the substrate, has good adhesion and is resistant to moisture.
The disadvantage of cement putty is the complexity of processing after hardening: it does not lend itself well to cleaning. This feature allows the composition to be used only as a draft layer.
Polymer
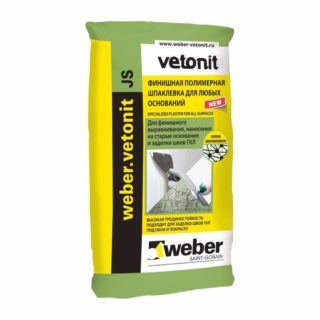
Polymer-based putty is strong, durable, moisture resistant. It is quite elastic, so it does not crack with linear changes in the base. The material is sold in bags of 25 kg. Another advantage is the long life of the solution - up to 12 hours.
The polymer composition is acrylic or latex. The first type is more often used for finishing plasterboard ceilings from plasterboard. In this case, the layer usually does not exceed 1 mm thickness. It can be applied on any substrate, even wooden. The disadvantage of the material is that paint does not adhere well to it.
Latex compounds are strong, durable, easy to use. They can be used in living rooms. This putty interacts well with paint.
Gypsum
Such a finishing material is used strictly indoors. It is forbidden to use it in rooms with high humidity levels. The product is sold in the form of a dry mix. The advantage of gypsum putty is that it is vapor-permeable, economical, dries quickly, and does not shrink. The disadvantage of the material is its instability to temperature extremes.
Dry and ready
The dry product is sold as a powder in 25-50 kg bags. To prepare the solution, the amount of water indicated on the package is added to it. To stir, you need a construction mixer or a drill with a special attachment. Such a putty can be stored in a sealed form for a long time. After cooking, it must be used quickly, since after 15 minutes it loses its properties.
Ready mixes can be applied to the base immediately after opening the package. They are distinguished by good elasticity and provide good adhesion to the substrate.
Required tools and materials
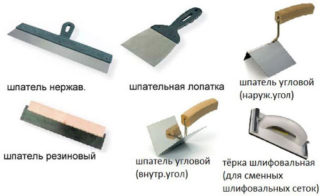
Plastering plasterboard ceiling begins with the preparation of the necessary tools and materials. Their list depends on the complexity of the work, as well as the experience of the master. The procedure requires:
- construction mixer (drill with attachment);
- container for solution preparation;
- spatulas of different widths;
- painting knife;
- grater;
- metal perforated corner;
- sandpaper with coarse and fine grains;
- brush-maklovitsa.
To do the job well, you need good lighting (a spotlight on a tripod), as a rule. It is necessary to strengthen the layer with a fiberglass reinforcing mesh. Before applying the mixture, the base is treated with a primer. The joints are additionally reinforced with a reinforcing tape.
Ceiling surface preparation
Plasterboard ceilings for painting should be done with mixtures from the same manufacturer. First, the surface is cleaned of dust. If the screws are peeking out, they need to be tightened so that the caps are recessed into the sheets by 1 mm. There should be no peeling cardboard on the surface of the base.
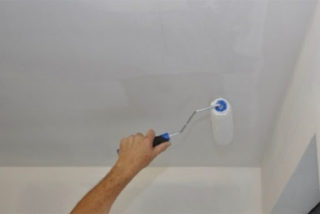
The base is primed. This will prevent paint shedding. Better to use an acrylic primer. To apply the composition, use a brush or roller. The seams are especially carefully processed. They need to be putty so that the mixture penetrates as deep as possible. On the surface, the mass is distributed as evenly as possible.
Puttying of ceilings is carried out at a temperature of at least +10 ° C. The humidity level should not exceed 70%.
Stages of ceiling putty
To properly putty plasterboard ceilings, you must follow the step-by-step instructions:
- Preparation of the solution. In most cases, the putty is poured into water. This will prevent lumps from forming in the mixture. You should not cook a large amount of material at a time, as it can quickly lose its properties.
- Seam sealing. It is necessary to press in the solution in a crosswise motion.
- Corner finishing. If you plan to hide them with ceiling decorative elements, puttying is not required. To strengthen the inner corners, a serpyanka mesh is required. For the outside, perforated aluminum corners are needed.
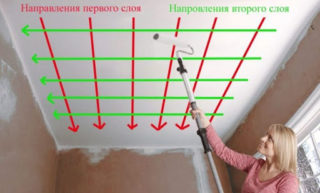
- Finishing of planes. This procedure will eliminate all flaws and level the base. The mixture is applied with a narrow spatula to a wide one and applied to the ceiling. Movements should be sliding. If a second coat is needed, apply it perpendicular to the previous one.
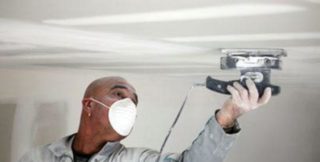
- Sanding the base. After complete drying, the ceiling is treated with a float and coarse-grained, and then fine-grained sandpaper. The procedure is performed under maximum lighting. Better to direct the beams at an acute angle.
- Dust removal, primer.
After 2 weeks after spackling, the base is painted.
Important nuances
You can putty the ceiling yourself, but during work you need to take into account some of the nuances:
- until the solution is completely dry, the room must be hermetically closed: a draft will lead to flaking of the mixture;
- it is better to apply the putty several times, but in thin layers;
- in the work it is necessary to use spatulas of different sizes;
- the tool must be pressed against the base with little effort so that no bumps remain on the surface;
- during work it is better to use work clothes, glasses, gloves and a protective anti-dust mask;
- after the procedure, the instruments are thoroughly washed, no later than 15 minutes later;
- it is necessary to start work from the junction of the ceiling with the wall;
- if there are no large surface defects, one layer of putty is enough;
- grinding is performed in a circular motion.
After sanding, the surface is primed. The last layer is placed parallel to the sun's rays. Thus, you can mask the irregularities.
Correctly treated ceiling will not lose its appearance for a long time. The use of starting and finishing solutions of the same company will allow you to achieve the maximum effect due to the similarity of technical characteristics.


