The creation of the pool bowl is 50% on the way to the adoption of the first water procedure, since the tank remains permeable at this stage. If the project provides for a PVC film as waterproofing, it is necessary to use plaster for the pool. Such work is carried out using one of two methods - mesh and shotcrete.
Appointment of plaster in the pool
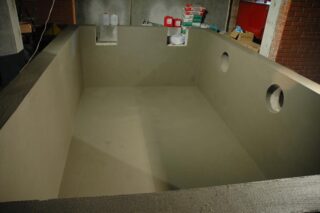
The lack of high-quality protection for a bowl made of concrete or brick causes water to seep through small pores. Over time, the liquid will reach the reinforcement, causing corrosion and structural destruction. In summer, water will saturate the layers of the structure, and in winter it will crack the base from the inside. A structure in this state will not last long.
Due to the fact that the walls and bottom of the pool are exposed to constant contact with the wet environment, the surfaces must be protected. For these purposes, plaster mixtures of different compositions have been developed - waterproofing and waterproof.
Types of plasters for moisture protection
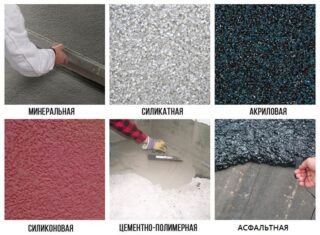
Types of plasters:
- mineral - cement, lime, etc .;
- silicate - liquid glass;
- acrylic - resins;
- silicone - hydrophobic silicon;
- polymer;
- asphalt.
The polymer contained in the mixtures is glued to the pool bowl. Before work, it is necessary to clean the concrete and apply a setting liquid. The product will penetrate deeply into the thickness of the base through the capillaries and create a water-repellent effect.
Preparing for finishing the bowl
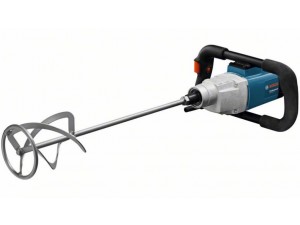
Tools are used to work with hydro-resistant pool plaster, just like in indoor finishing. The main equipment is a mixer for mixing mortar in large batches. The device can be rented. Additionally prepare:
- trowel;
- Master OK;
- usually a plumb line, building level;
- paint brushes, rollers, rags;
- several spatulas of different sizes;
- beacons.
Use personal protective equipment - plastic glasses, gloves, rubber boots.
Self-mixing solution
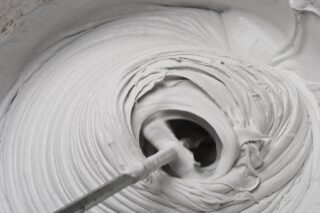
You can prepare waterproof plaster yourself. For these purposes, Portland cement M400, quartz chips and liquid glass are selected. As an additive, it is allowed to use a superplasticizer, which is kneaded in proportions of 1: 5. The mortar is added to the cement-sand composition and thoroughly mixed with a mixer.
Mixtures with water-repellent properties should be purchased from hardware stores. For self-production, you will need VRTs cement and quartz sand. The components are mixed at a rate of 1 to 3. Additionally, additives are introduced - 2% for the entire volume. It is recommended to select products with sodium silicate.
Plastering technology for walls and floors
The inner surfaces of the pool are in constant contact with water. Additionally, the walls are subject to a hydraulic load of 0.1 atm. In view of this, high operational requirements are imposed on plaster compositions and methods of application.Of primary importance is the degree of adhesion of the composition to the base of the tank. Traditional cement-sand mortars do not provide reliable adhesion, therefore, special plastering technologies are used.
Grid method
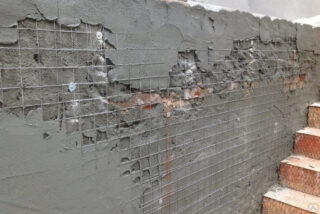
Before finishing, conduct a thorough analysis of the condition of the walls and floor. Clean the base from debris and dust. Cover surfaces with 2-3 coats of deep penetration primer - leave 2-3 hours between applications. The composition increases the moisture-resistant properties of concrete and brick.
The use of grid technology is almost identical to the usual plastering of walls in a living room. However, when using the method, it is recommended to carefully consider the quality of work. Even minor defects should be corrected immediately.
Instructions:
- The grid technology involves the use of a traditional cement-sand mixture. A steel reinforcing mesh is installed on the surface of the concrete base. The design provides high-quality adhesion of the solution to the surface.
- Clean the walls and floor of construction items and debris. Experts recommend removing dust from the substrate. Then apply the primer mixture.
- Fix the reinforcing frame around the pool perimeter with anchor bolts or dowels. Install the grid in a staggered manner with a step of 300-400 mm.
- In a container, knead the required amount of plaster, following the instructions for use from the manufacturer. Apply the first coat evenly over the entire area and leave for 24 hours until the composition is completely dry.
- After a day, prime the surfaces and apply a finishing layer of the mixture. At this stage, minor defects are also eliminated, the geometry is leveled. After completing the work, grout the walls and ceiling. Leave the reservoir until the solution is completely dry.
The method of applying plaster on the grid has an undeniable plus - the low cost of materials. Masters give preference to this method because of the simple technology and low training requirements. However, the method has a drawback - the steel crate and fasteners quickly rust when in contact with water. Such consequences lead to a complete or partial violation of the integrity of the pool. Not only the plaster layer is destroyed, but also the concrete base.
Glass or synthetic materials may be used instead of iron mesh. However, such a crate will turn out to be twice as expensive as a metal one.
Shotcrete
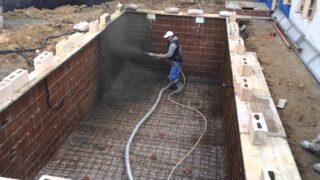
Shotcrete technology involves the use of a cement gun as an application. The essence of the technique lies in the preliminary mixing of the solution. Dry components (racking) are fed into the nozzle of the equipment under the influence of compressed air. Inside the device, the elements are wetted with water. Through the outlet hose, the mixture is delivered to a previously prepared surface.
The only drawback of finishing with PVC film is its unpresentable appearance in comparison with tiles.
Technology features:
- Each layer is left to dry for 24 hours. After a day, the surface is tapped with a hammer to identify poor-quality areas. If there is poor adhesion, remove any loose plaster. Clean the place, apply a primer and a new solution.
- Form the edges of the screed joint under a bevel with a width of 15 cm. After the layer has hardened, brush the walls and floor with a metal brush. Moisten the surfaces with plenty of water before proceeding with the re-plastering.
- When using a cement gun, place the nozzle at a 90 ° angle to the base and no closer than 60 cm from it. Carefully round off the joints to achieve perfect mating of the planes. Form the last layer for grouting with a thickness of no more than 5 mm.
- The shotcrete sand is washed several times. It should be free of impurities. Use the component in three fractions - 0.25 mm (one part), 1 mm (three parts) or 1.5 mm (five parts).
The plastered surface must be free from flaws.The presence of irregularities of 1-2 mm up to 1 mm2 in size on an area of 5 m² is allowed.
Building a pool on a site with your own hands is fraught with the risk of improper organization. However, difficulties can be leveled with a competent approach and compliance with SNiP. In the absence of the opportunity to engage in the construction of the reservoir or skills, contact the masters. The service life depends on the quality of the work.

