After building a house, carrying out major repairs or replacing a door in an apartment, ugly openings remain around the box in some cases and with through holes. There are many ways to seal, seal and finish them. Plastering the slopes of the entrance door is a classic that remains relevant to this day, despite the invention of new interesting technologies. This process is quite laborious and complex, but it allows you to achieve an effective and practical result. To do this, you need to study the rules for the selection, preparation, application of mortar and the sequence of work.
The main functions of plastering the slopes of the entrance door
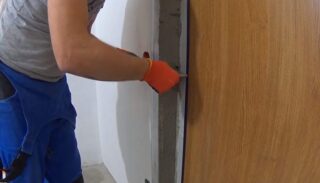
In most cases, the openings between the jamb and the wall are filled with polyurethane foam. It is not suitable as an independent filler, since it does not meet many criteria, including strength and durability. Based on this, the decision to plaster a doorway is not only a tribute to tradition.
The main functions of this technology:
- Strengthening the structure. Without mastering the locks, the burglar will not be able to get to the crossbars and anchor bolts.
- Warming. The putty has a low thermal conductivity and will perfectly protect housing from temperature changes. All cracks and accompanying drafts are eliminated.
- Soundproofing. The plaster has a porous composition and absorbs noise from the street and entrance well.
- Smooth and strong base for finishing - paint, varnish, wallpaper, ceramic tiles.
- Representative appearance if decorative material is used and the corresponding design of its application.
Plastering door slopes is a practical way to seal openings and the best option for a beautiful room design.
Advantages and disadvantages of finishing the slopes of the front door
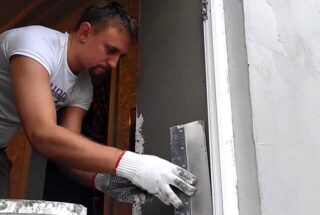
Plastering door slopes does not belong to the category of quick and easy repairs, but it is the most popular technology in both the private and industrial sectors.
This is justified by the following advantages of the technology:
- Strong and monolithic filling of technological openings. It is almost impossible to destroy them, and minor cosmetic damage can be eliminated without much difficulty.
- Practicality and efficiency in areas such as tightness and insulating qualities.
- The absence of internal cavities in which an environment for the development of fungus and mold, the appearance of a colony of small insects can arise.
- Ample opportunities for finishing. An even and hard surface can be coated with paint, varnish, glaze, wallpaper and ceramics. A good solution is to plaster the door slopes with a decorative composition.
The disadvantages of this technology are as follows:
- Labor intensity. The master will have to buy and deliver the mixture home, mix the solution and fill the cavities with it for quite a long time.
- Undesirable side effects. If you make the slopes on the front door with plaster, you need to be prepared for the formation of a large amount of dust, construction debris, scattering drops of solution.
- Duration of the process. Plastering the doorway after installing the door can take more than one day.This is due to the fact that the mixture is applied in several layers, and each one needs time to harden.
- The complexity of the work. In order to qualitatively plaster the slopes, you need a firm hand, attentiveness and responsibility. It is difficult to achieve even edges, but with proper diligence, it is quite possible.
In such situations, it is rather difficult to make the decision to plaster the door. However, the pluses are constant and unchanging, while the minuses are subjective and really surmountable.
Required tools and materials

To plaster the door slopes with your own hands, you will need the following set of tools:
- roulette;
- level;
- stationery knife;
- square;
- plumb line;
- trowel or trowel;
- wide and narrow spatula;
- rule;
- mixer or drill with attachment;
- paint brush;
- scissors;
- marker.
You need to purchase materials:
- metal perforated corner;
- starting putty;
- decorative plaster;
- fillers and dyes;
- deep penetration primer;
- painting net;
- grater;
- sandpaper;
- containers for mixing the mixture and rinsing tools;
- mounting film;
- foam rubber;
- rags.
Repairs should be carried out using protective equipment for skin, eyes and breathing. This will require a respirator, gloves, goggles, or a visor.
Preparatory work
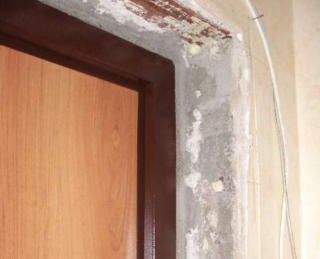
In the case of installing a standard metal door, there is already a casing on the outside and finishing work remains only from the inside. If the installation of a wooden product was carried out, the walls will have to be plastered outside.
First, a preparatory stage is carried out, which includes the following activities:
- Removal of the largest amount of furniture and interior items from the corridor. Covering the remaining objects, walls and door leaf with a protective film, covering the floors with cardboard or rags.
- Inspection of openings, identification and removal of fragile fragments of concrete and brick, strongly protruding parts of the old finish. After that, you need to clean the work area from crumbs, dust, paint stains, grease and rust.
- Cutting off excess frozen foam with a clerical knife so that at least 20 mm remains between the filler and the edge of the future surface.
- Treatment of cavities with a deep penetration primer corresponding to the wall material. For slippery surfaces it is better to use a concrete-contact agent.
Further actions can be carried out after complete drying of technical fluids. Whenever possible, choose a time when residents or guests will not enter and exit through the door.
Plastering the slopes of the front door with your own hands
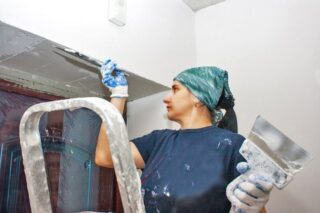
Decorating the entrance is a long and painstaking process. You need to tune in for several hours of continuous work. It is not recommended to start it in a state of fatigue or soreness.
Step-by-step instruction:
- Take measurements, determine the approximate amount of putty needed and the exact length of the guides.
- Make a nut. It is made of concrete, and floor tiles are installed as formwork.
- Knead the solution. This should be done in strict accordance with the manufacturer's recommendations, maintaining all the prescribed mixing and settling times.
- Moisten the surfaces of the opening with clean water using a spray gun or paint brush.
- Set guides. The profiles are fixed at the outer corners of the slopes with mortar. The putty is applied in volume so that there are no voids and a lot of excess. The corner is pressed into the mixture so that on one side it is on the same level with the wall, on the other - just below the plane of the future slope. The mixture protruding through the holes is carefully removed with a spatula. The external guides should be positioned first on the sides and then on top of the jamb.
- Install interior beacons over the door frame. To achieve normal strength of the mortar, it is necessary to put it on the jamb by at least 20 mm.As guides, you can use a plastic profile or a wooden strip with smooth edges. Fastening is best done with liquid nails.
- Fill the openings with putty. The solution is thrown into the openings with a trowel or trowel from bottom to top. After filling them, it is necessary to follow the guiding rule, level and compact the mixture, remove its excess and return it to the container. The upper part of the jamb is not closed by throwing, but by pressing with a broach with a spatula.
- Remove the interior beacons and level the slopes. This can be done only after complete hardening of the entire applied mass. Depending on the type of topcoat, the surfaces are smoothed or polished to a perfect level.
- Treat the putty first with an antiseptic, then a primer. After each liquid, the slopes must dry completely.
- Finish cladding. A material is selected that best suits the interior of the corridor and the conditions of its operation.
In conclusion, the installation of decorative corners is carried out. The best option is PVC profiles, which are glued with acrylic glue after fitting in the corners.


