An outbuilding at a summer cottage sometimes appears faster than a residential building. Tools for working in the garden and garden need to be stored somewhere, somewhere you need to leave the vehicle. And the harvested vegetables or seedlings should also not be left in the rain or sun.
- Basic building requirements
- Types of utility blocks
- Metal utility blocks
- Wooden utility blocks
- Choosing a place for construction
- Structural design
- Step-by-step instructions for making a utility block
- List of tools
- Foundation
- Assembling the frame and roof
- Finishing outside and inside
- Ready-made utility blocks for summer cottages
Basic building requirements
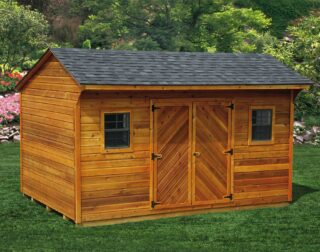
Do-it-yourself hozblok is the most primitive structure. Its main purpose is to serve as a repository for tools, equipment, demountable structures, like swings, inflatable pools, hammocks or other equipment - a rubber boat, tackle, fishing rods.
The following requirements are imposed on the storage in the country.
- Compactness - a tool shed should not be made large. Conversely, the more tools fit in a small area, the better.
- Lightness - often temporary huts of this kind are built without a foundation, on the site or on the simplest foundation. A barn is a structure that, when redeveloping a summer house, should be easily transferred to another place.
- Prefabricated structure - the best is considered to be a makeshift, which, after use, can be disassembled, and the resulting materials can be used elsewhere. This requirement is rarely met.
- The speed of construction - the utility block, if it is not intended for chickens or goats, must be built very quickly.
- Cost - it makes no sense to build a shed in a summer cottage from heavy expensive materials or put it on a capital foundation.
- The furniture in the change house is represented by the simplest devices: shelves, racks, hooks on the walls. However, their quantity and quality must correspond to the volume of materials stored here.
A shed designed only for storing inventory is not insulated. However, he must protect the objects left in it from rain, snow and wind. Dampness is not allowed here.
Types of utility blocks
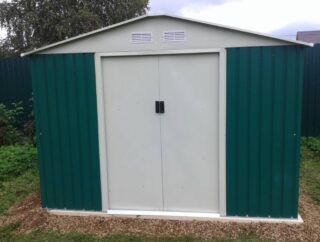
The utility block project is simple. Sometimes there are not even windows, except for the ventilation one. The roof is the simplest - one-pitched, sometimes with a canopy. It is made from the most affordable materials.
Metal utility blocks
Reliable and robust construction that can be installed directly on the site without a foundation. It is a rigid frame, welded from corners and channels and a profile pipe, sheathed with sheet iron. If the shed will be used in winter, for example, during fishing, the shed is sheathed from the inside with insulation and covered with clapboard or plywood.
A metal shed is inexpensive, it is assembled very quickly, and does not require maintenance. The iron box does not attract rodents or insects at all, so you can leave wooden tools here.
The disadvantages include the ability of the metal to conduct heat well. In winter, it is very cold in a change house without insulation, and very hot in summer.
Wooden utility blocks
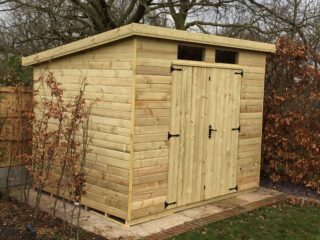
A do-it-yourself household block for a summer residence is often constructed from wood materials, since they are more affordable and easier to process. In addition, with self-erection, there is no need for a welding machine.
The advantages of such a barn are more:
- the construction is light and can also do without a foundation;
- the tree remains warm, so that it will not be cold in the fall and hot in the summer in the shed;
- assembly is very simple and fast, even a beginner can handle;
- it is not difficult to complete or modify a wooden shed;
- easy to repair the structure in case of any damage.
The disadvantages include the flammability of the material and the lower resistance to water in comparison with galvanized sheet. The wooden shed needs to be painted or varnished periodically.
There are 2 options.
- Collapsible structure - wireframe model. The basis is a wooden frame, which is then covered with shields or upholstered with panels, clapboard, chipboard sheets.
- Modular - the walls are folded from a bar, and the nodal elements are reinforced with double boards. In this case, the walls are self-supporting, so it will not work to disassemble the house and move it to another place.
The first option is more common. It is cheaper, it is easy to supplement it with blocks, like a shower, a compartment for storing vegetables, a firewood.
Choosing a place for construction
If there are no other buildings at the summer cottage, the only requirement for the chosen place is a low level of groundwater. You cannot put a barn in a lowland: flood and rainwater will flood the structure and it will not last long.
If housing is built on the allotment and there is another structure, the following rules are observed when choosing a place:
- a wooden utility block should be 15 m away from another wooden structure;
- the distance between the barn and the stone building is 8 m;
- if the shed is equipped with a shower, the distance is maintained at 8 m;
- the change house is 1 m away from the fence.
Requirements for distance from green spaces are met very carelessly. But still, you shouldn't put the outbuilding under the old tall tree.
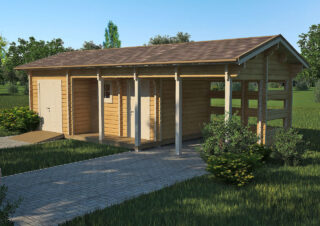
If there are several utility blocks, it is recommended to combine all buildings under one roof.
Structural design
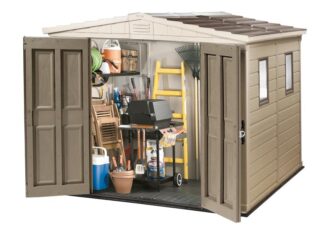
A shed for inventory is more often 1 room equipped with storage devices - shelves, brackets, stands. More often, not only walls, but also the door leaf serve as the basis for shelves and hooks. If, for example, a water scooter or a motorcycle is left in the shed, the room is conventionally divided into 2 compartments: a parking lot for a vehicle and a compartment for tools.
The utility block, which combines several simple buildings, is more complex. It can be several parallel rooms without communication with each other. Or maybe a module with interior doors. Often, such a change house has an angular configuration to save space. In such a house, a shower and even a toilet are more common.
The plan is transferred to paper. The drawing is done in 3 projections. It is recommended to reflect all the main nodes on the diagram. It is important to indicate the dimensions of the utility block and each element: this makes it easier to calculate the required amount of materials and make an estimate.
If communications are carried out to the barn, the places for the connection and installation of sockets, a shield, switches, installation of pipes, and so on are marked on the drawing.
Step-by-step instructions for making a utility block
Building a utility block with your own hands is a doable task. The fundamental number of separate sections is not important, but if the dimensions of the building exceed 3 * 4 m, it is advisable to put the change house on a light foundation.
List of tools
To build a wooden utility block, you will need the following building materials and tools:
- timber of different sections - better conifers, like pine and larch;
- edged board or lining for cladding, as well as sheets of plywood, chipboard;
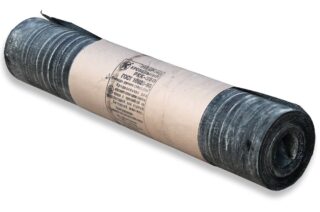
- roofing material or waterproofing film;
- sand, gravel for the foundation;
- asbestos-cement pipes;
- shovel, bucket and trough;
- saw or hacksaw for wood;
- screwdriver and drill;
- plumb line, building level, tape measure.
For finishing the barn, the list includes paint, antiseptic, varnish.
Foundation
The base for the shed is made columnar.So that the wooden case does not come into contact with wet soil, a site is built under it.
- They clear the area by picking plant roots and weeds. The fertile soil is removed. They take out the earth 20 cm and tamp 10 cm of sand to the bottom. From above, the site is covered with fine gravel.
- In the corners of the future structure, as well as, if necessary, along the perimeter of the walls, pits are dug under the support pillars - up to 1 m deep. Sand and fine gravel are tamped at the bottom of the pits.
- A fragment of an asbestos-cement pipe is installed in the recess and poured with concrete in 3 stages. After each pouring, the concrete is pierced with a rod to release the air. The post should rise 20 cm above ground level.
- Most often, the pipe serves as a permanent formwork. But if you wish, you can lift the pipe after each pouring, thus freeing it.
The foundation can be reinforced with reinforcement. It is installed before pouring. To facilitate the further construction of a wooden outbuilding, pins for fastening the lower frame are walled up in the upper third.
Assembling the frame and roof
The frame is erected as a whole, that is, for all premises. Usually, the rafter system is also installed immediately.
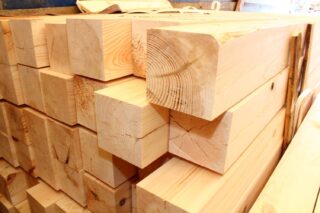
- The lower frame is assembled from the thickest timber - 150 * 150 mm. In the corners, the timber is fastened "half-tree", the grooves are connected with self-tapping screws.
- The columns are waterproofed with roofing material.
- The finished frame is placed on the foundation, fastened to the pins. It is recommended to reinforce the frame with transverse joists.
- The frame is treated with antiseptic and drying oil.
- Vertical racks - first angular, then intermediate, are attached to the lower frame with self-tapping screws and corners. While the entire frame is being assembled, you can strengthen the racks with temporary jibs.
- Connect the vertical elements with crossbeams. Immediately put frames for window and door blocks.
- The upper ends of the struts are tied with a frame. Usually it is made from the same thick beam as the lower one, since it serves as the base for the rafters.
- The rafter system is best assembled on the ground and ready to be hoisted onto the upper harness. It is easier to make a pitched roof, but for this you need to build walls of different heights.
A gable roof is more difficult, for it you will have to collect triangular trusses and connect with a ridge. Such a structure is difficult for one person to lift. An assistant is required.
Finishing outside and inside
The floor in the shed is often laid before the roof is erected. To do this, boards are fixed to the base and transverse logs. If there is a need to insulate the floor, the structure is made more complicated: first, the subfloor is laid, then waterproofing and mineral wool are laid, and then the final floor is laid.
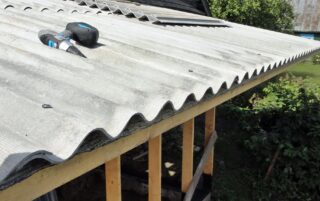
The roof is laid with tiles, corrugated board, slate. Roofing material must be laid under the material to prevent leakage.
Outbuildings for a summer residence are sometimes finished from the inside, if, for example, it acts as a car repair shop and the owner spends a lot of time here. For cladding, lining is most suitable, but plywood, chipboard sheets, even plastic panels are also used. Insulation can be placed between the finish and the wall if the shed will also be used in winter.
Ready-made utility blocks for summer cottages
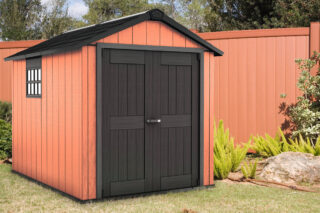
You can buy a shed for a summer residence. Available in metal and plastic options.
Metallic in its merits does not differ from homemade. The structure does not have a floor, it is installed on a concrete platform. The box is quite light, but you still need equipment to install it.
The plastic construction is even lighter. You can put such a house on your own and move it to another place with your own hands. The assembly takes a couple of hours. And the appearance of the plastic model is quite attractive.
The common advantage of buildings is their readiness. There is no need to assemble, finish the structure, look for additional materials, etc.


