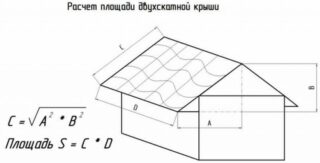
There are a huge number of varieties of gazebos in shape, size, with and without glazing, with supplied communications or with only a minimal set of furniture. The choice of roofing material is made depending on the personal preferences of the owner and the size of his budget. The optimal option in all respects is considered to be laying flexible tiles on the gazebo. This event does not differ in great complexity, but it has a number of nuances, the knowledge of which will help to carry out the installation quickly and efficiently.
Material advantages
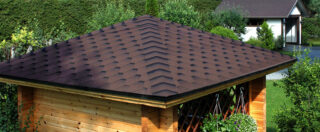
Roof coverings made of rubber-bitumen tiles are very popular among private and commercial developers. This is due to the advantages of the material:
- Presentable appearance. Despite its simplicity, the tiles look presentable and attractive.
- Affordable cost. The composition of the coating includes inexpensive components, and its production is well-established.
- Ease of use. Do-it-yourself installation of a soft roof on a gazebo is not difficult and does not require physical effort.
- Versatility. The cladding can be laid on a base of any shape, even, angular, concave and convex. Fragments are easily trimmed to the desired size.
- Durability. Additives are added to the raw materials, which give the finished product strength, resistance to temperature extremes, dampness and ultraviolet light.
- Minimal care. In fact, it boils down to only rinsing the surface with water as it gets dirty.
- Practicality. The material perfectly absorbs the noise of precipitation. During operation, under the influence of natural heating, individual fragments are fused together, forming a monolithic surface.
When planning to lay the shingles on your own on the gazebo, it should be borne in mind that it needs a rigid base. If repairs are needed, replacing one tile will not work. A complete dismantling or patching of the damaged area will be required.
Planning and drawing
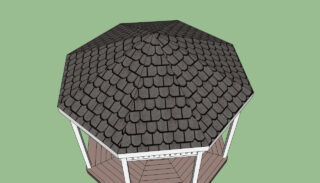
Since you can attach soft tiles to the roof of the gazebo for any pattern, you can choose a shape with almost no restrictions on configuration and complexity.
Design options:
- Shed. The simplest in execution, used for rectangular buildings.
- Gable. The most common designs that look great and fit any gazebo configuration.
- Four-slope. A more sophisticated but practical design. The roof looks good, effectively removes rainfall and withstands strong winds.
- Six-sided. The structure is versatile, suitable for square, round and multifaceted bases. It is more difficult to build, but the investment is justified by beauty and practicality.
- Eight slopes. There are concave, convex and even element configuration schemes. Towers can be given a classic or oriental style.
After deciding on the shape of the roof, a drawing should be drawn up. Depending on its design, the diagrams show the top trim, rafters, lathing, flooring and gutters. Insulation and waterproofing is used in closed-type buildings.
Rafter system and angle of inclination
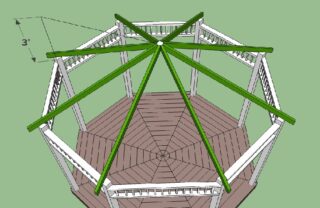
The rafter system is a number of beams laid at a certain slope. The rafters are connected to the ridge beam or to each other when a multi-pitched roof is made. Depending on the size of the building, a hanging or layered system is used. In the first case, the beams are supported on supports, in the second, on the upper frame strapping.
The shingles are laid on a rigid flooring made of boards, slabs or shields. The base must have a constant shape and size, since deformation leads to the appearance of cracks or bubbles on the roof.
The slope angle of the roof depends on its shape, the strength of the prevailing winds in the region and the level of snow cover. It is 12-30 degrees for one- and two-slope structures and 30-45 degrees for pyramidal structures. High roofs are characterized by high windage, and shallow ones - by poor snow melting and the risk of breaking through the flooring.
Required tools and materials
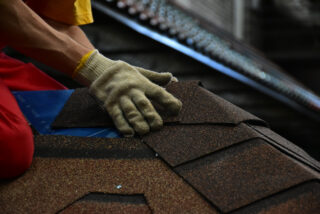
To fix the soft roof to the gazebo roof, you need to prepare a set of tools:
- roulette;
- level;
- a hammer;
- scissors;
- putty knife;
- saw, milling cutter or jigsaw;
- screwdriver;
- stairs;
- safety devices.
The following materials are needed:
- flooring boards (plywood, OSB, chipboard, boards);
- nails;
- waterproof glue;
- additional parts for sealing surface joints.
To ensure safety, work must be carried out in protective goggles and gloves.
Calculation of the number of tiles
It is necessary to take into account the reserve for such adjustments:
- errors - 10%;
- waste on a simple roof - 10%;
- trimming on a complex roof - 30%.
The same goes for consumables - nails and adhesive mixture. Some will be lost, so it is better to have a stock of at least 25% of the estimated amount.
The service life and cost of a shingle roof
Prices for soft tile models may vary depending on their country of origin, composition and shape. The best types of European-made coating cost from 4,000 rubles / m², while domestic products can be purchased for 800-2,000 rubles / m².
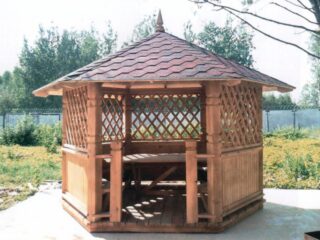
As an example, a square gazebo 3x3 m with a hipped roof is considered. The roof area, taking into account the slope, will be 10.5 m². Shingles are sold in packs of 3 m². Accordingly, you will have to buy 12 m², where 14% will be stock, which is quite normal. If the price of Russian tiles is 1,500 rubles / m², the coating will cost 18,000 rubles. Another 2,000 will be spent on glue and nails. Total - 20,000 rubles excluding flooring.
The service life varies from 20 to 50 years and is directly proportional to the price of the material. Here the owner of the property can decide for himself.
Installation instructions
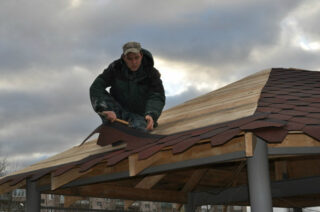
Installing a bituminous tile roof is a short-term process, consisting of several stages:
- Surface preparation. It is necessary to lay the shields in a checkerboard pattern, gluing the joints with aluminum tape. Unevenness up to 2 mm is allowed, since they will be compensated by the mortar and the shingles themselves.
- Planks and gutter. If you do not install these parts, the flowing water will erode the soil at the base of the gazebo, and the spray will leave dirty marks on it. The gutter elements are attached to the crate or eaves with brackets. Then the gutters are hung out.
- Facing. The correct layout gives the surface a presentable appearance, ensures its tightness, and, accordingly, the long term of the entire structure.
- The adjacency nodes are drawn along triangular slats nailed in the corners of the mates. This allows the soft tiles to be well anchored. The working process involves unbolting the timber.
- Waterproofing and insulation are carried out in closed-type buildings. For this, foam, polyurethane foam and membrane film are used.
- Laying flexible shingles. You can put the shingles in strips horizontally or vertically. There is no difference in quality. The top of the tiles is nailed or screwed on, the joints are coated with glue.
The ramps in a hexagonal structure are triangular in shape of the same size. The first is to fix the cornice row, after which the subsequent rows are mounted in steps of 1.5-2 cm in a checkerboard pattern. Each shingle is fastened with roofing nails along the edges, all side seams are coated with special glue. The ridge row is assembled from the third of the cornice shingles with an overlap.
The installation of the roof must be carried out in dry, calm weather in order to exclude a violation of the geometry of the masonry and sealing.

