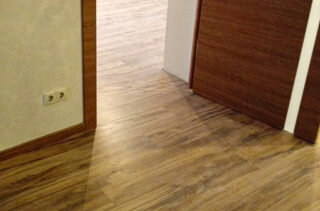
Installing laminate flooring without thresholds throughout the apartment is a fashionable trend in interior design. This technique allows you to create the effect of spaciousness, wide space without a clear division into zones and transitional groups. This idea is interesting, tempting and quite doable on your own. However, to implement it, you need to take into account many nuances, use materials and tools of only top class.
Advantages and disadvantages of installing laminate flooring without thresholds
Laying laminate flooring without thresholds is quite difficult, not every master will undertake its implementation. Pressed multilayer panels noticeably change their dimensions with changes in temperature and humidity. In the rainy season, the lamellas swell and expand to 0.1%, the opposite phenomenon is observed in the summer and at the height of the heating season, when the boards shrink and shrink. For different manufacturers, these indicators differ significantly, but in each case they have boundary limits for the maximum width and length of the continuous flooring.
Design advantages:
- Attractive appearance, pleasant to the eye illusion of a wide platform, a sense of freedom and space.
- Lack of thresholds that you can trip over or knock over the dessert table.
- Ease of putting in order, since it is easier to move the harvesting equipment, there are no gaps.
- Availability of a wide range of components for creating a damper seam between areas of an acceptable size.
Disadvantages:
- Failure to comply with the manufacturer's instructions. Violation of this will void the product warranty.
- Damage to one fragment entails its replacement, associated with the dismantling of the flooring in several rooms at once.
- There is a high probability of formation of cracks and blisters due to seasonal deformation of the coating.
- High complexity of design and practical implementation of the project. A lot of waste.
There are serious arguments in favor of a solid floor in the form of a wide range of decorative joints with various fastening systems.
Methods for connecting laminate between rooms
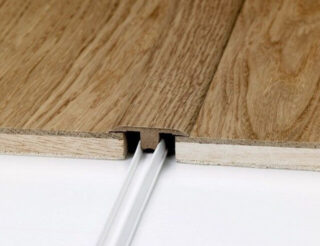
In order to install continuous laminate flooring throughout the apartment, efficient, practical and aesthetic docking devices made of metal, cork and plastic have been developed.
The home craftsman can choose one of the following methods of connecting laminated flooring between adjacent rooms:
- Connecting profiles. They have internal guides for placing the edges of the boards and an upper decorative strip. With thermal expansion, the coating moves freely without the formation of blisters and cracks. Rigid and flexible models are on sale. With the help of the latter, you can create joints of the most complex geometry.
- Nuts. They are made of metal, usually aluminum, adapted to the color and texture of the panels. Products have a flat or semicircular cross section.
- Cork expansion joints. They are inserted between the rows of flooring every 4-8 m, depending on the expansion coefficient of the laminate. The insert is made when the material is well dried and in its minimum size. As a rule, they are installed in openings where they are least conspicuous.
One or several types of joints can be installed within the same apartment, which best fit on a particular section of the flooring.
Preparatory work
The initial stage is to measure the premises. Here you need to calculate the correctness of its geometry, you will need to measure not only the sides, but also the diagonal.
After that, you should perform the following actions:
- Draw up a detailed scale diagram. It is advisable to apply the location of each panel and joint to it. This will allow you to correctly calculate the need for materials and lay the panels without preliminary measurements.
- Prepare the base. If the old wood flooring is in satisfactory condition, it must be examined, repaired, treated with an antiseptic, leveled with a grinder or planer, sheets of plywood or chipboard. Correction of the concrete slab is done with a cement or gypsum screed.
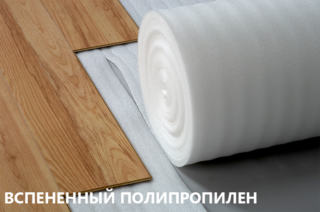
- Put the backing on. It lays down in strips, which are held together with ordinary or aluminum tape. So that the material does not move during the installation of the lamellas, it is advisable to glue it to the base.
Finally, a soft damping tape 8-10 mm thick is installed around the perimeter of the premises.
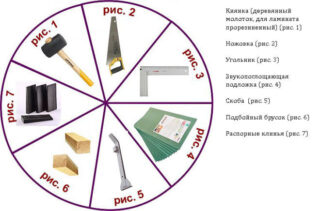
Required tools and materials
So, to complete the program, with a maximum arrangement of the screed, you will need:
- puncher;
- scissors for metal;
- a hacksaw with fine teeth;
- level, tape measure, rule;
- miter box;
- mallet;
- shaped emphasis;
- mounting foot;
- metal profile for beacons;
- shovel;
- wide spatula;
- sand and cement (self-leveling mixture);
- container for mixing the solution;
- paint brush;
- scissors;
- Scotch;
- marker;
- antiseptic.
To ensure your own safety, you should work in goggles and gloves, and when mixing the solution - in a construction respirator.
Stages of laying laminate without thresholds
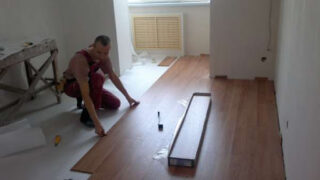
To provide the flooring with the necessary strength, each subsequent row must be laid with an offset of half or a third of the board, strictly maintaining the original dimensions. In all cases, the assembly should be started from the far left corner of the largest room.
Installation of a laminate without a threshold is carried out in the following sequence:
- The blanks for the first row are selected. All have their comb grinded. Laying and connection is carried out in accordance with the manufacturer's instructions.
- As you move towards the exit from the room, the base is filled with laminate. If the lengths are suitable, they are used at the beginning or end of the row.
- When the flooring approaches the opening, the platbands and the door leaf are removed, horizontal slots are made in the box from below. The panels are brought out close to the walls and further into the adjacent room. A cut of the desired shape is made, the ends of the lamellas are closed with a profile or cork insert.
- In the next room, laying continues according to the previously used scheme. Cut fragments are applied to the gasket. This achieves the effect of continuity along the plane and pattern.
- Installation continues using a similar technology until the next opening. There, a pass is made again using shims and cuts. Upon reaching the last room, the masonry ends at the far wall, where the last row is adjusted in width and inserted using the mounting foot.
After checking the quality of the work performed, the platbands and doors are returned to their place, the skirting boards are installed.

