Popular in private and commercial construction, laminate is appreciated for its presentability, beauty and practicality. An important factor is the affordable cost and the possibility of self-styling. However, the installation of the flooring is possible only on a flat base with height differences of no more than 1%. Laying laminate flooring on plywood is one way to follow the manufacturer's recommendations for proper installation of the flooring. This operation is quite difficult, especially if the base plate has serious deviations from the horizontal. Nevertheless, it is quite feasible, provided the exact adherence to the technology.
Choice and advantages of plywood
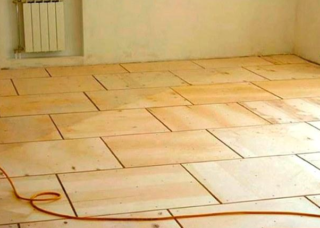
Plywood is a multi-layer material assembled from veneer sheets by gluing and pressing. The slabs are assembled from strips alternately arranged in transverse and longitudinal orientations. The number of bands is always odd, starting from three. The sheets are characterized by strength, shape stability, slight flexibility and elasticity.
By design, products are divided into the following categories:
- construction - characterized by all the properties necessary for leveling floors;
- industrial - has sufficient strength, but the quality is lower;
- furniture - it cannot be laid as a base, since it is produced for the rear walls of furniture and the manufacture of containers.
Material classification by moisture resistance:
- FBA - this property is absent;
- FSF - increased protection against moisture. Due to the use of phenol-formaldehyde resin;
- FC - high protection provided by an adhesive composition of carbamide-formaldehyde resin.
- FB - absolute protection through the use of bakelite glue.
Plywood is produced in the following formats:
- square - 1525 × 1525 mm, 1220 × 1220 mm, 1475 × 1475 mm, 1270 × 1270 mm:
- rectangular - 1525 × 1350 mm, 1525 × 1220 mm, 1525 × 1475 mm, 1525 × 1270 mm.
Laying the laminate on plywood is possible with a thickness of 16-21 mm in one layer or 8-10 mm in two layers.
In addition, you need to pay attention to the grinding and quality of the material. It is advisable to lay the laminate with your own hands on plywood marked Ш1 (one-sided grinding), I-II quality categories. It is not worth saving, as this is fraught with the appearance of knocks, squeaks, deformations and very quick unscheduled repairs.
Laying methods
The choice of a way to level the floor with plywood is determined by the structure, condition and type of the existing base.
To perform this process, you can choose one of the following technologies:
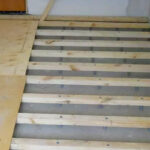
- On lags. It is used at the construction stage after the construction of the rough flooring or dismantling of the finished floor after it becomes unusable. After determining the zero level and laying the waterproofing, logs are installed along it. The interval is taken in the range of 40-60 cm, a multiple of the size of the sheets. Gaskets are installed and rigidly fixed over the large depressions. Then the horizontal and the strength of the fixing of the lag are checked, the space between them is filled with insulation, a membrane film is attached on top. Plywood sheets are screwed onto the prepared base in a checkerboard pattern. Their edges should lie exactly in the middle of the frame beam.
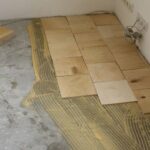
- On the screed. A flat slab is an excellent base for plywood. The screed is pre-treated with an antiseptic and impregnation, then marking is done, holes are drilled in plywood and concrete, plastic dowels are installed. The sheets are lubricated with polymer glue and screwed to the plate.Hardware hats need to be sunk into the wood by 0.5-1 mm.
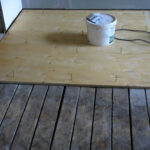
- On the boards. This choice is made when the boardwalk is warped but not internally damaged. Plywood is screwed directly to the floor; if it is lowered, longitudinal spacers are installed. Another option for leveling the base is to use polymer solutions or quick setting putties.
In all cases, expansion joints with a width of 2-4 mm must be left between the fragments of the flooring, which after installation must be sealed with a sealant.
A set of necessary tools
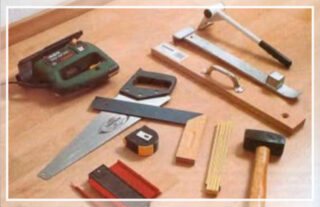
Since the sequential production of two decks is a multi-stage and step-by-step process, each of them will require a separate set of tools and accessories.
To lay plywood:
- level;
- puncher;
- screwdriver;
- roulette;
- square;
- a hammer;
- paint brush;
- assembly gun;
- rubber spatula;
- hacksaw;
- rasp.
Additionally, to lay laminate flooring:
- scissors;
- mallet;
- file;
- jigsaw;
- stationery knife;
- substrate;
- damper tape.
Each phase of the activity involves the use of protective glasses and gloves.
Features of laying laminate on plywood
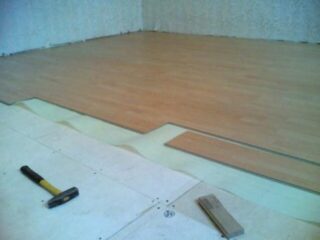
In accordance with the manufacturer's instructions, the laminate can be installed on a base with a height difference of no more than 0.5%.
It is necessary to adhere to the following recommendations:
- Before starting work, the boards must be kept indoors for 2-3 days so that they come in accordance with its temperature, humidity and take on constant dimensions.
- It is better to start laying from the far left corner of the room from the doors.
- The presence of a jigsaw will simplify and speed up the installation, allow you to quickly and accurately make corners and holes for pipes.
- It is not worth glueing the substrate to the base - this is a waste of time, effort and money. The fabric will be pressed firmly against the deck.
- To fit the last row without any problems, you need to use a special clamp.
- The elements in the locks should be joined through the gasket, avoiding impact on the edges of the boards.
- Leave a thermal gap of 8-10 mm between the flooring and the walls. Subsequently, it will be covered with a plinth.
It is recommended to purchase boards with a Click connection system, which allows you to easily disassemble and reassemble the flooring, if necessary.
DIY installation
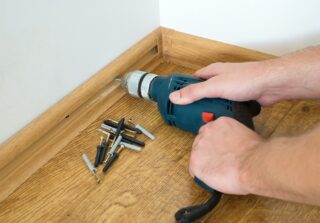
This technology is perfectly worked out and will not cause much trouble for the master.
To lay the laminate with your own hands on plywood follows the following method:
- Lay the underlay, connecting the overlap strips by 15 cm, gluing these places with tape.
- Install a damper tape around the perimeter of the room. You can also use shaped spacers or board trims.
- Lay the first panel in the lower left corner, attach the following fragments to it. Cut the last one to length and complete the row.
- Collect the subsequent rows one piece at a time or after assembling them into a long board. The best offset option is 1/3 of the lamellae. This is how a beautiful herringbone pattern is obtained on the flooring.
- The boards of the last level should be measured, cut and driven into the panel using a mounting clamp.
- Remove spacers around the perimeter of the room, install the plinth. It is better to fix it to the wall in order to exclude the occurrence of gaps during thermal deformation of the flooring.
- Fill up scratches, if any, appeared on the material during installation.
All that remains is to remove the trash, wash the floors and arrange the interior items.

