In private and industrial construction, laminated panels are popular. Manufacturers produce many models of the material, which differ in appearance, composition and method of connection. Experts recommend paying attention to lamellas equipped with a chamfer, as the most acceptable finishing option according to many criteria. Laying a beveled laminate is not particularly difficult and may well be carried out even by a novice master.
Classification of beveled laminate by category
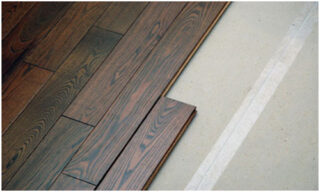
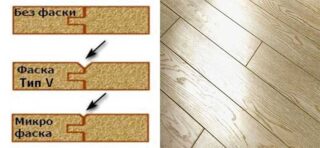
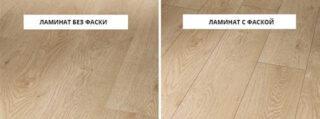
The elements of the covering are panels with locks along the edges, with the help of which they are connected to each other and a single monolithic flooring is assembled. A chamfer is a cut along the edges of the products with a certain shape, when they are connected, it forms a small recess.
There are several criteria by which this type of product is classified.
The location of the slice can be:
- double-sided, along the long edges of the panels;
- four-sided, along the perimeter of the board.
In the first case, the coating looks more like parquet masonry, in the second, it looks like a plank floor.
- V-like - differs in a flat, mowed end at a certain angle;
- U-like - the connection is a semicircular groove.
Surface treatment:
- paint that is applied directly to the material or after processing it with a primer;
- laminate that protects the inside of the board from moisture and mechanical stress.
Production methods:
- end milling with special knives - process accuracy and a wide variety of shapes are achieved;
- rolling by passing the lamellas through special rollers, pressing the edges of the end immediately together with the front coating.
The choice of material is made based on the size, configuration, style of the room and your own aesthetic priorities.
Benefits in use
The technology for making bevels on panels is relatively new, but has managed to win a large number of adherents who believe that models of this type are superior to classic products.
This opinion is based on the following advantages of the products:
- Effective masking of gaps arising from temperature and humidity changes. This property is typical for solid wood flooring.
- Improved design. The covering faithfully imitates natural wood of any species. The presence of grooves at the joints makes it even more realistic.
- Increased strength. For the bevel, the outer part of the panel increased in thickness is made, which takes on the mechanical and abrasive load.
- Protected joints. In a quality product, they are treated with hydrophobic impregnations and a protective film. Thanks to this, the inner filling is reliably protected from water ingress.
- Compensation for minor irregularities in the substrate. This is due to the backlash provided by the design of the products between the fragments.
For all its advantages, the price of products practically does not differ from analogues with rectangular edges.
Installation methods for beveled laminate
Lamellas can be laid in one of the following ways:
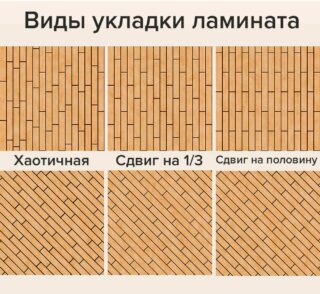
- Along the walls. It is recommended to lay the floorboards perpendicular to the window opening so that the light coming from it emphasizes the structure of the veneer. If the room is narrow and long, it is best to lay the laminate parallel to the short wall. So it will visually become wider and shorter.
- Diagonally. This installation pattern for beveled laminate is more complex and wasteful. But all this is justified by the beauty and originality of the finished flooring. This technology is perfect for square rooms of any size.
Planks with double-sided cuts are best placed along the wall, while four-sided models are suitable for any placement.
Preparatory work
After that, you need to perform the following activities:
- Remove all furniture from the room. Separate the skirting boards, remove the old covering, remove and take out the trash.
- Conduct a foundation study. Mark defective areas, fill holes and crevices, replace rotten floorboards.
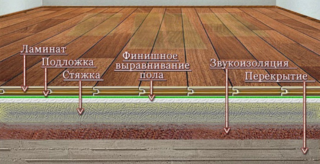
- Level the floor. Chipboard, plywood are used for the wood covering, minor irregularities are eliminated with a sander or grinder. A screed is arranged on a concrete slab.
- Install waterproofing and underlay. Wood fiber, rubber, polystyrene, expanded polystyrene, polyurethane, natural cork, polyethylene foam can be used here.
In conclusion, a damper tape is attached around the perimeter of the room, which will simultaneously act as a limiter during installation.
Required tools and materials
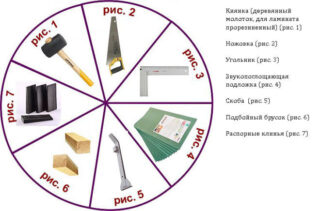
- a hacksaw for wood or a jigsaw;
- roulette;
- level;
- wide miter box;
- mallet;
- template;
- mounting foot.
Materials other than panels may require glue, cut impregnation, rags and a shield to clean them.
You should work in goggles and gloves, a gauze bandage will not interfere.
Installation instructions for beveled laminate
In the future, you need to step by step perform the following actions:
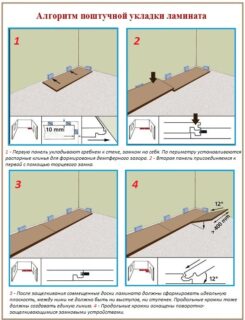
- Install a starting element in one of the far corners. It can be a whole panel along the wall or a triangle in the case of diagonal installation. The elements are spiked away from themselves.
- Create rows one by one, connecting the fragments to form locks. With both methods, the lamellas are staggered with an offset of a third or half of the figure. Docking is carried out using a mallet and a template.
- Cut the last row to size and insert into the deck using the foot.
- Install skirting boards, wet clean the new coating.
It is better to cut the boards in one of the adjacent rooms, so as not to constantly be engaged in cleaning the substrate from sawdust and dust.

