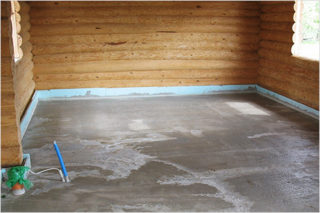
Wood is a mobile and breathable material; it expands or contracts when the temperature and humidity are unstable. It is possible to lay ceramics on lumber floors in compliance with the technology in order to keep the finishing layer intact for many years. Laying tiles on a wooden floor becomes possible after the preparation and processing of the base. Do not put ceramics on the surface if less than two years have passed since the installation of the boards.
Features and options for the base for laying tiles
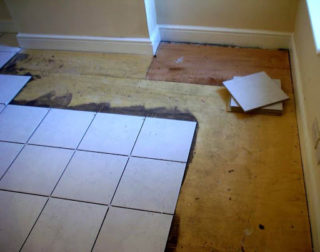
Tiles are usually used in rooms with high humidity, for example, in a sauna, kitchen, bathroom and toilet.
There are several factors that create problems when installing and using ceramics on a wooden layer:
- the difference in the service life of sawn timber and tiles leads to the fact that the first material has already deteriorated, therefore the second must be replaced, although it may still work;
- difference in the structure of tiles and wood, different technical characteristics of building materials;
- the floor of the boards is not static, which gives a negative result when the tile and wood interact;
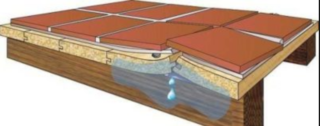
- oxygen ceases to flow to the tree, the base begins to rot after installing the tile covering.
Before performing work, you need to create a fixed base, distribute the loads evenly over the entire area and make fresh air access to the surface of the board layer.
Options for the base on which the tiles are laid:
- plank floor without defects;
- wood floor to be repaired;
- waterproof plywood covering with or without logs;
- lag structure without a plank layer.
The quality of ceramic flooring depends on a constructive analysis of the condition of the base and the choice of the correct installation technology. The decision is made after inspection and identification of traces of rot. Fungal lesions soften the wood, changing its structure and color.
In the thickness and on the surface, beetle larvae are found that gnaw through the tree, arrange many moves and reduce the density and strength of the material. Most of the damage develops at high humidity, therefore, waterproofing is provided. In dry conditions, microorganisms develop due to a violation of the protection against cold, it is necessary to check the integrity of the thermal insulation layer.
Required tools and materials
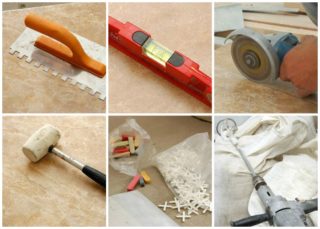
The surface level is checked with a building level, you can use a laser device. Irregularities resulting from swelling of boards or logs are eliminated with a planer. In case of subsidence, bricks or other materials are placed in order to raise the surface to the desired level.
Other tools for leveling the base and laying tiles:
- containers for mixing glue, impregnation;
- notched, straight and rubber spatula;
- rubber hammer, brush, rule;
- electric drill with a whisk;
- building hair dryer for lifting paint when removing;
- tape measure, pencil, square, lace;
- tile cutter, grinder.
You can put the tiles on a wooden floor using a standard mortar consisting of cement and sand at a concentration of 1: 3. To increase the waterproofing properties, liquid glass is introduced into it in an amount of 150 g per 10 liters. It is recommended to use a special dry adhesive, which is diluted with water. Polymer additives improve the elasticity of the layer.The consumption of the mixture depends on the unevenness of the area, the standard consumption is 1 bag (25 kg) for processing 2.5 - 3.5 squares.
After leveling, wood is treated with impregnation from fungi and microorganisms in accordance with the instructions for use. A common effective remedy is heated linseed oil. You will need chemical washes to remove a layer of paint on the surface, such compositions look like a gel and are sold in hardware stores.
Surface preparation
To identify rotten areas, a sharp instrument, such as an awl, is stuck in a suspicious place. If it enters easily, there is a lesion that needs to be eliminated, and the adjacent areas should be treated with an antiseptic. Areas affected by beetles are removed, the surrounding layers are impregnated with insect repellent.
Methods for removing damaged paint:
- A hairdryer with a spray temperature of about + 250 ° C. In this case, the stream is directed to the paint, and it swells. The remains are scraped off with a knife, a spatula. It is not recommended to use a blowtorch, because overheating of the wood leads to a weakening of strength.
- A chemical wash is applied to the area and left for a certain time. Then remove the softened mass with a spatula. This option is expensive, it is used to lay a tile covering on a small area of the floor.
- Mechanical cleaning is a method of peeling off an old layer with an emery or a knife without any aids. The method is cheap, but time-consuming, sometimes a sander is used.
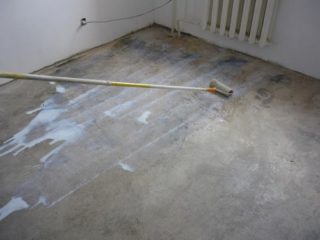
Linseed oil is considered a safe and natural impregnation agent, it kills bacteria, larvae and spores. For efficiency, it is applied 3-4 times, each next layer is applied after the past has dried. Hot air is used for heating, you cannot put the container on the stove, because drying oil vapors ignite.
When damage is detected, boards or logs are replaced, while the method of preparing the base differs depending on the type of base base and the degree of destruction. Insulation is done with expanded clay gravel, foam, expanded polystyrene are used. Waterproofing is performed with plastic wrap, or super-breathable special membranes are installed. The latter type additionally protects wood from household fumes.
Laying tiles on a wooden floor with your own hands
Pre-lay the elements on the floor. Choose the standard rectangular method or apply diagonal stacking. For some rooms, a decorative method is used - the details are laid out with carpet or stripes to emphasize the functional areas. Depending on the pattern, they begin to lay from the corner or from the center of the room.
Step-by-step instruction:
- prepare the base;
- prepare a mixture for gluing tiles;
- soak the tile in water for 5-10 minutes so that the tile does not draw moisture from the solution, and it hardens under normal conditions;
- glue is applied to areas of the floor so that 4 tiles fit on the area, use a notched trowel;
- monitor the horizontalness of the surface, the thickness of the seams;
- ceramic elements are positioned taking into account the pattern, irregularities in height are tapped with a rubber hammer.
Use crosses for tiles 1 to 4 mm in size. Wide seams look rough, the standard size is 2 mm. Grouting compounds are used to fill the gaps; they are based on cement and polymers. The mortar is applied to the seam and spread with a rubber spatula.
Grout does not just cover the gap between the tiles, they try to press it into the seam. All longitudinal slots and corners around the ceramics are filled with a compound. After hardening, the next day with a damp cloth or sponge, remove the remains of grout from the tiles. The rags are regularly washed in water.
Dry leveling
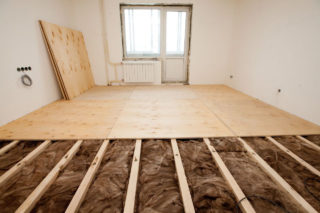
For this method, green gypsum plasterboards (GKL), gypsum fiber sheets (GVL), cement-bonded particleboards (DSP), particle boards (chipboard) are used, sometimes moisture-resistant plywood with a thickness of 10 mm or more is used. Such options are made in dry rooms, in a bath or sauna, the material will collapse. For wet rooms, choose laminated chipboard (on both sides) and wax-based OSB boards.
The composition of the floor is thought out so that the insulation does not come into contact with the waterproofing film. Condensation forms on its surface, which flows down onto the insulation and reduces its protective characteristics from the cold. This applies to mineral wool, stone wool. If they put expanded polystyrene, polystyrene, this requirement is unimportant, because the insulation does not get wet.
Rule of stacking sheets:
- the joints of the panels are staggered so that they do not coincide;
- for fastening the sheets, self-tapping screws are used for wood, which are placed every 30 - 35 cm along the perimeter of the plates;
- the distances between the sheets are treated with a moisture-resistant solution, which is sanded after drying.
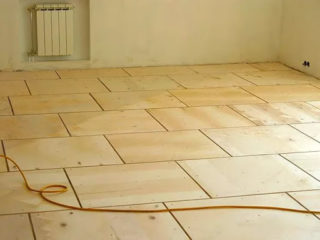
When using plywood, a different technology is used. Be sure to scroll the boards with self-tapping screws so that they do not creak. Gaps with a thickness of 2 - 4 mm are left between the strips so that they do not rise from moisture, temperature gaps with a width of 5 - 10 mm are left from the walls. The joints between the sheets are sanded and reinforced tape is glued to them. In damp rooms, a grout with hydrophobic properties is used.
For leveling the floor with a dry method, one layer of sheets is laid. If the surface has unevenness more than 6 - 7 mm, it is recommended to lay two layers of plywood. If large indentations are found, the plywood will not level the surface, but will repeat the unevenness. For this case, self-tapping beacons are used. They are screwed into the base, the sheet rests on them in the region of the recess. Sheets can be glued to the base without the use of hardware.
A crate is placed under the chipboard panels, in the body of which insulation and vapor barrier are mounted. The material is not waterproof, so it is impregnated several times with special agents to increase moisture resistance.
Wet screed
The main screed is poured after hardening of the rough layer on the second day. Before pouring, longitudinal plaster beacons are exposed or point benchmarks are used, which are leveled using a water level.
The solution is prepared in a trough, the amount of water is taken such that a tough mixture is obtained. Excess water, when solidified, will sag, and large dents will appear on the surface.
For alignment, you can apply:
- starting self-leveling mixtures, they are applied up to 5 cm thick;
- finishing self-leveling compounds, their height can be up to 5-8 mm;
- ready-made repair mortar in the form of a dry powder, the thickness of the screed is allowed up to 7 cm.
The first two types contain polymer additives that provide elasticity and flexibility of the screed. The repair mortar provides added strength by adding cellulose fibers to the dry mix. Ready-made compositions are more expensive than sand-based cement mortar, but they are distinguished by improved performance.
The wet screed technology assumes that the layer must be installed in one go. It is impossible to store the prepared solution for more than 1.5 - 2.0 hours, since it hardens and cannot be restored.
The screed hardens on the second day, but gains 100% strength only on the 28th day. Tiling can be done 10 to 12 days after pouring.
Express option
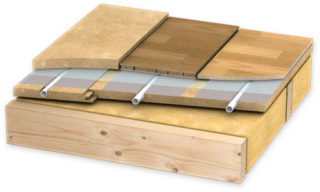
The method is suitable for wooden bases that have already been leveled before and have served two years until the floor is finished. It can be a perfectly flat plank floor, a stably installed parquet, a base made of moisture-resistant plywood or wax-impregnated OSB boards. Additionally, the horizontal level is checked so as not to be mistaken.
For floors in good condition, the minimum treatment method is suitable. Slots, seams and gaps between the lumber are filled with polyurethane foam, they also come at intervals along the perimeter of the walls. The floor surface is primed with deep penetrating compounds to increase moisture resistance.
If you need to lay a warm floor, make the following layers:
- GVL sheets;
- metal grid;
- electric underfloor heating carpet;
- screed with plasticizer (from 3 cm thick);
- a layer of ceramic tiles.
The tiles are laid out on the square, the place of each element is marked. The solution is prepared before laying. If the floor level is perfect, the adhesive will be 2-3 mm thick. For application, use a spatula with teeth equal to the thickness of the intended layer. They improve the properties of the mortar by using special plasticizers that are available in hardware stores.

