Ceramic tiles are always relevant when decorating a bathroom interior. Its wide range of designs, strength, durability and ease of maintenance have made it a popular finish. You can lay the material with your own hands. This is a laborious process that requires preparation and accuracy in work.
Advantages and Disadvantages of Bathroom Tiling
When choosing a finishing material for a bathroom, first of all, they remember ceramic tiles. It meets all the requirements for laying in rooms with high humidity, and the variety of design solutions even makes it difficult to choose. Modern manufacturers use innovative technologies that increase the strength and durability of products. The product is presented in all price categories, and when installing with your own hands, a significant amount of money is saved for repairs.
The main advantages of using the material:
- Durability - the material is made from special types of clay by firing at high temperatures. The products are resistant to mechanical stress, shock and wear.
- Moisture resistance - constant exposure to water does not spoil the tile, it does not absorb moisture, delays its flow to the base.
- Environmental friendliness - the tiles are made of natural material, they do not have harmful chemical impurities that cause allergies.
- Easy maintenance - the tiles are easily cleaned with detergents, in order to prevent the appearance of limescale, experts advise to install good ventilation.
Disadvantages:
- High thermal conductivity - the surface of the ceramic is cold, which is unpleasant to touch with bare feet. The problem is solved by installing a floor heating system or simply laying a rug.
- The presence of defects - improper storage, careless unloading and transportation lead to the appearance of broken corners on the tiles. Defects may also be manufacturing defects, this happens with the goods of unscrupulous companies.
- High-quality exclusive tiles from European manufacturers are expensive, but they can be replaced with domestic products manufactured under license on imported equipment.
The main disadvantage is the differences in the performance characteristics of ceramics and wood. Tiles and wood react differently to indoor humidity. Boards swell under the influence of liquid, can rot. The tile does not change its size and strength. Laying tiles on a wooden bathroom floor is possible with special preparation of the base.
Tile calculation
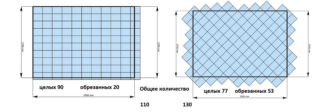
Before purchasing the material, you need to measure the length and width of the floor. In addition to the size of the room, the type of laying, parameters and shape of the tiles are taken into account. For a simple installation method, it is enough to determine the consumption of products in square meters:
- Calculate floor area - length times width.
- Calculate the area of one tile by multiplying the length by the width.
- Divide the floor area by the area of 1 tile.
When a fractional number is obtained, it is rounded up. The material must be bought with a margin of 10-15%.It is necessary to replace products that are damaged during delivery or trimming.
Required tools
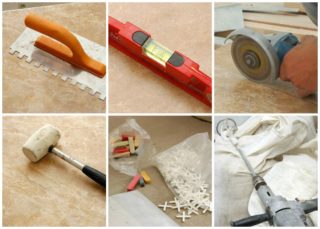
To lay the tiles in the bathroom with your own hands, you will need the following tools:
- building level;
- rubber and notched trowel;
- tile cutter;
- rubber hammer;
- construction mixer;
- wide brush;
- plastic crosses.
For the floor, tiles with a low porosity and an anti-slip coating are selected. You will also need a dry glue mixture and grout. The best option is Ceresit brand products.
Variety of styling methods
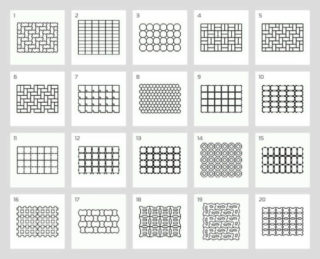
There are several ways to put tiles in the bathroom. The layout determines the decorative appearance of the coating. When making a choice, do not forget about the different level of installation complexity. For those who do the styling on their own, it is better to start with a simple option.
Straight
The traditional way is that rows of rectangular or square tiles are parallel to each other. This is the easiest option with the least amount of clipping.
Diagonal
Products are stacked along diagonal axes. Suitable for square-shaped material, helps to hide the unevenness of the walls. Cutting consumption is about 15%.
Chess pattern
To make the coating look spectacular, tiles of two colors are used. The peculiarity of the method is that the elements of the next row are placed with a shift of half the length. The result is a drawing that resembles a chessboard.
Offset
According to this scheme, each part is shifted vertically and horizontally, and a small element is placed in the resulting gap. The method is difficult for beginners.
Preparatory work
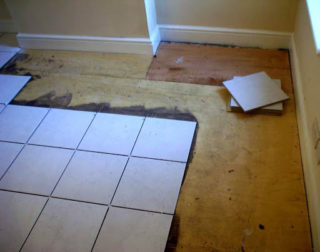
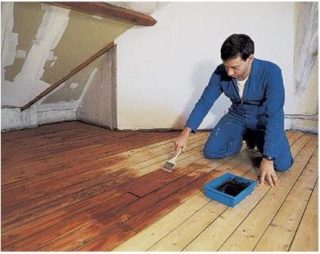
Before laying the tiles on the bathroom floor, you need to check the strength of the boards and take care of creating a waterproofing layer. It will prevent the base from swelling, deformation of the boards. The first step is to revise the floor. Squeaking and crumbling floorboards are repaired or replaced. Ceramic coating cannot be mounted on dilapidated boards. They are completely removed and replaced with new ones.
Lags should be located in increments of no more than 50 cm, if necessary, additional elements are installed. The space between them is filled with expanded clay, which serves as heat and sound insulation. A rough wooden base is treated with an antiseptic primer. A special membrane or latex, bituminous mastic is used as a waterproofing layer. It should go up to 10 cm on the walls. Waterproofing compounds are applied in 2 layers.
The base for the tiles must be rigid, the best option is a screed.
Leveling wet screed
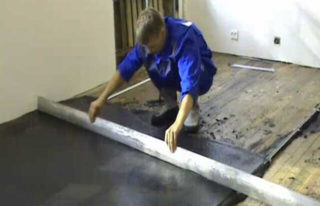
It is allowed to raise the base by no more than 3 cm. For pouring, a sand-cement mortar or a self-leveling mixture is used. The horizon of the future foundation is set at the laser level. The perimeter of the room is glued with damper tape. The mixture is poured from the far corner and distributed over the entire surface by the rule. When using a special composition, a needle roller is passed through the solution so that air bubbles come out. Further work is carried out after the screed has completely dried. Advantages of the method: a solid, even base, disadvantages: the load on the wooden structure and the repair period increase.
Dry screed
A popular option using sheet materials. For installation of the base, moisture-resistant plywood, cement-bonded particle boards (DSP), gypsum fiber (GVL) are taken. The material is laid on a prepared (sanded and primed) surface in 2 layers, for DSP one with a thickness of 12 mm or more is enough. Gypsum-fiber sheets with hydrophobic impregnation and moisture-resistant plywood are laid with a gap between the seams. They are screwed to the base with self-tapping screws. A gap of 2 mm is left between the plywood sheets, the gypsum fiber board is connected with glue.After fixing the coating, its surface is treated with deep penetration soil in 2 layers. Pros: dry technology is faster, tiling starts immediately, the load is insignificant.
Preparation of the solution
When choosing an adhesive, take into account the type of base. Universal dry mixes for ceramic tiles and porcelain stoneware from the companies Monolit, Knauf, Weber, Ceresit are suitable for a concrete screed, gypsum fiber board and cement-bonded particle board. Due to the special structure of plywood, such compounds have poor adhesion to it. Ready-to-use elastic adhesive mixtures are recommended.
A clean container with water at room temperature is prepared under the glue. The manufacturer indicates the required volume of liquid in the instructions on the package. The mixture is poured into water and mixed with a construction mixer at low speeds until a homogeneous mass is formed. Then the solution is left for 5 minutes and mixed again. The glue should be elastic, but not liquid.
Instructions for laying tiles on the floor in the bathroom with your own hands
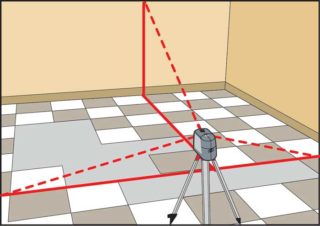
Before starting work, markings are applied to the floor. With the help of cords, perpendicular lines are drawn from the middle of the walls; the center of the room will be at the place of their intersection. The starting point is chosen individually, the installation can start from the door, opposite corner or the center of the room. The starting point for installation depends on the bathroom layout. One of the advantages of the material is that it can be laid out on the floor and tried on the optimal scheme. On the basis of the marking is done in rows. Experts advise not to leave narrow details around the edge. It is better to trim on both sides of the row.
Step by step installation of tiles on the wooden floor in the bathroom:
- The first tile is taken, moistened with a sponge on the back side. This will provide better adhesion to the mortar.
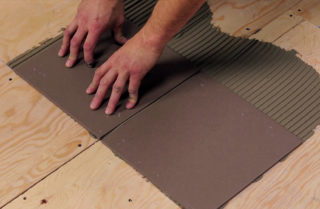
- With a spatula, glue is applied to a floor area equal in size to the tile. The solution is carried out with a notched trowel to form grooves.
- The adhesive is applied to the tiles and also applied with a notched trowel. When laying the strips on the floor, the tiles must intersect to ensure maximum strength.
- The material is evenly pressed to the floor, then the horizontal level is checked with a bubble level.
- Then the solution is applied to the markings of several elements and several tiles are laid. Plastic crosses are inserted between them to align the seams. The plane of all elements is checked with a level.
- First, all whole tiles are laid, the trimming remains at the end of the installation.
- After 24 hours, the crosses are removed and grouting is performed.
The solution that gets on the surface of the tile is removed with a damp cloth or sponge. When applying the adhesive, it is important to ensure that no voids are left. In such places, tiles can crack.


