The process of laying tiles on an uneven floor is laborious and futile. This is due to the fact that over time, defects will appear on the surface. It is safer to operate according to the classical algorithm: stripping, leveling and facing. Self-laying tile or porcelain stoneware requires the study of technology, preparation of tools and materials.
Technological features of laying tiles on uneven floors
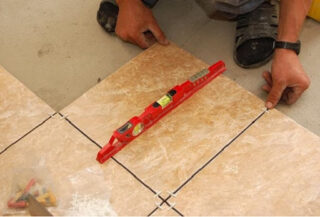
Tiles may be laid on a screed with a slight slope. In other cases, the surface is leveled using the "self-leveling floor" technology. However, using this method increases the level, which is sometimes unacceptable.
Before starting cladding, familiarize yourself with the nuances of the technology:
- uneven surface doubles the operating time;
- the amount of glue depends on the defects of the screed;
- for mixing mixtures and solutions, an electrical appliance is required;
- it is better to lay tiles of 30x30 cm on an uneven floor.
The correct calculation of tiles is not only measuring the area, but also taking into account additional factors:
- size and type of tiles;
- glue thickness;
- base material;
- defects and obstacles on the surface.
If you need to cut tiles, pay attention to the size of the cuttings. When they make up more than 50% of the area of the fragments, a double volume of material must be purchased per row. When calculating, add 10-15% to the resulting number to cover the costs of marriage and incorrect cutting.
Selection criteria for tile adhesive
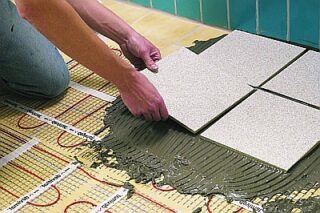
The choice of glue depends on the place of installation - a room or an open space. For example, outdoor compounds can withstand temperatures ranging from +40 to -40 ° C. For closed rooms, such characteristics are not taken into account.
The assortment on the market does not differ, but when leveling the floor, it is recommended to choose an adhesive with a plasticizer. A thick layer allows you to lay the tiles efficiently and avoid undocking them during work.
Surface preparation and the use of a self-leveling compound are cheaper than the cost of tile adhesive. An additional plus - ceramics fit easier.
List of required tools
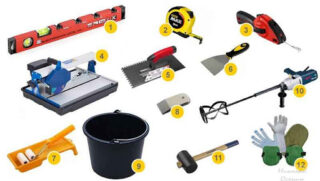
The quality of the cladding depends on the chosen tiling tool. For work, there is not enough porcelain stoneware, glue and a hammer. Professional tilers use special equipment. If you are planning one-time work and you need to reduce the burden on the budget, rent a tool.
For facing an uneven floor, you will need basic equipment: a perforator with a whisk attachment or mixer, a tile cutter, a grinder and nippers.
Additional accessories:
- rubber hammer for tapping;
- trowel and notched trowel;
- a bucket for pouring glue;
- scraper, construction knife;
- a set of plastic crosses or SVPs;
- extension cord and pencils;
- roller for applying a primer.
Auxiliary tool: tape measure, squares, water or laser level (spirit level), aluminum rules 2.5 and 1.5 m.
Grouting kit:
- bucket 2 l.;
- trowel spatula;
- rubber and felt gloves;
- hard washcloth;
- foam rubber and a capacity of 10 liters.
Observe safety precautions when performing construction work. Wear glasses when using a grinder.A respirator will prevent dust from entering the respiratory tract. Use gloves to protect your hands from minor injuries.
SVP is an innovative scheme that allows you to level the tiles on the floor when laying. The system is suitable for ceramic and porcelain stoneware with a thickness of 3-20 mm.
Preparation of the base
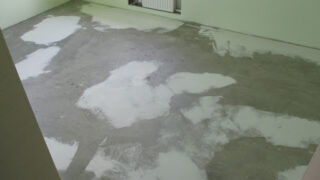
The preparatory stage is the main part of any construction work. Provide a flat floor surface, otherwise the tiles will not work perfectly. A prepared base helps to achieve a high-quality cladding.
A large layer of adhesive mass will not help to hide unevenness. If there is an old coating, dismantle it, then form a screed and waterproofing. For leveling, you can choose any method: dry, wet or warm floor. An important point - observe the technology of the work.
Dismantling means removing sills, skirting boards, old tiles and other irregularities from the surface that prevent laying right next to the wall.
Instructions for laying tiles on uneven floors
Before starting work, read the “Insulation and finishing coatings” standard (SNiP 3.04.01-87 / SP71.13330.2011). The surface of the concrete floor must be dry and free of debris, dust and oil. Work on laying floor tiles takes place in three stages: marking, facing, grouting.
Markup
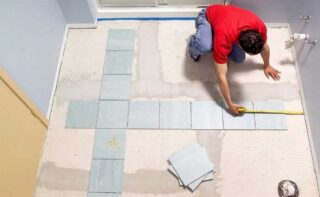
The tiles are laid using one of 3 methods: seam-in-seam, staggered and diagonally. The markup depends on the selected type. The first two options involve calculating the amount of material taking into account the seams. Entrust the diagonal installation to professionals.
Markup rules:
- In the far corner of the room, mark the first row of tiles with a straight line.
- Mark the location of the material. If the tile is patterned, place all the elements for a complete drawing.
- Near the entrance, the marking of the rows is done taking into account the whole fragments. Depending on the tile settings, you may need to offset from the far wall.
- Consider the size of the seams when laying out.
- Spread the tiles all over the floor for accurate markings.
Make reference marks, pull the lighthouse cord along the wall. Avoid creating wedges near other surfaces. Use bright markers to make the lines clearly visible.
Cladding
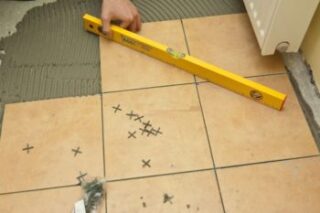
Before laying the tiles, treat the floor with deeply penetrating soil. After 2-3 hours, you can start working.
Laying tiles with your own hands on uneven floors:
- Prepare the adhesive mixture according to the manufacturer's recommendations. If the surface is curved, thicken it. The volume of the batch should not exceed the amount of the mixture per 1 m².
- Using a notched trowel, apply the adhesive to the floor and then to the tiles. The grooves of the mixture are placed perpendicular to each other.
- Lower the prepared fragment to the surface, lightly pressing it to the desired level. They control the horizontal position of the spirit level. Take a rubber mallet, tapping lightly, compact the tile. Movements must be fast and precise, since it is not recommended to remove the tiles after installation.
- In a similar way, you need to lay tiles on a curved floor along the following lines. Align the surface with the first row.
Remove excess adhesive after shrinkage of the tile. Use crosses to create uniform seams on the surface. Place the alignment system at the corners, at the intersection or with an indentation of 2-3 cm. Immediately clean the gaps of the glue, otherwise it is difficult to remove it after drying.
Grouting
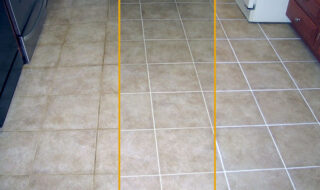
The final stage of work is grouting, which is not carried out when laying the tiles butt. Wait until the glue is completely dry before proceeding. Remove crosses or other alignment system. Remove coarse debris from the surface and vacuum the floor.
For grouting, use a cement-based mixture according to the following scheme:
- Cover the edges of the tiles with masking tape to avoid contamination and make cleaning work easier.
- Dilute the compound with a rubber spatula. Using movements perpendicular to the joint, apply the grout, applying light pressure to fill the cavities.
- Remove excess mixture.
- Wait until it is completely dry and remove the tape. Wipe the surface with a damp sponge.
Grout is an element that influences the design of a room. Choose materials one shade higher or lower than the tile color.
Recommendations of the masters
The work on self-lining of the floor includes the selection of materials, surface preparation and giving the coating a finished look. At each stage, you need to adhere to the technology, study the features of the procedure.
Specialist recommendations:
- calculate the coverage area before marking;
- lay along the long wall first;
- clearly mark the location of the picture;
- use a syringe or piping bag to save grouting material.
Follow the technology and guidelines to make it easier to install your floor tiles. Provide tools and materials. Together, this will lead to the expected results. If you have any difficulties, seek the advice of a specialist.


