Ceramic tiles are used for flooring in rooms with high humidity. Laying tiles on the bathroom floor solves problems with cleaning, protecting the coating from water. A certain pattern gives a beautiful appearance to the bathroom, with the help of which the elements are placed on a concrete base and combined with each other. Special adhesive mixtures increase the strength of the layer and firmly bond the ceramics to the substrate.
Criteria for choosing tiles on the floor in the bathroom
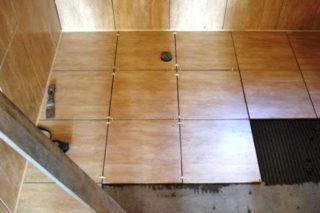
Ceramic is a durable and durable material that does not react to sudden changes in temperature and contact with water. The market offers many types that differ in size, thickness, texture, shape, and also have different technical characteristics.
Tile selection criteria:
- by the type of surface, it is floor and wall;
- according to the degree of water absorption - the optimal value is at the level of 20%;
- resistance to high temperatures does not play a role, since ceramics are used in domestic conditions;
- by the type of surface they produce glossy, matte and embossed.
The most common shape is square and rectangle. These are classic options that fit in rooms of different sizes and generate little waste. There are small mosaic-like elements that create an effective covering, but they are difficult and time consuming to install.
There are models in the form of a trapezoid, waves, polygons, such tiles are very laborious to install.
They use pastel colors or bright, saturated colors, depending on the wishes of the owner of the bathroom.
Tile laying methods
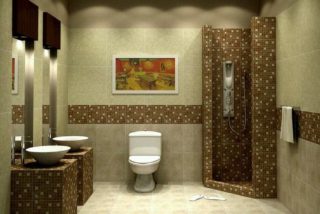
The humidity in the bathroom is high, so the styling pattern is chosen so that few open cuts and complex seams are obtained. You can put tiles on the bathroom floor using different methods, but take into account the type of base (reinforced concrete, screed or wood in a frame house).
The most common ways are:
- classic drawing;
- diagonal masonry;
- staggered arrangement;
- artistic complex options.
Floor ceramic elements are selected in accordance with the designer's drawing, the base is carefully prepared or the old screed, concrete, and wooden frame are dismantled. The glue is taken taking into account the high humidity. Marking is performed on the floor if the laying pattern is complex.
Specialists cut the tiles to size all at once, tk. have a certain amount of experience that excludes errors. For those who will glue ceramics for the first time, it is better to trim them in place, especially if a complex artistic ornament is taken as a basis. When filling the area step by step, slight shifts may appear.
Classic
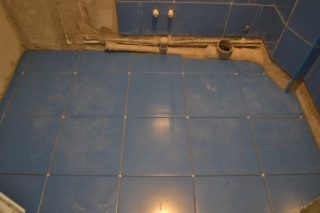
The scheme involves the installation of elements in straight rows so that there is no displacement. Large tiles, laid in the standard version, look better. Plates are installed parallel to the walls in a rectangular bathroom, placed tightly to each other, in the same rows.
Features of classic styling:
- the size of the tiles must be the same, differences cannot be allowed even by 1 mm;
- put tiles without factory defects that will be noticeable on the surface;
- the floor area with classic installation has a monotonous appearance.
When laying out the tiles, you need to regularly check the horizontal installation, the straightness of the vertical and horizontal joints. Adjacent and opposite gaps should be of the same width, for which tiled crosses are used.
The standard ceramic layout is used in large square baths. Work begins with two perpendicular rows in the center of the floor. The method is suitable for areas of irregular configuration, which have niches or protrusions on the walls.
Diagonal
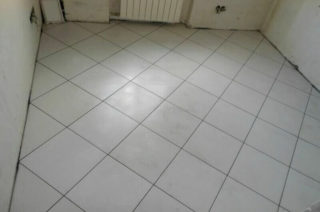
The styling method looks nice, but is more time consuming than the previous one. It is called the corner method or diamond masonry. Before starting work, you need to mark the floor and cut a large number of tiles. The diagonal laying method is used to hide small irregularities in the floor. The angular arrangement is used in non-standard and small-sized areas.
Features of the method:
- structural mesh is positioned at 45 ° to the edge of the wall;
- square plates are used, sometimes rectangular;
- even details of the same color look interesting;
- consumption in comparison with the standard method hardly increases;
- visually increases the squaring of small areas.
Diagonal axes are marked on the surface, intersecting in the center of the floor. The first 4 elements are placed so that their corners completely coincide with the lines drawn. The difficulty lies in cutting the tiles at an angle, while the first row is set diagonally from whole elements without trimming.
Chess
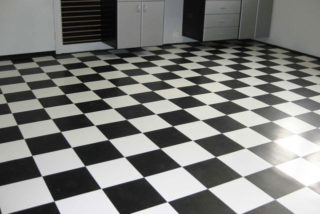
This method can be used for diagonal and standard laying. The checkerboard arrangement of colors cannot be used if the floor has curvatures, bulges or depressions, since the curvature of the contrasting tiles will emphasize all the irregularities, and will not hide them.
Two colors are involved in the layout, the colors are arranged according to the example of cells on a chessboard. Sometimes a third shade is added, but such elements make up a fourth of the main tile and are placed to dilute the pattern. For a chess layout on large areas, tiles measuring 50 x 50 cm are taken, and in household bathrooms they are 25 x 25 cm, or rectangular elements 15 x 30 cm are used.
Plain ceramics are alternated with tiles on which a pattern is applied. Layout with smooth and embossed tiles looks good. They use imitation of natural stone, different types of wood, there are patterns of braids or fabrics, they produce tiles with a chameleon effect and overflow of shade. The basic rule is that after installing contrasting elements in color, there should be no ripple in the eyes.
Artistic
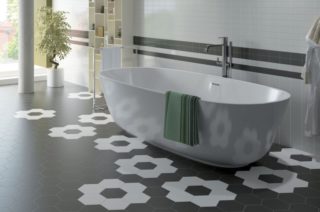
The installation option involves various decorative combinations of tiles of different shapes, colors and sizes to create a beautiful ornament on the floor. It is better for beginners to make simple layouts so as not to get an offset of the picture.
Common options:
- Carpet. Suitable for large bathrooms where the middle is not crowded. The center is highlighted using elements of different sizes, inserts from 4 to 16 colors are used.
- Ornament. The structure is similar to the previous one, but not only the middle is highlighted, but the perimeter of the room is emphasized, functional zones are highlighted in contrast, and beautiful paths are created between them.
- Kaleidoscope. Plates of different colors are arranged in a certain combination to obtain an interesting visual pattern. It is important to use mutually matching shades so as not to get difficult contours for perception.
You can create radial ornaments, build horizontal lines, use inserts of small elements. It is recommended to use bright colors in the center, and to put calm shades at the edges.
Tile adhesive
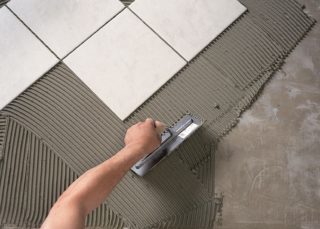
You can put the board on a standard mortar of cement and sand in a ratio of 1: 3, but modern dry adhesive mixtures contain polymer additives to improve the quality. The microclimate of the bathroom is humid, so ordinary mortar can stratify and decrease strength over time.
Requirements for the adhesive mixture:
- easily sticks to any surface, creates a solid base;
- plasticity and spreadability over the surface, so that the mixture fills all the smallest irregularities in the floor;
- long-term stay in working order so that the master has the opportunity to correct the drawing or shift the element.
Do not take compounds for outdoor work, because special advantages will not work, only there will be an increase in the cost of the finishing layer. The Ceresit CM - 11, CM - 14 Extra brands are used more often. Other common adhesive solutions in the form of dry mixes: Baumit Ban, Anserglob BCX-33, Siltek T-80, Polimin P-22.
Pre-layout
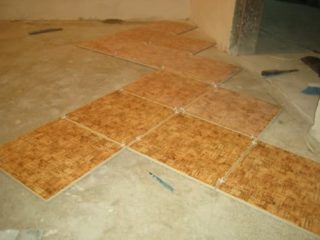
The purpose of laying tiles on a dry surface:
- find the optimal arrangement of elements in relation to each other and the sides of the room;
- visually see the final drawing;
- make changes if necessary;
- determine the location of the rows;
- identify a convenient place to start laying.
Dry installation is carried out after leveling the floor. The number of whole products in a row is calculated, the areas of installation of the trimmed elements are determined. When laying out, the location of the toilet, the bath screen is taken into account. The area under the bathroom is considered a separate area that is not associated with the main floor area if the screen is placed before the tiles.
Instructions for laying tiles on the floor in the bathroom with your own hands
It is better to finish the floor after finishing work on the walls and ceiling, so as not to damage the tiles.
Stages of work:
- preparation of the foundation;
- dry tile layout;
- kneading glue;
- laying ceramics.
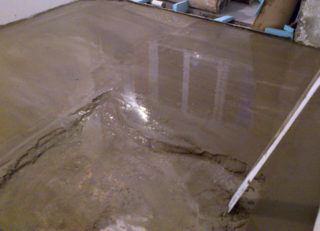
The preparation includes waterproofing before pouring the screed. More often they put plastic wrap or roofing felt. Alignment is carried out to reduce the consumption of glue. On each package of the mixture, the thickness of the layer is indicated, which is recommended to be placed under the tile. After the screed has dried, the surface is primed to increase the adhesion of the layers.
The glue is kneaded according to the instructions, while observing the recommended volume of water - the characteristics of the finished mixture depend on this. The glue is applied to the base, the amount may vary, depending on the pattern and skill of the tiler. The layer is smoothed with a notched trowel at an angle of 45 ° in one direction. The back of the ceramic is moistened with a sponge.
A small amount of glue is applied to the back side and smoothed with a spatula, the element is placed in the mounting position and pressed down with vibration movements. Use a rubber mallet for tapping.
Typical mistakes
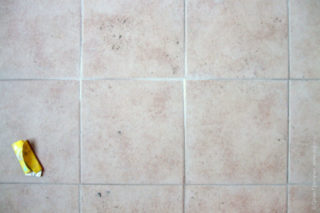
Often incorrect laying is due to a violation of the floor plane. If a defect is detected, they return to the row where the error was, and wedge the seams using matches or larger crosses. The pottery is displaced if the room has oblique corners.
Sometimes one tile sinks inward and is knocked out of the plane of the finishing layer if little glue was applied or the wrong method of installation was applied to points, and not the total mass of glue. The tile must be removed and the mortar added.
Dips along the seam line occur if the areas are poorly cleaned before grouting, sometimes the solution for this procedure is made too liquid. To fix the grout, remove it and do it over again.
Tiles of different sizes, even if the error is minimal, always look unprofitable on the floor. Before laying, the dimensions are carefully measured so as not to change the elements after installation.


