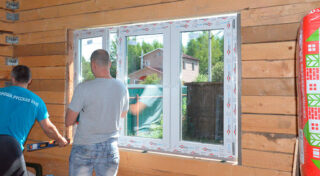
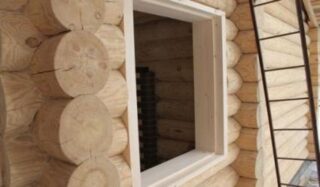
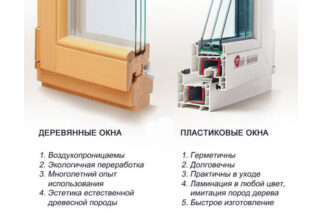
In the first year of operation, frame houses and structures made of logs, beams sit down, so there is a danger of skewing window frames. There is a way to make the frames and walls independent of each other so that the glass block does not react to changes in the dimensions of the frame. The installation of plastic windows in a wooden house is carried out using a casing - a strapping box, which is connected to the ends of the walls with a groove-protrusion fastening, and moves when the house shrinks.
- Dismantling and measurements before installing plastic windows
- Various wall configurations
- The advantages of plastic windows
- Required tools and materials
- DIY installation instructions for plastic windows
- Casing device
- Layout of the fastening scheme
- Installing the frame in the opening
- Installation of PVC slopes and window accessories
- The role of PSUL tape
Dismantling and measurements before installing plastic windows

The finished window block consists of a frame, sash, glass unit. The opening is controlled by a removable tilt-and-turn fittings. In order for the window to fit correctly into the wall opening, it is necessary to determine the dimensions for installation after installing the casing.
Measurements are made taking into account the options for mounting clearances:
- end gap or side gap is the distance between the edge of the opening and the frame;
- the frontal gap shows the span between the outer plane of the window and the quarter of the wall.
Determine the distance along the width of the wall hole at the top and bottom, and measure the height from the left and right sides. Leave a gap to install the sill board. A sketch is made on paper in the form of a quadrangle, numbers are put down, and the compliance of the parameters is assessed. It happens that the sizes of the same order differ.
For control, the opposite diagonals of the window hole in the wall are measured. Their comparison gives an idea of the degree of curvature of the opening for the installation of the frame. Determine the acceptable dimensions of the window so that the block fits into the hole and at the same time its corners are straight.
The dimensions obtained are reported to the manufacturer. Indicate the number of opening parts, the option of opening (folding, swivel, swing-out). Sometimes one upper transom is enough. The best option would be to invite an experienced measurer who will take the measurements correctly and determine the best configuration for a particular case.
When dismantling the old window, the slopes are first disassembled, then the fastening elements are exposed. For removal, use a grinder to cut a bolt, self-tapping screw, anchor, or twist the hardware with a screwdriver, if possible.
The frame is removed carefully to be used a second time, or cut into pieces with a grinder, electric jigsaw. A hand saw is used for wooden boxes. Before dismantling, remove the sash, unscrew the hinges, latches.
Various wall configurations
The tape measure is placed so that the dimensions of the window in the house made of timber are 2 - 2.5 cm larger (on both sides inclusive), and 1.5 cm is added at the top.If the binding is made more in width, the front part of the frame side rack or upper frame will be hidden by a quarter, and only the body of the glass unit will be visible from the outside.
In the second version, the measurement is made in the wall hole, where there are no quarters, i.e.the ends are straight without bends. In this case, you can determine the dimensions from the outside and inside of the opening. Measure the width between the walls, subtract 4 - 5 cm to make the mounting gap from the sides. In height, the size is reduced by 2.5 cm at the top and 3 cm at the bottom (for the window sill).
The advantages of plastic windows
Advantages of PVC windows:
- Soundproofing. Compared to other materials, the construction of a plastic window in a wooden house reduces the level of noise coming from outside by 1.5 times. For houses with windows facing a noisy street, there are block options with soundproofing films and frame linings.
- Comfortable climate in the room. Sealed plastic frames have special drip valves inside - valves through which fresh air enters and the room is ventilated. The swing-out mechanism allows you to put the transom in the winter ventilation mode.
- Ecological cleanliness. Well-known brands offer quality products from safe materials. Such structures do not emit hazardous vapors at room temperature and when heated by the sun.
- Durability. Their PVC block serves 30 - 40 years if the window is mounted according to GOST standards. The service life is influenced by the composition of the profile, the quality of the fittings, the type of glass and care in handling the finished product.
- Aesthetics. The windows look beautiful and improve the appearance of the building. You can choose a color design instead of the classic snow-white, make the window arched, trapezoidal.
Profiles are not afraid of corrosion, precipitation, frost. Windows do not rot, resist moisture saturation. The material does not accumulate harmful substances. Structures protect the house from burglary.
It is easy to take care of plastic windows in a wooden house. Do not use abrasive powders, alcohol or bleach.
Required tools and materials

To install a window into a wooden casing, you do not need a perforator, since you can drill wood and plastic with an electric drill, it is enough to pick up drills for metal for it without winning. The diameter of the drills is determined by the cross-section of the self-tapping screws in order to fix the frame to the fastening plates, and fasten the strips to the casing.
Additionally, tools are prepared:
- screwdriver, flat and Phillips screwdrivers;
- tape measure from three meters long, pencil, carpentry square;
- hammer with a wooden or rubber head, knife, pliers, wood saw;
- a hex wrench is suitable for the hardware.
Establish a structure with constant checking of the horizontal (level) and vertical (plumb line). Polyurethane foam is used, you will need a spray bottle with water to moisten the surface before foaming. Use foam for outdoor use with a low expansion rate.
List of installation devices and materials:
- spacer wedges for fixing the frame;
- vapor-permeable tape-shaped seal;
- waterproofing strip;
- fasteners are chosen in the form of anchors, self-tapping screws, overhead plates;
- supporting consoles;
- stand parts;
- silicone sealant.
Wedges are made of hard plastic, you can put wooden ones, which are made by yourself, the main thing is that they withstand the window frame in a log house until the foam processing stage. Spacers must be placed around the perimeter and removed after the foam has set.
Tape insulators are inserted to prevent moisture from entering, and a vapor diffusion effect is obtained. The strips protect against noise, vibration, and reduce deformation. The plates are made in the form of steel strips with mounting holes for the frame and for attachment to the end.
DIY installation instructions for plastic windows
The casing design adjusts the configuration of the opening if a log or frame house shrinks. Moreover, the wood can swell or dry out, in any case, changing the parameters will not affect the window frame.
The action of casing for a wooden house when installing windows:
- makes the wall plane stiffer, the holes for the installation of glazing weaken the vertical barriers, and the additional box strengthens and tightens it;
- the cage keeps the wall from shifting relative to the axis;
- reduces blowing and drafts;
- forms an opening of an ideal shape for mounting the frame.
Casing device

The design is a box made of timber with a section of 10 x 10 cm. The part must be installed in the opening, while joining the groove and the ledge along the length of the side and top. A PVC box is attached to the window. During shrinkage, the casing slides along the ends of the wall, does not depend on changes in parameters, and the plastic window is firmly fixed in the window.
The upset is placed in the aligned wall hole. A groove is cut at the ends or a thorn is made, the dimensions are measured and the box is assembled.
Types of pigs:
- U-shaped sits on the end protrusions;
- T-shaped with a formed longitudinal protrusion on the frame, while the cut is made on the wall.
If the house will not be finished, the mowing is performed in a final version, in this case, the vertical posts serve as slopes, and the lower crossbar is used as a window sill.
Layout of the fastening scheme
The attachment points of the support plates are marked after checking the right angles and matching the width at the top, bottom and height on the right and left. The number of points depends on the block size and configuration.
Step-by-step fastener placement diagram:
- from the point of joining the imposts with the frame, they retreat by 16 - 20 cm;
- a distance of 50 - 70 cm is provided between the centers of the plates.
At these points, metal strips are fixed with one side to the frame. They are bent so that on the slope they fall into the solid body of the casing, and not into the void or the fastening joint. Fasten the window box so that the hardware does not pass through the casing and does not hit the end, which will cause unwanted rigidity when the house shrinks.
Installing the frame in the opening

If the box is secured with self-tapping screws through and through, the opening transoms and sashes are removed before installation so that nothing interferes with the installation according to GOST standards.
The seam between the frame and the casing box includes the elements:
- the outer layer protects against moisture;
- the middle one reduces heat loss;
- internal - protects from the action of steam.
The plastic frame and the wooden end differ in expansion coefficients, so the material for the inserts is chosen so that cold bridges in the form of cracks do not appear when the house is deformed. In places near the window box, condensation falls in the wall, mold appears there, especially in walls without quarters.
Step-by-step installation procedure:
- select the type of attachment;
- free the frame from moving elements and glass units;
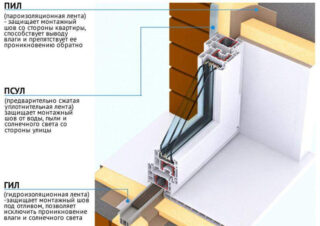
- in the box, the windows fix the PSUL tape;
- the frame is exposed using wedges and spacers vertically and horizontally;
- the profile is drilled, and through the hole is fixed to the casing with a self-tapping screw;
- install internal spacers so that the frame does not squeeze inward;
- foaming up the gaps;
- after hardening, remove spacers, wedges, cut the foam;
- reassemble the structure, insert the sash, double-glazed windows.
In order not to remove moving elements and glazing, plates are used. This is the most acceptable option, which is used more and more often. The doors are opened immediately after installation, and large elements - only the next day.
Installation of PVC slopes and window accessories
For the final finishing, accessories are installed:
- ventilator;
- mosquito net;
- closing and half-open position latches;
- drippers for draining internal condensate from the frame;
- blinds and other functional details.
The sill is mounted after the window, but before finishing the slopes. If the decorative layer is already present, a board is cut into its thickness by 2 - 5 cm. The gap between the window sill and the lower wall is foamed. If the gap is more than 8 cm, bricks are laid out to reduce the height of the gap, you can use a mortar of cement and sand. Large intervals are penalized for several times, taking breaks of 8 to 10 minutes.
The role of PSUL tape
Feature of PSUL tape:
- resists destruction from ultraviolet radiation;
- does not deform in the range of -45 - + 80 ° С;
- does not react to fats and chemicals in the atmosphere;
- does not lose elasticity over time;
- creates a diffuse effect for steam.
A strip is made of porous polyurethane foam with modifiers. Glue is applied from one side, then rolled into rolls. Roll out the tape before use so that the impregnation does not have time to react with oxygen, does not lose its properties, increasing in size.
Before using PSUL, the surface is cleaned from dirt, dust, soft wood is primed. At room temperature, the strip becomes bulky in 30 minutes, and in frost, expansion lasts about two days.


the distance between the glasses must be increased by at least 4 cm